Figure Drawing – My Summer Project

figure drawing
I realized the other day that even though there are a couple of weeks left til the kids are out of school – I only have 3 days of quiet “me” time left! Ahhhh! I’ve been doing so well since I made my creative resolution. I can’t let it fall apart now. 🙂

With this in my mind, I went paper shopping and took my time looking at all the art products in the store. As soon as I saw the figure drawing books, I knew how I was going to stay motivated this summer. I needed a summer project and it was going to be figure drawing.

When I got home I took the wooden figure from my daughter’s room and started my first sketch. Later on, I took out a book from the library to help me with my project.

My weekly checklist is getting longer and longer by the minute! lol. But I’m excited to see how I can progress in figure drawing if I can keep at it over the next 13 weeks. I’ll keep you posted!

Happy Easter! [Colored Pencil Bunny]

bunny

I fell in love with colored pencils when I first started drawing (6? years ago). One of my first drawings was of a bear, and after that I did several animals, including this bunny. I think I felt animals were easier subjects because the pencil strokes were the fur! Eventually I learned about blending colors (and using the side of the pencil instead of the tip) for a smoother look and to create colors that weren’t in my box (see the terracotta pot). It’s been a while since I picked up those pencils, maybe it’s time to try them out again. Happy Easter!

kitten

Developing a Children’s Book Illustration Style (Part II)

In my quest to develop a children’s book illustration style, I continued to look at the work of other illustrators and practice drawing. Each exercise made a difference in the evolution of my character and the birth of a drawing style. My character, is an Irish Fairy, called the Claddagh Fairy. I invented her when I wrote my children’s book, “The Claddagh Fairy.” She spreads the message of the Irish Claddagh – friendship, loyalty and love!

Phase 1

phaseone

Phase 2

phasetwo

Phase 3

phasethree

Phase Four – I have a look for my fairy! Now the question was – how was I going to illustrate an entire book?! How was I going to make the Claddagh Fairy from different angles, but still look the same?! Read Part III to find out.

Claddagh Fairy

Related Posts you may enjoy reading:

11 Art Supplies I can't paint without

The Claddagh Fairy is copyrighted. Unauthorized use of this blog’s content, text and artwork is prohibited. Re-blogging and/or sharing links is allowed provided that http://www.mycreativeresolution.com is credited and a direct link to the original content is included. Thank you.

Developing a Children’s Book Illustration Style (Part I)

A few years ago I wrote a children’s book and wanted to illustrate it. I was pretty good at drawing things realistically. But how do you draw in a children’s book style? How do you develop your own style? I searched for books on the topic and found “Illustrating Children’s Books: Creating Pictures for Publication” by Martin Salisbury. This book gives a great overview of all aspects of children’s book design, including: a brief history, different media and techniques, character development, design and typography, and getting published, as well as several case studies. I enjoyed this book. It examines all the techniques needed to illustrate for children, but in the words of Salisbury it is not a “how to” book and doesn’t contain “easy steps to stylistic tricks or wizardry.” I now had a greater understanding of the field of children’s book illustration, but still felt lost as to where to start illustrating my own book. The only instructional books I found on drawing in a style were specific to Manga and comics. It seemed I would have to figure this out on my own.

11 Art Supplies I can't paint without

I spent time reading about other illustrators’ processes and looked through tons of children’s books to see what I liked, what the illustrations had in common and what might be “in line” with my current drawing style. I even emailed a few illustrators, and Illustrator Scott Magoon offered this advice,

“Thanks very much for your kind works about my illustrations in Mostly Monsterly. I’m flattered that you’re using it as a sample animation style! As for how I developed it, well, I’ve been drawing for many years and I guess it’s sort of just grown out of lots and lots and lots of drawings – and borrowing elements from illustrators I admire.

If you find that your drawings are too realistic for children’s books, it sounds like you may need to try to abstract your drawings more. Perhaps trying to keep your drawings very loose may help – don’t close all of your circles for instance – perhaps the perspective could be slightly skewed – or, if you use color, color outside the lines so to speak. Look at some books on cartooning or at cartoonists you admire and see how they simplify gestures, movement, facial expressions to very, very simple shapes, lines and compositions.”

I realized there was no quick answer. Developing a style was going to be a process. I needed to get to work. I picked a few children’s book illustrations that I loved and drew them. (These included Joe Berger, the illustrator of “Hattie the Bad” and Vicky A. Fieldhouse.) I thought of it as a way to study each illustrator’s technique and as a way to determine the common elements in children’s book illustration.

  • Exaggerate features – like big eyes or wacky teeth
  • Color palette – stick to 3 colors
  • Kids – small bodies, big heads
  • Use marker
  • Outline

I took a photo of my son and tried to draw it as a children’s book illustration. It still wasn’t cute enough. Then I tried to draw it again using the first drawing as reference, NOT the photo. Each time I drew it, it got more watered down, more loose and less realistic. It was a great exercise.

childrens1childrens2childrens3

I’m happy to be on the path to developing my children’s book style. The steps I recommend to anyone else wanting to start are:

  1. Research. Get a synopsis of the industry in “Illustrating Children’s Books: Creating Pictures for Publication.” Then look for children’s book illustrations that you like. Search online for information about the illustrator’s process.
  2. Practice. Start drawing! Draw multiple versions. Each time try it a slightly different way. When you’ve filled the page – see which ones you like and ask yourself why.


Related Posts you may enjoy reading:

Painting Candy

Happy Valentine’s Day! When I think of Valentine’s Day, I think of love…just kidding…I think of candy!! I love candy. I love sweets. I am a sugar addict. Recently, I was looking through my artwork and I had to laugh at all the sweets I’ve drawn and painted.

Colored pencil:

gumball machine cupcake

Acrylic paint:

hard candy

My favorite candy is Tootsie Rolls. Years ago, I started a painting of Tootsie Rolls and of course, never finished. I decided to dust it off and finish. Sometimes it’s hard going back to an old project. I’ve learned a lot since I started this painting. If I was doing it from scratch today, I would paint it differently.

Tootsie Rolls tootsie1

I decided not to over think it, and move forward with what I have. It was an ambitious project, from the beginning, trying to paint the lettering correctly. That is probably why I put the project aside – I got to the hard part. Originally, my plan was to print something to use as a stencil for the lettering. I’ve decided not to do this, but to do my best, and freehand it. I wish I had a bag of Tootsie Rolls to inspire me!

I used a small stiff brush and white paint, that wasn’t too heavy. I decided to sketch in the placement of the letters and then, fill them in. I realized my Tootsie Roll shape was too long, but as I said, I’m trying to do the best with what I have.

tootsie2 tootsie3 tootsie4 tootsie5

I also realized that, there are letters all over the painting, not just on the primary Tootsie Roll. Ugh, I don’t think I’m going to do those too. I’ll have to tone down the Tootsie Rolls in the background. So, they are not so obvious. I’m also going to have to mix more brown paint, whether I want to or not. I stacked my canvases, probably not a wise idea, and they stuck together in spots. When I separated them, the paint came off.

This project reminds me of the artist who paints in Walmart. He literally pushes his supplies around in a shopping cart and stands in the aisles painting. I especially love his close up paintings, of different packaging.

I filled in the letters a few times, then I mixed brown and refined the edges of the letters. I applied the brown all over, then, mixed a lighter shade to put on the front side of my Tootsie Roll. I used a brownish white for the “Roll” letters on the farther side of the Tootsie Roll. I went over the main Tootsie Roll letters on the front side again. I was getting a little crazy with it. I knew it wasn’t perfect. I tried to remember the “Walmart” artist, and how he paints the logos very loose. I put a brownish wash over the letters to tone down the white.

tootsie6 tootsie7 tootsiealmost

I had to touch up one area, of the letters, that was driving me crazy. Okay now, here is the final painting. It’s probably the Graphic Designer in me, but I find packaging interesting. An idea for the next painting – a can of Redpack Tomato Puree. How very Warhol that would be!

Tootsie-Roll-final

The Five Minute Sketch

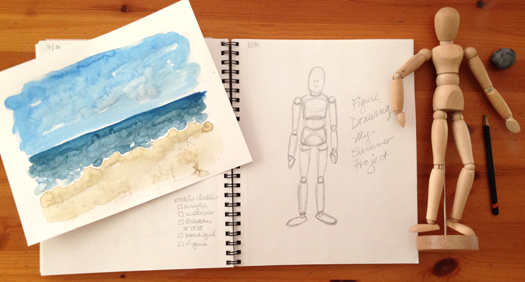
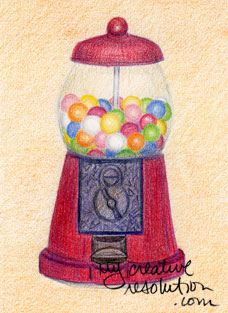
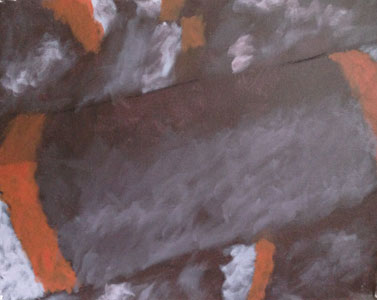
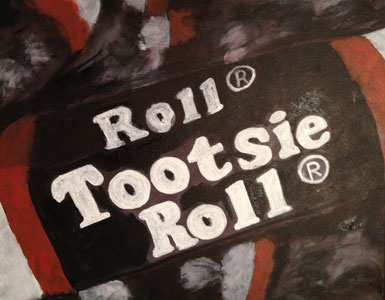
I am proud of how, I have kept, my creative resolution, this past month. I spent a lot of my creative time, painting in acrylics, which is something I’ve wanted to focus on, for a while. In a short amount of time, I’ve refined my skills and I’m happy with my progress. I plan on continuing with acrylics, in the next few months.

Another part of my resolution was, filling my sketchbook, which I’ve been lax about. I’ve done 12 sketches, which might sound decent, until I admit that, four of them were done in one day, and most were done right after the first of the year. If my resolution was dieting, I surely wouldn’t be losing any weight!

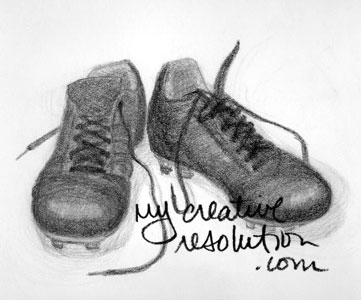
Yesterday, I did a quick sketch. As I sketched my running sneakers, I decided to renew my resolution to sketch more, and decided I would do quick five minute sketches. It’s an experiment in “what can I accomplish in a short time?” It also feels like, less of a commitment, if I only have to pick up the book for five minutes. I don’t want projects, in my sketchbook, “hanging over my head.” As I’ve mentioned before, I’m great at starting projects, but it takes real effort, on my part, to finish them. I just want the sketchbook to be, practice time or a way of keeping track of ideas.

sneaker sketch

For the past month, I’ve kept my sketchbook on my nightstand, which has been a great reminder. I’ll continue to do this, but now I plan on picking it up more often! I’m interested in hearing from you! How do you guarantee you spend time on your projects? Do you allocate a certain time each day, or week? Do you work on a project from start to finish or in bits and pieces, like me?

My sneakers caught my eye yesterday, because, drawing shoes, was one of the first projects in my first drawing class (several years ago). My teacher, Eva, was a thin, fragile, soft spoken, much older woman. The first day of class, I hate to admit this, I looked at her and thought, is she 90? Am I going to learn anything?

Needless to say, Eva proved me wrong. Within a week or two, I had an “aha” moment and my drawings went from outlines to shaded, three-dimensional looking objects. I loved Eva, she taught me so much and was so supportive. I enrolled in her class, several times and was very sad when she retired. I certainly learned not to judge a book by its cover!

When Eva asked that we bring in a pair of old shoes to draw, I chose my son’s worn baby shoes. I went on to draw my daughter’s first ballet shoes and much later, my other son’s soccer cleats. I think Eva thought worn shoes were a great subject, because of all the nooks and crannies. There is so much shading and detail to add. I think shoes are hard to draw! Getting the perspective and foreshortening to look right, is a real challenge.

babyshoes balletshoes cleats

Filling the Sketch book

Sketchbook

I plan on filling this sketch book. Although it is a bit daunting! I like saving all my old sketch books and looking through them. I even keep drawings that I am embarrassed by. They show me how far I’ve come. I look at old sketches with a fresh perspective and know what is “off.” Sometimes I look at a sketch and proudly think, “I did that?” As I thumb through, I am reminded of projects I was interested in. I can add some of those  to my list for the coming year.

sketches