
Finally I sat down and carved my first linocut. It’s amazing – when you make a date with yourself and commit, you follow through. I had been putting it off, sketching ideas for the design, until I realized the design didn’t really matter – it was about trying out the tools and learning the process.
Linocut Tools:
- Speedball Speedy-Cut Easy blocks – apply design to and carve
- Speedball Cutter – cutting tool with several blade types
- Foam 4″ Brayer – for applying paint/ink to the block
- Lucite 4″ brayer or wooden spoon – to evenly rub the paper when it’s on the block
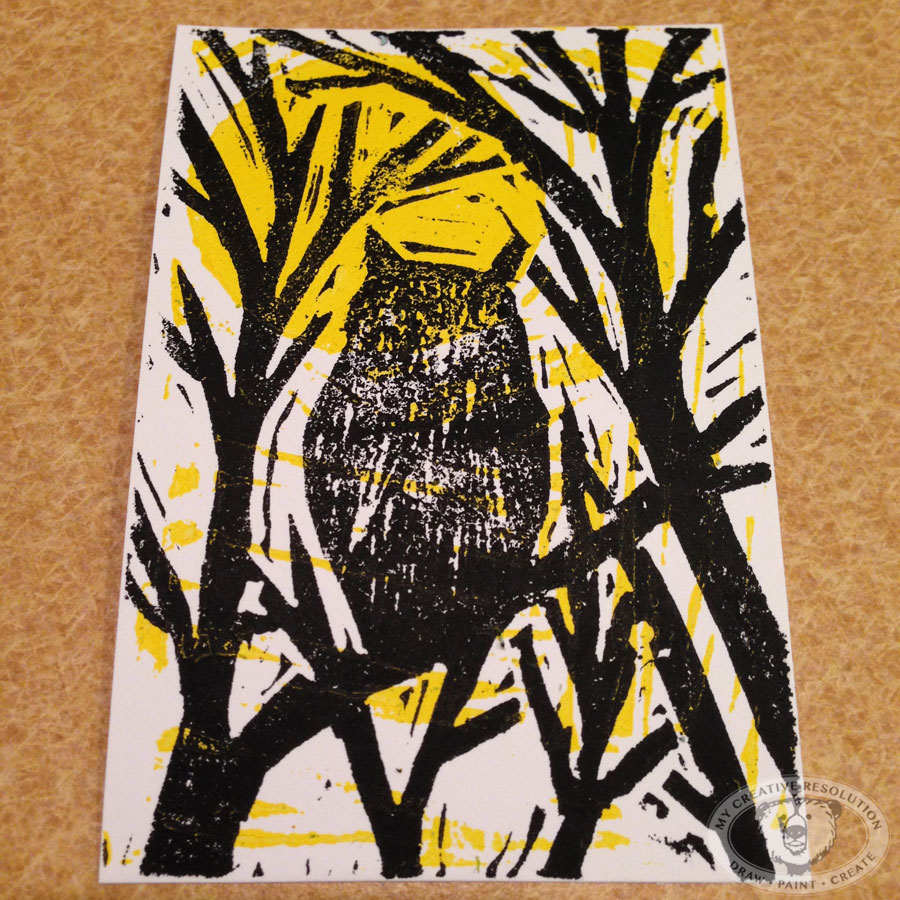
I sketched an idea I had in pencil, directly onto the “Speedyball Speedy-Cut Easy” block. It took me a few minutes to figure out how to attach the carving blade to the handle, but I got it. I was surprised at how easy it was to carve. I carved around the trees first. For the owl I used a thinner blade to add texture (to show the feathers). I messed up with the beak when I momentarily spaced on what I was supposed to carve off – the negative space. But again, this is a learning process.
I used the back of the block, because I wanted two colors. I transferred the eye shapes over to the back with tracing paper – although they mostly fell within the moon. These fine details didn’t really print in the end. And I did it wrong – it should have been the mirror image of the eyes and moon. Imagine my surprise when the moon ended up on the left instead of the right. There were other mistakes: I should have wiped the carving before printing. I didn’t carve deep enough, but this led to a happy accident because I liked the texture it added and the yellow through the print. I can’t wait to do another one!
Here are my steps:
You’ll need:


