Happy Thanksgiving! My Fall mantle has become a mini gallery of some of my favorite Fall projects: sunflowers, Fall leaf, watercolor and ink leaves and the “give Thanks” Thanksgiving sign. I think tomorrow I need to start on some Winter/Christmas projects!
I finally got around to finishing this. I started it back in the summer, when I painted the background for two signs. One sign became my “beach lover” sign, which I finished over a month ago. For this sign, I wasn’t sure what to do with it, what words to paint on it – Fall harvest? With Thanksgiving getting closer and closer, I decided on “give thanks.”
Two years ago Thanksgiving took on a whole new meaning. My siblings, parents, cousins and my aunt were all affected by Superstorm Sandy. They all had major renovations to tackle and some of them couldn’t even live in their homes. Living 20 minutes away, our home was unaffected. So Thanksgiving 2012 was here at our house. We hosted around 40 people. I wasn’t stressed at all. I knew everyone would be happy, just being together in a warm, dry place. There was no need to sweat the small stuff. Although they suffered damage to their homes, everyone was safe and that was definitely reason to give thanks.
Technique:
I used the same technique for the lettering as last time. Using the side of the pencil, I quickly colored on the back of my printout. Then, I flipped the printout over and taped it to my sign. With firm pressure, I traced the letters on the printout, using a Nintendo DS stylus pen. I peeled the printout off and, using the light pencil marks and indentation as a guide, I painted the letters. After the letters were dry I added a little white for effect.
I bought a piece of wood and had it cut into pieces at the hardware store. Using acrylic paints – teal and white – I added streaks of both and blended them, to get achieve a beachy, sun bleached look.
I set up the lettering on the computer and outlined it. Last time around I cut custom stencils which was a lot of work. This time I found advice on hand lettering. I laid the printout on the wood and using a hard stylus pen (from my kid’s old DS), traced the outline of the letter. When I was finished I could see the outline impression on the wood.
Following the outline impression on the wood, I painted the letters black. When they were dry, I painted white steaks over the letters with a very dry brush to capture the distressed look. I’m happy with the results!
Click here to learn more about how I painted the background.
Finally, I’m tackling a wood project! I’ve been interested in painting on wood, and creating handmade signs. It was surprisingly easy to walk in to Ace, pick out wood and ask them to cut it. And cheap!
I pulled out the hand sander, which made me feel like a pro, and gave the wood a light sanding. Then I added streaks of different colors and blended them, sometimes adding water to dilute a color. I wanted to create a bleached, weathered look.
I’m happy with how they came out. See how I added lettering to them here.
I finished adding the lettering to my cabana stripes canvas! I played with the layout on the computer:
Then I figured out the sizing of the letters and printed them on cover stock. Using an exacto knife, I cut out the letters. When there was a shape inside a letter I left a thin connecting strip (like on the letter b).
Creating the stencils was easier than I thought it would be. The transparent white was a little too light, especially on the yellow. The letters didn’t pop enough, so I added the brownish glow around them. I’m happy with the end result. Finishing is such a great feeling!
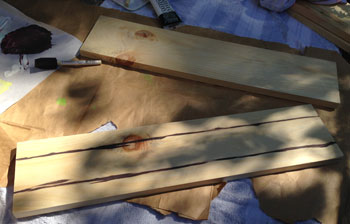
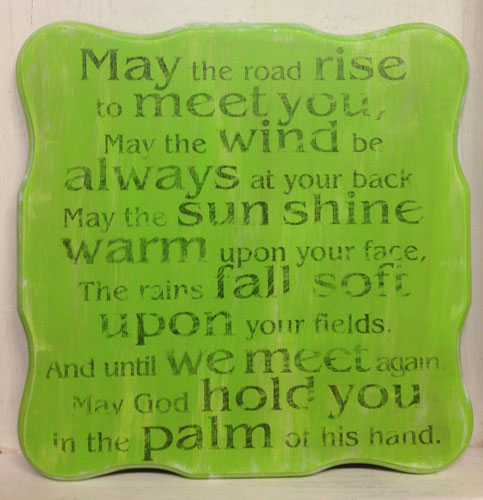
When I read about Citrasolv on a blog, I was very excited. The idea that I could design anything I wanted on the computer and transfer my artwork onto wood, without messy stencils and paint, was very appealing. I came across a cool piece of wood that was originally the top of a plant stand and painted it green with accents of white.
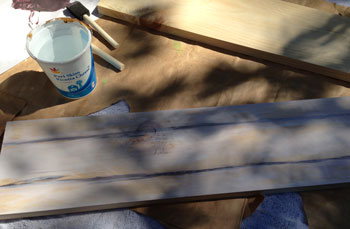
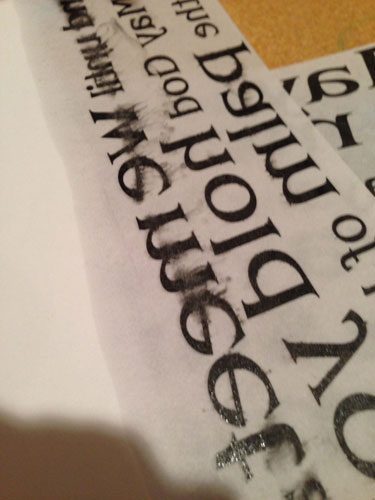
I layed out the Irish Blessing text on the computer. I flipped the text, so it was the mirror image, and printed it. To do a Citrasolv transfer you need a laser printer, not an inkjet. I positioned the printout on my sign, (text side facing down), taped it so it wouldn’t move, and applied the Citrasolv to the back of the paper with a cotton ball. Using a spoon, I rubbed the back of the paper, trying to rub the entire poem.
My first try didn’t go so well:
Things worked better on my second try. A few spots blurred a little and some areas came out light, because I didn’t adequately rub everything, but it gives it an aged look.
Want a dose of creative inspiration?Sign up for my newsletter “My Creative Collection” where I feature artists and makers, and link to inspiring art, design, and craft, inspiring places, interesting books, movies, and more. It’s a collection of all the things inspiring me delivered to your inbox every two weeks. Click here to sign up.
This post contains affiliate links to products/brands I use and recommend. I earn a small commission whenever you buy using these links, at no additional cost to you. Thank you for supporting my blog!