How to Learn Watercolor Painting

Interested in watercolor?

Watercolor is a fun, convenient medium. It’s easy to set up and clean up. If you are just getting started with watercolor you may be wondering…

What supplies do i need to paint in watercolor?

There are several things you need to paint in watercolor – some of which you have around your home! Here is what you’ll need:

  • Watercolor paint (see below for specifics)
  • Watercolor brushes (see below for specifics)
  • Watercolor paper (see below for specifics)
  • Cardboard larger than your paper
  • Painter’s tape to tape down your paper to the cardboard
  • Container of water
  • Paper towel
  • Scrap paper
  • Palette to mix paint with water or mix colors – try the top of a plastic egg carton

You are probably wonder – Ok, but what kind of paint, brushes and paper? I’ve created a FREE downloadable pdf – “Watercolor Basics” – that covers what kind of paint, brushes, and paper you should use.

sign up here to receive the “Watercolor Basics” free pdf:

Processing…
Success! You're on the list.

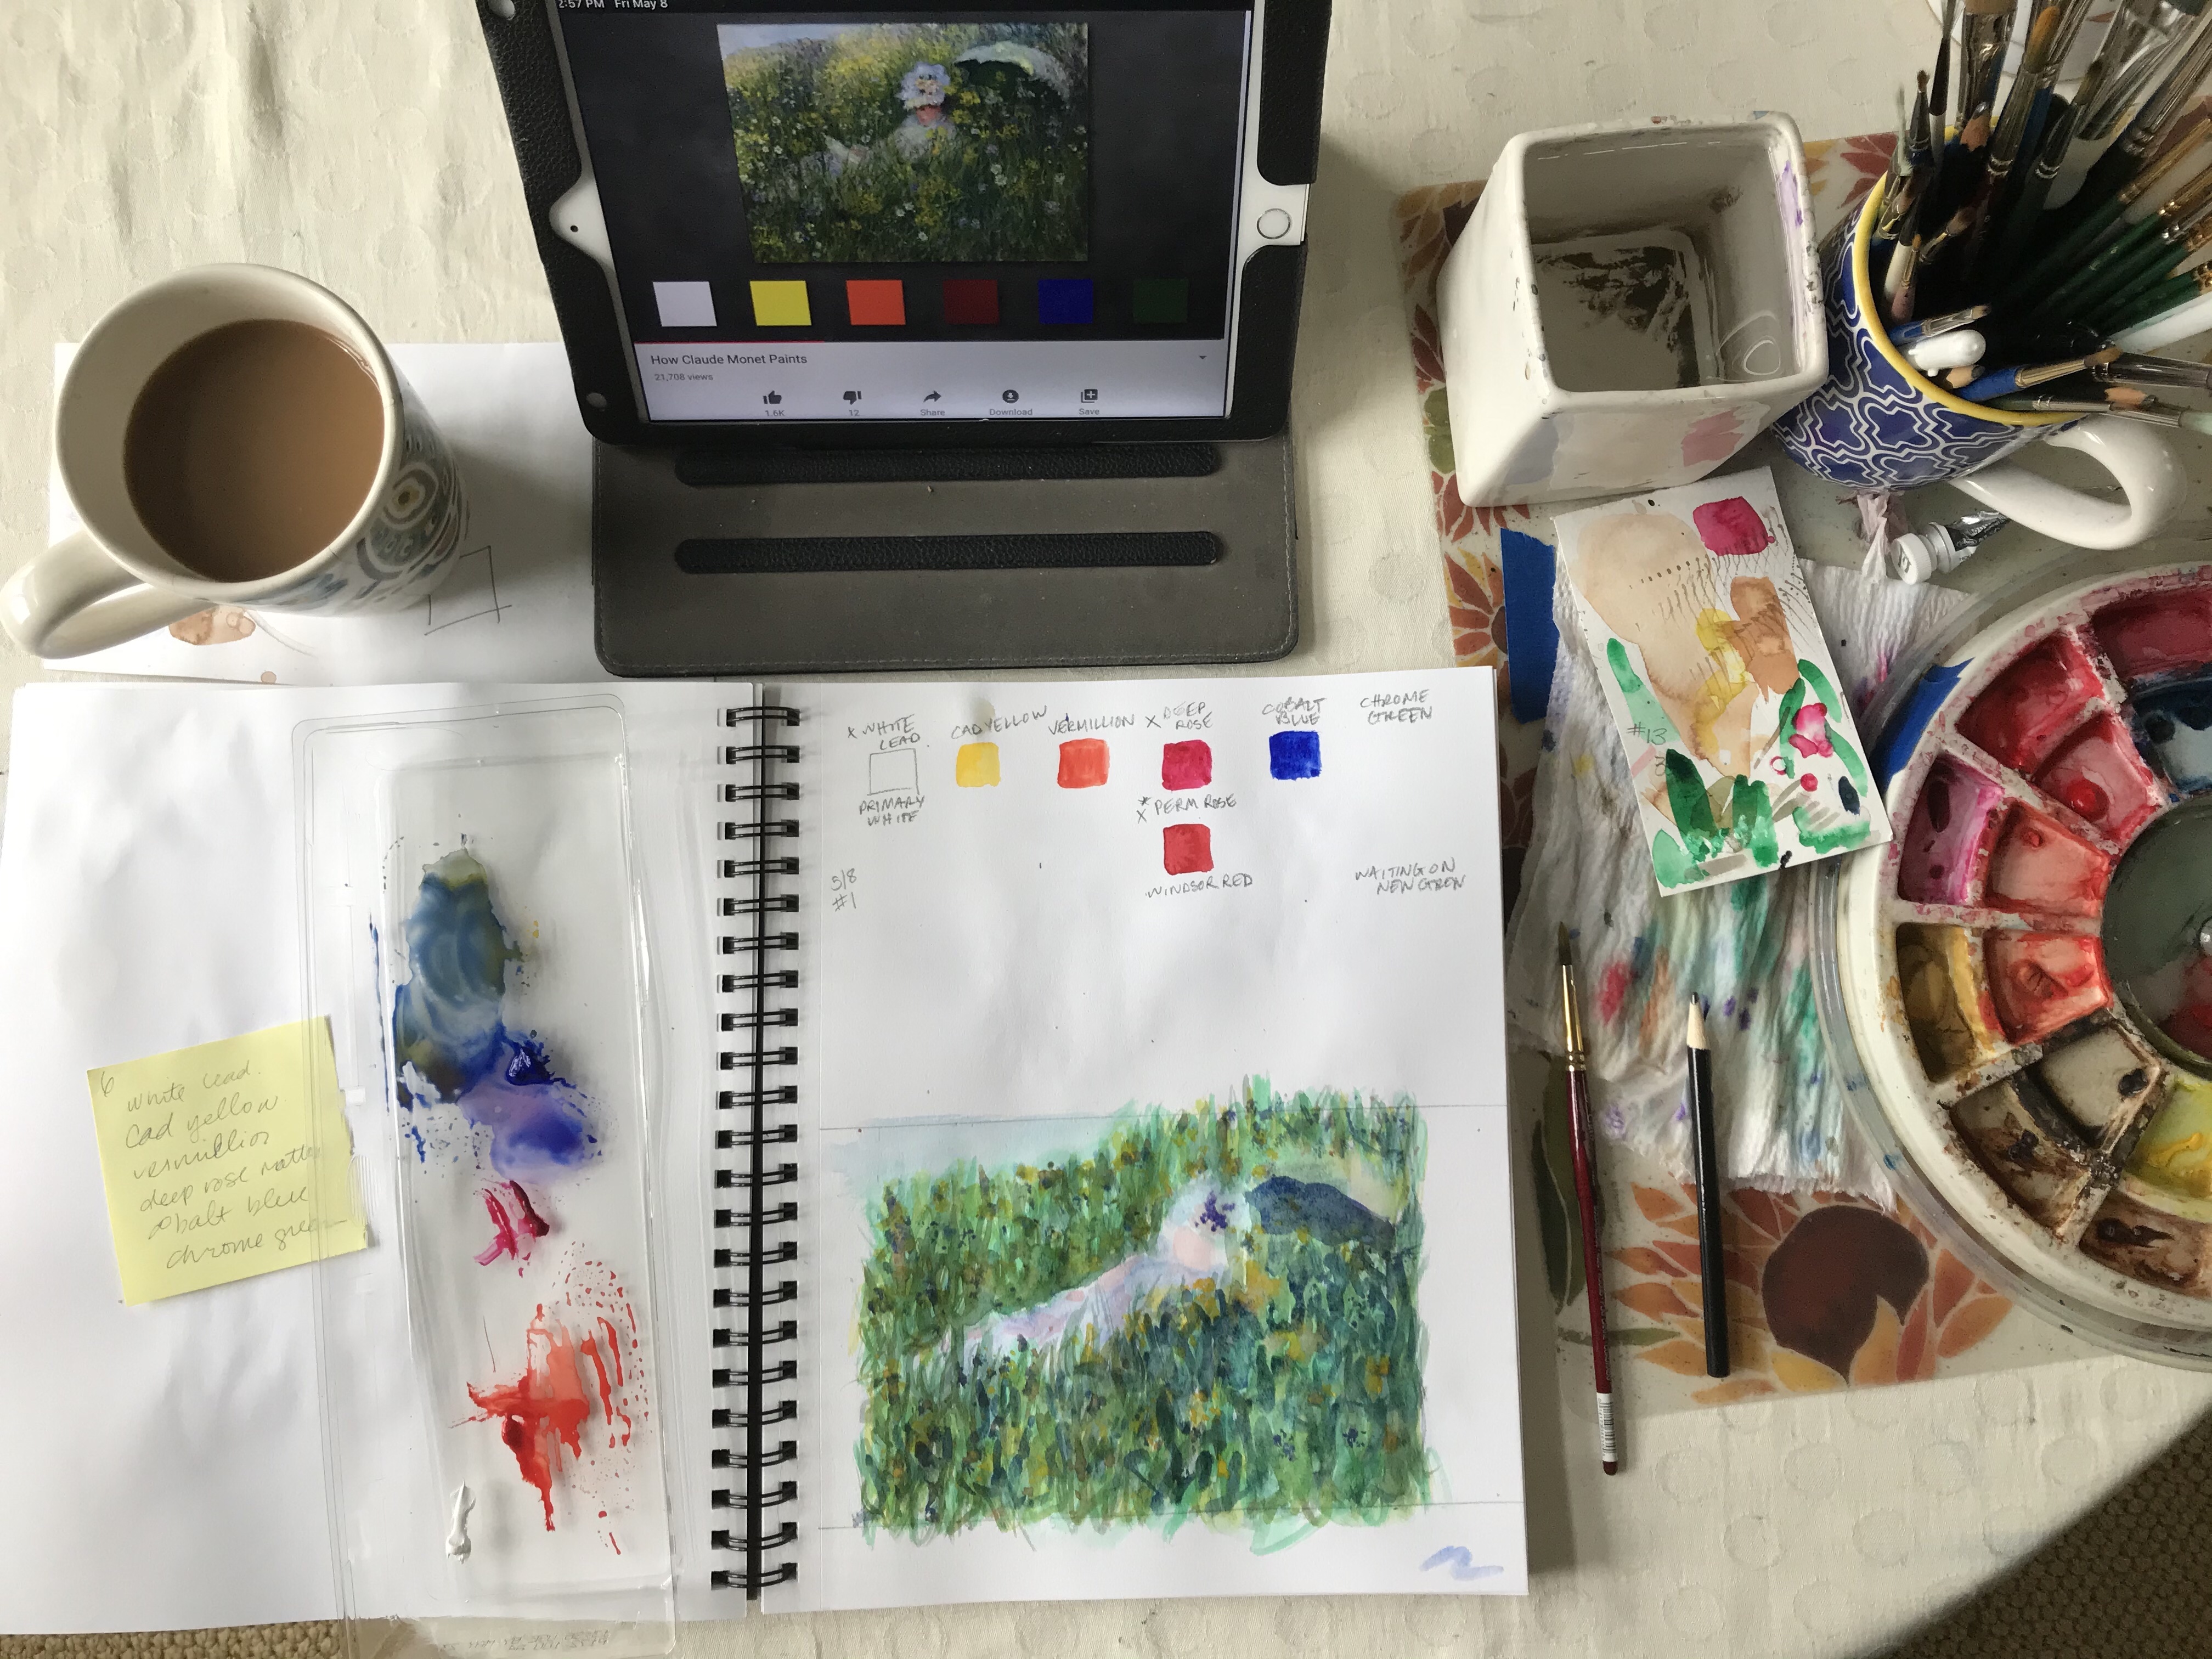
How should I set up my supplies?

Now that you’ve collected all of your watercolor supplies, you may be wondering how to setup your workspace.

As a right handed person, I set up most of my supplies to the right of my paper or sketchbook. This is so I’m not reaching across my paper to get water or paint – I don’t want to accidentally drip on my paper! I usually place a reference photo (on my ipad) directly in front of my workspace. My mixing palette (top of an egg carton) can be moved around as needed. It’s always best if my coffee isn’t near my water. I’ve dipped my paintbrush in my coffee too many times!

Painting in watercolor with Monet's color palette

how do you paint with watercolor?

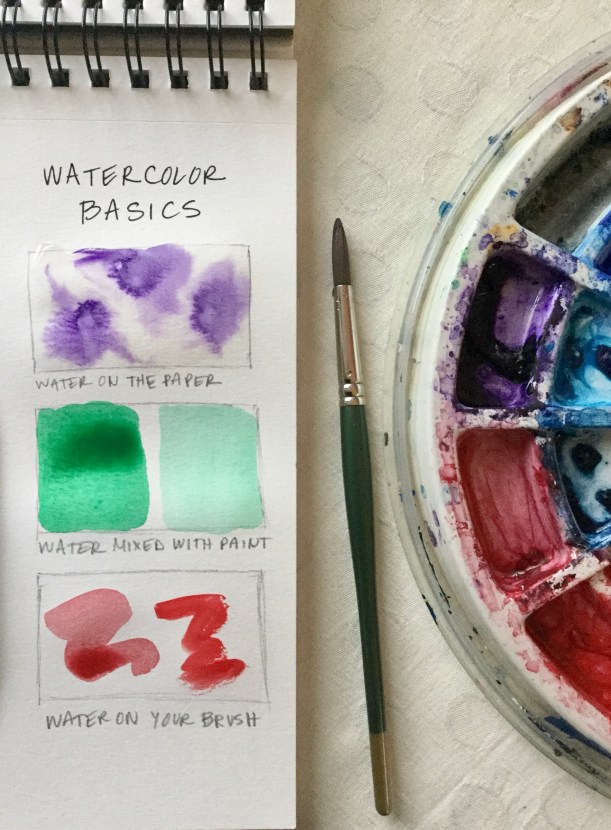
A key element to painting in watercolor is water.

  • If you use a dry brush, the paint will go on rough and paper will show through in spots.
  • If your brush is wet the paint will glide onto the page.
  • If the paper is wet the paint will bleed into the water on the page when you touch it with your brush.
  • To lighten watercolor add water, NOT white.

These different ways of painting work in different circumstances. To paint one subject you will likely use all of the above ways of painting in different areas.

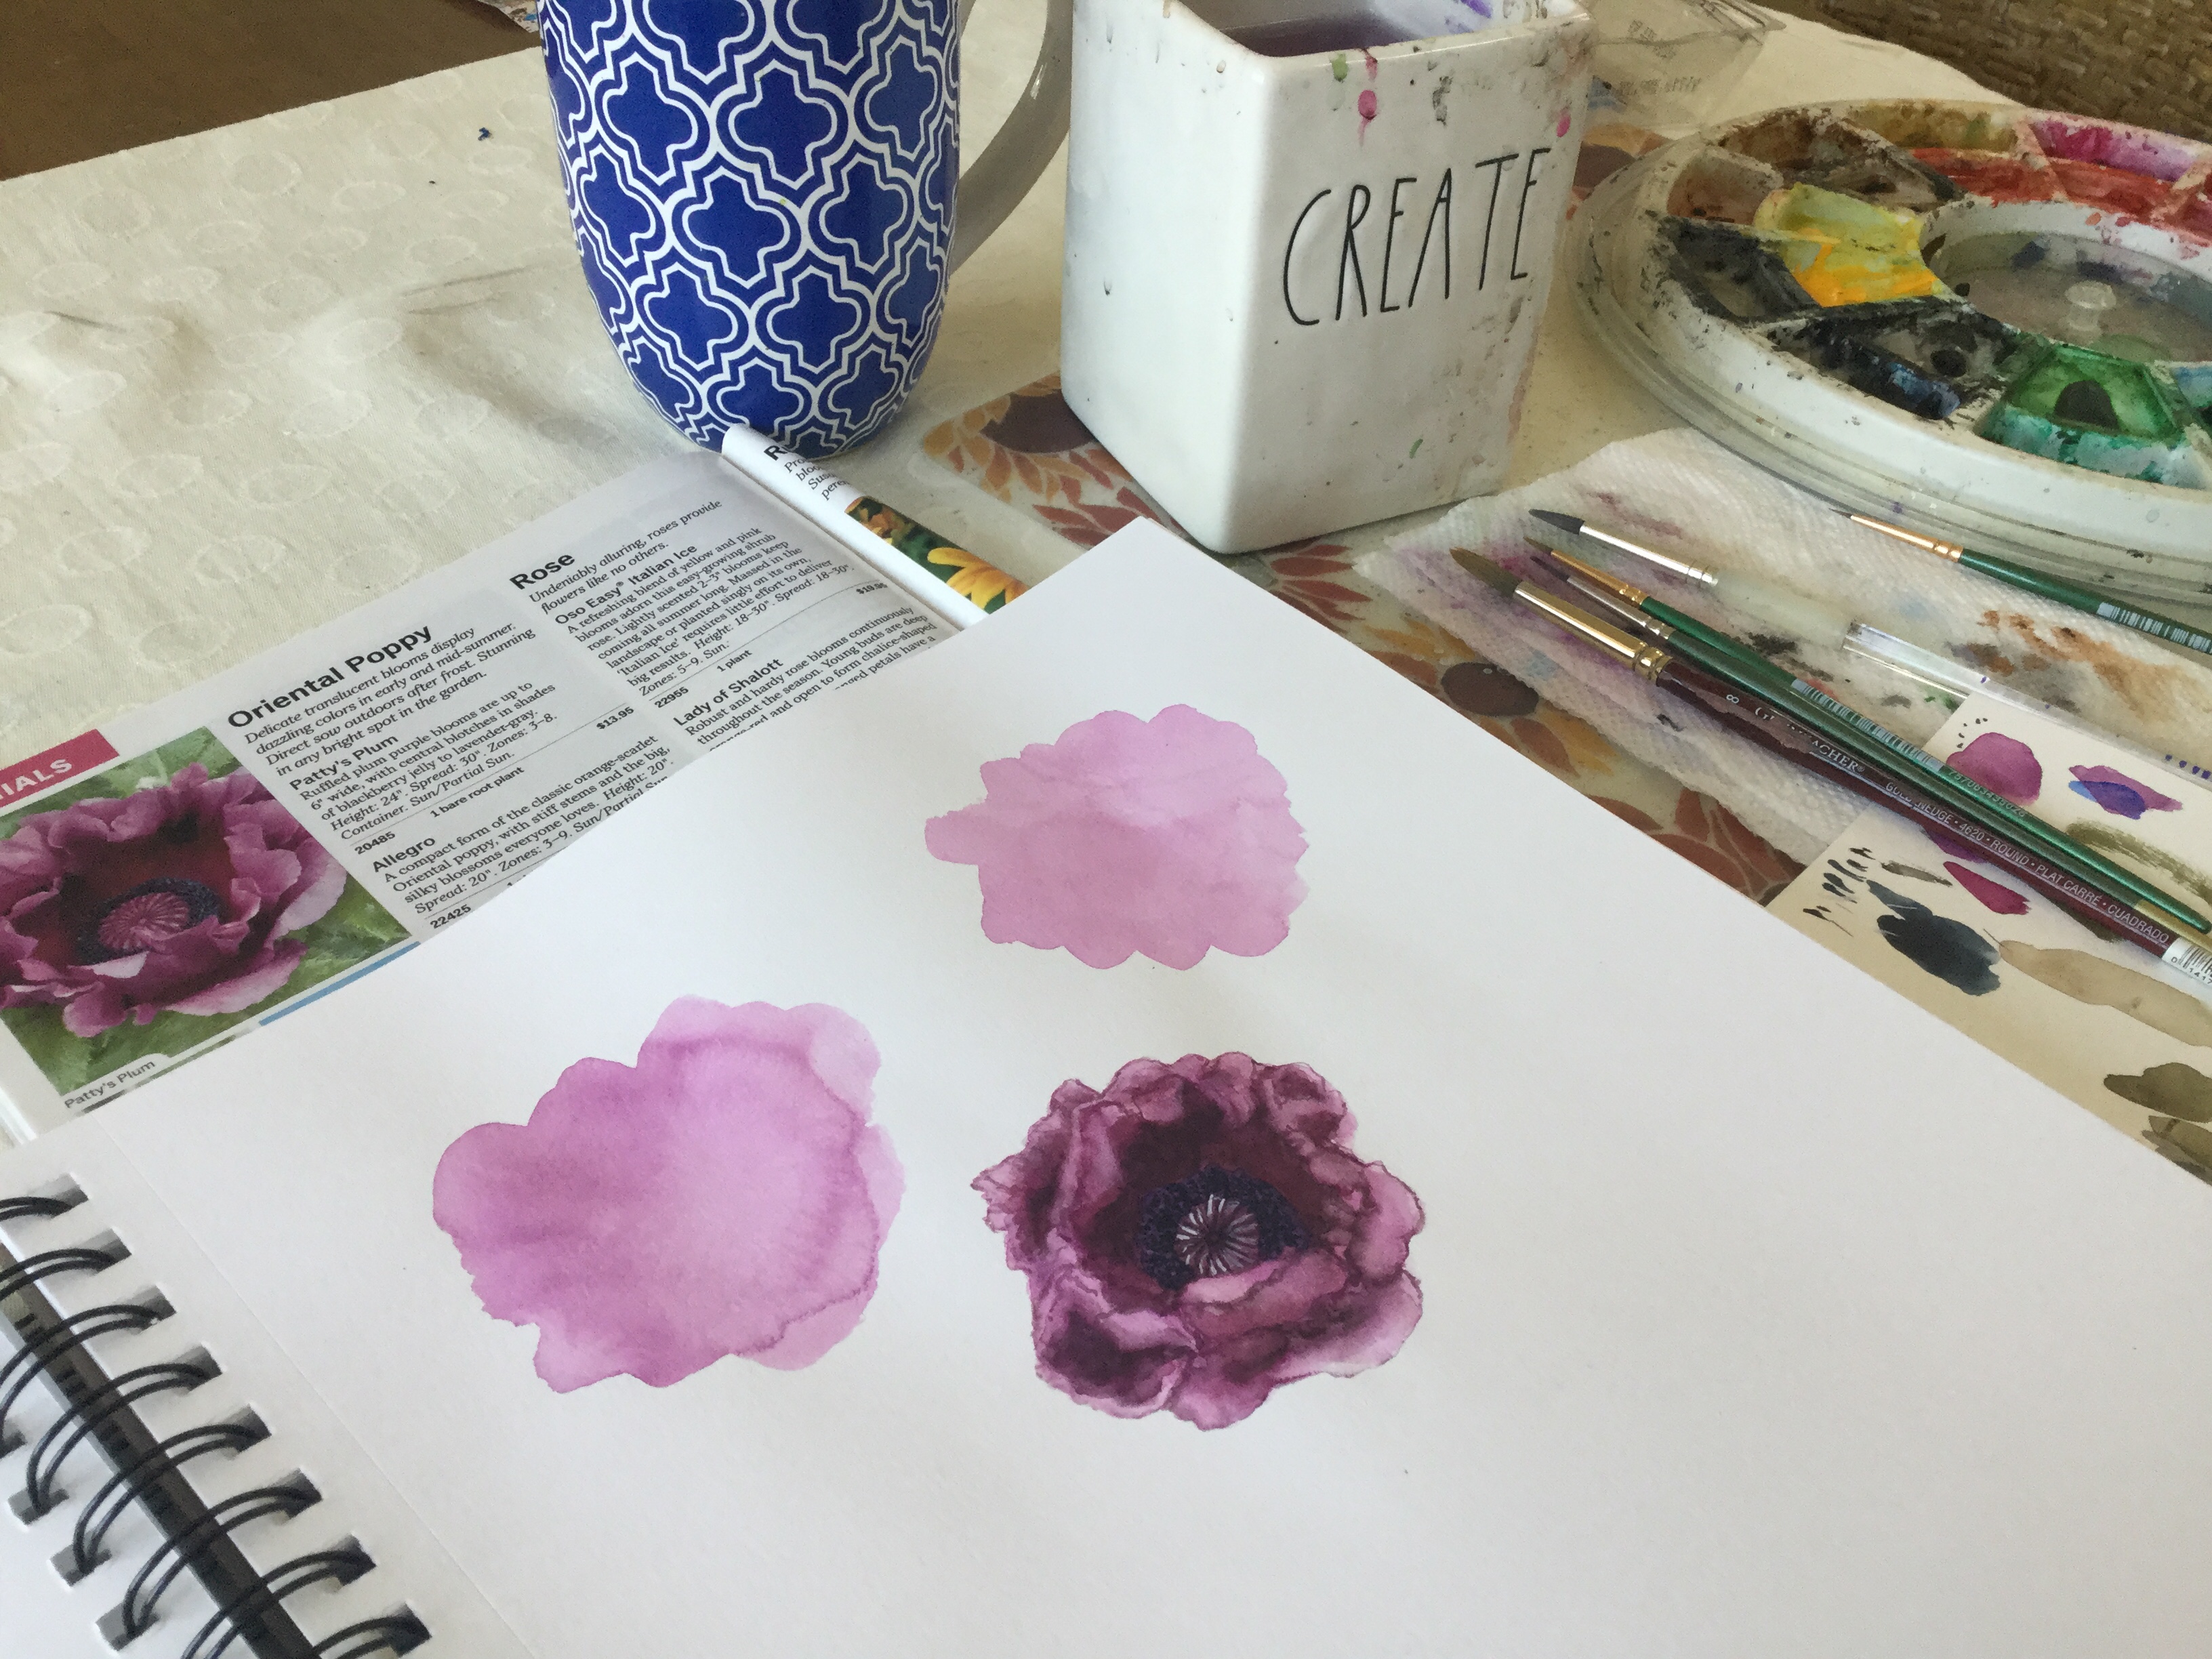
what should i paint?

When you are starting out it’s sometimes hard to come up with ideas. You’d like to practice but don’t know what to paint. Choosing a challenging subject can be discouraging.

printable painting tutorials

To help with this and to introduce you to the fundamentals of watercolor, I’ve created printable painting tutorials. Each tutorial walks you through fundamentals as you paint the steps for a specific final painting, like the “WATERCOLOR CONEFLOWER PAINTING LESSON” below.

WATERCOLOR CONEFLOWER PAINTING LESSON

The tutorials might look intimidating – but I promise – I explain each step and provide photos to bring you to a successful final painting!

*tip ~ prep your paper before painting

When paper gets wet it wrinkles and buckles. To avoid this tape your paper to a piece of cardboard using painter’s tape. The tape also creates a nice border to your painting.

For weekly tips, sign up for my newsetter:

Processing…
Success! You're on the list.

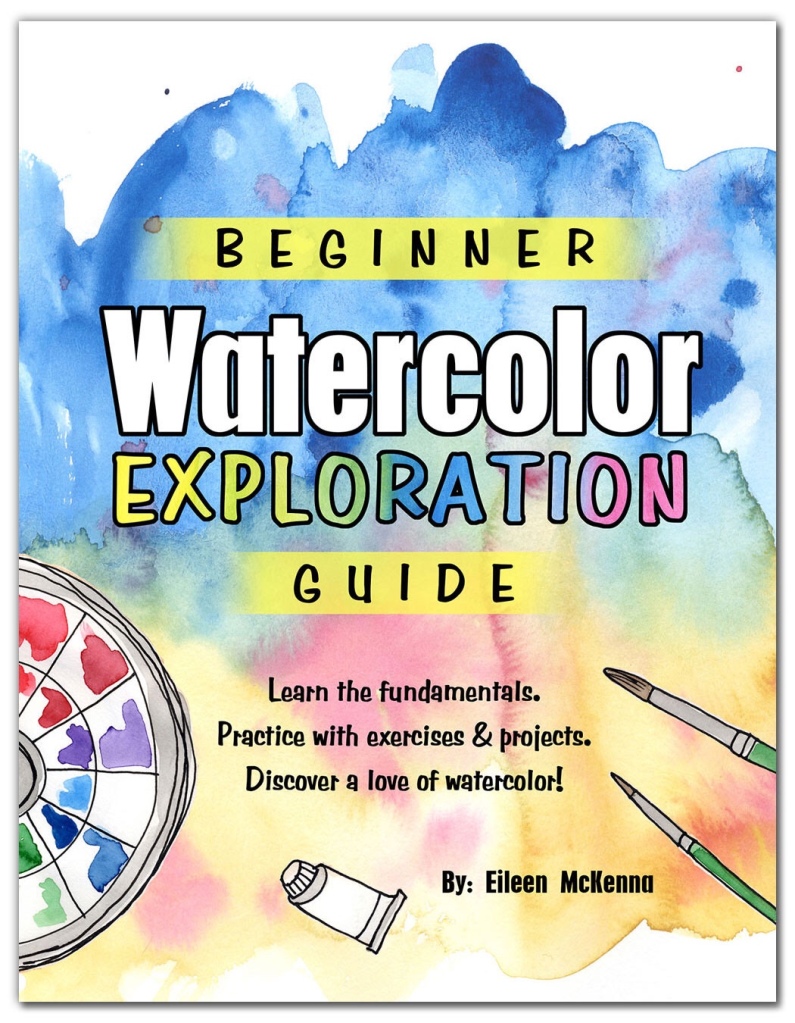
looking for a comprehensive introduction to watercolor? This guide is for you!

This Beginner Watercolor Exploration Guide is the perfect introduction to watercolor. Each fundamental is explained and then you practice it with exercises and painting projects.

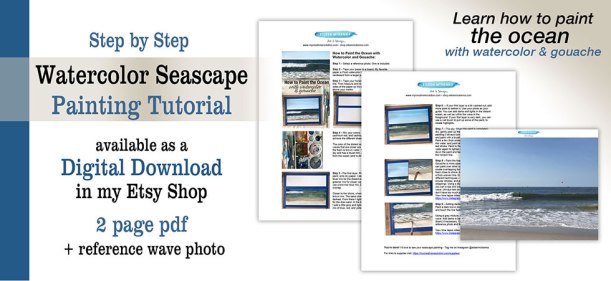
The 5 tutorials build upon one another as you progress through the guide. You go from beginner brushstrokes to a watercolor seascape!

  • Learn the fundamentals.
  • Practice with exercises & projects.
  • Discover a love of watercolor!

Start your watercolor journey today – visit https://eileenmckenna.com/guide/

Beginner Watercolor Exploration Guide
Available on Amazon or as a pdf download.

This posts contains affiliate links to products/brands I use and recommend. I earn a small commission whenever you buy using these links, at no additional cost to you. Thank you for supporting my blog!

Watercolor Basics free download!

Watercolor Basics free pdf download
I have been painting in watercolor for over twelve years. When I first started out I didn’t know anything about paper or paint or even brushes. For months I used the wrong paper and it showed! Over the years I’ve tried different paints, papers and brushes. I created the “Watercolor Basics” pdf to give you the information I was missing when I started. I want you to start your watercolor journey with the right tools and tips, so that you’ll have success and develop a love of watercolor like I did! 

To receive the free pdf, just sign up for my weekly newsletter – a collection of all the things inspiring me, in hopes of inspiring you! 

Sign up for the Watercolor Basics free download here!

*****

Ready to get started in watercolor? The “Beginner Watercolor Exploration Guide” is for you!

  • Learn the fundamentals.
  • Practice with exercises & projects.
  • Discover a love of watercolor!

Learn more here!

Beginner Watercolor Exploration Guide pdf download | how to guide beginner watercolor

Watercolor Basics for Beginners

If you are new to watercolor – welcome! Watercolor is one of the most fun mediums. When painting with watercolor, aside from paint, water is the key ingredient. Water on the paper, how much water is mixed with the paint, and how much water is on your brush.

Water on the paper. If your paper is wet, the paint you add will spread quickly and even bleed into areas you didn’t touch with your brush.

Tip: Wetting your paper before adding paint, is a fun technique which leads to interesting backgrounds with colors blending into one another. Avoid too much water that leads to puddles on your paper. When puddles occur soak up the excess water and paint with a dry brush or paper towel.

Water mixed with paint. The more water you mix with your paint, the less saturated the color will be and the more transparent it will be on the paper.

Tip: Always test your brush on scrap paper before touching your painting so you aren’t surprised by the results.

Water on your brush. A brush dripping with water and paint will spread easily even on dry paper. A dry brush will not spread smoothly, but will go on more irregularly – missing some areas of paper.

Tip: To dry your brush blot it on a paper towel and soak up the extra water.

Experiment! Try out the different ways water changes how paint interacts with paper. You may feel you have no control with watercolor, but the more you know and can anticipate how the paint will react to situations, the more control you have.

Looking for resources for beginners? Check out my Etsy shop here.

Beginner Watercolor Painting Instructional PDF "What you need to know to get started with Watercolor" Beginner Printable Introduction
Watercolor Basics for beginners

Watercolor Wisdom

I started painting in watercolor about twelve years ago when I enrolled in a class. A few years later – during the early days of my blog – I gave myself the freedom to explore everything and anything. I came back to watercolor to make working in my sketchbook more fun, and remembered how much I loved it. Watercolor has been a focus of mine ever since. Here are the most impactful things I’ve learned.

Tips for Painting in Watercolor

Embrace the magic. When I showed my teacher my first watercolor painting she said, “No, no, no, you’re drawing.” I was quite proud of my painting and didn’t understand what she meant. But as my familiarity with watercolor grew, I began to understand. Allow watercolor to do its thing. Colors bleed into one another creating interesting effects. It’s magical!

Watercolor Sunset Painting by Eileen McKenna

Go with the flow. Give up control. Some people say they don’t like watercolor. I think it’s because you don’t have as much control as with other mediums. Colors will bleed into one another whether you want them to or not. But over time you will better be able to predict what will happen – how the paint will react. You have more control then you think. Embracing the fluidity creates beautiful effects.

It’s not (quite) permanent. A damp brush can “erase” watercolor. This is more effective when the paint is still wet. A wet brush can also soften edges. You can “work” at a painting to turn it into your desired outcome.

Paper matters. Always use watercolor or  multimedia paper. Other papers are not made for watercolor and will wrinkle and tear, especially the more you “work” your painting. Tape your paper to cardboard if you are painting to the edges, to prevent buckling.

It’s all about the layers. Add more and more detail with each “layer” using a finer and drier brush as you go. Allow drying time between each layer. A watercolor painting is like a camera coming into focus. It’s starts out blurry – the first layer. With each layer the painting comes more and more into “focus.”

Use super thin brushes for fine lines. Years ago I began using a black gel pen for thin lines. I really liked this illustrative effect and used it for years, but unfortunately unlike watercolor every pen line is permanent. You can’t erase and adjust. Just this year, I saw on Instagram an artist using super thin brushes. I’ve been using them ever since.

A simple paper towel is one of your most important tools. How wet your brush is (with water and/or paint) is an important factor in how your brush stroke will react to the paint on your page. To control how wet your brush is, blot it on a paper towel to absorb excess water. I do this constantly as I paint.

Test what’s on your brush before painting. Use scrap paper to test color mixes and saturations. I test what is on my brush often to see how watery or dark a color is, before I touch my painting.

Painting a poppy in watercolor | my watercolor setup

Mix your shadows instead of using black. Mix a color with its complement to desaturate it – make it less bright – or to create darker values. Complementary colors are those across the color wheel from each other. I keep a color wheel with my paints. There’s a printable color wheel in my Etsy shop – click here.

Preserve your brushes. Don’t leave your brushes sitting in water. Lay them flat to dry. Use an old beat up brush to mix colors or to mix water to dried up paint.

Repurpose. The top of a plastic egg carton makes a great mixing tray.

Try white gouache. White gouache (more opaque than watercolor) was a game changer for me. Instead of using frisket to keep areas white, I use white gouache at the end of a painting to “add the white back in.” (Frisket is like a glue that keeps paint off the areas you apply it to. You peel it up when you are finished painting.)

Want to learn more?

Visit my website at www.eileenmckenna.com/shop. You’ll find:

  • Printable painting tutorials
  • Video lessons
  • Live Zoom lessons!

For a steady stream of watercolor tips and tricks…

Sign up for my weekly newsletter here. You’ll get the “Watercolor Basics” download for free!

Ready to get started in watercolor?

This guide is for you!
Learn the fundamentals. Practice with exercises & projects. Discover a love of watercolor! Learn more here.

Beginner Watercolor Exploration Guide

This post contains affiliate links to products and brands I use and recommend. I earn a small commission whenever you buy using these links, at no additional cost to you. Thank you for supporting my blog! 

watercolor wisdom - 12 tips from 12 years of painting
watercolor wisdom – 12 tips from 12 years of painting

Online Video Lesson: Easy Birch Forest Watercolor Painting for Beginners


Two years ago I created a blog post called “Easy Forest Watercolor Painting for Beginners.” The post outlined the steps I took to create this birch forest painting.Easy Forest Watercolor Painting for Beginners

I created this image to go with it and pinned it on Pinterest.
Easy Forest Watercolor Painting for Beginners | Learn watercolor techniques! #winter #forest #watercolor #beginners

The post became my most viewed post. Currently it has over 47,000 views!

For a long time I aspired to create a watercolor video lesson. It is much easier to learn by watching something then to read about it. But I struggled with the exact format I would use to create the video lesson. Finally I came up with a format and figured my most popular post was the obvious lesson to start with.

Instead of a long continuous video where I explain what I’m doing as I paint the project, my format is as follows. For almost every step, you can listen as I explain the step. You can also read the slide to follow along. Then you can watch a video demonstration of that step. My hope is that this format will better communicate the nuance of each step.

I’m really excited to see how effective the video lesson is. The birch forest painting project is such a great project for beginners. You learn so much about watercolor while painting the project. And it yields a great final painting at any level.

Easy Birch Forest Watercolor Online Video Painting Lesson – Learn Watercolor with this simple project!

  • Learn several watercolor techniques
  • 10 step, easy to follow 17 minute video lesson
  • Listen and/or read the easy to follow instructions, watch a video demonstrations of each step
  • Great for watercolor beginners

Click here to purchase access to the Birch Forest Online Video Lesson. 

Watercolor techniques used:

  • Masking areas with tape
  • Wet on wet painting
  • Dry on dry
  • Using salt
  • Softening lines with water
  • Adding details in ink

Click here to purchase access to the Birch Forest Online Video Lesson. 

Would you like to: Be creative on a regular basis and experience the joy that creativity brings? Explore mediums and subjects, in search of your thing? Learn about my new book Creative Exploration: A Six Week Process for Introducing Regular Creativity into your Life by clicking here.

Creative Exploration book -

Beginner Watercolor Painting Instructional PDF "What you need to know to get started with Watercolor" Beginner Printable Introduction
This post contains affiliate links to products/brands I use and recommend. I earn a small commission whenever you buy using these links, at no additional cost to you. Thank you for supporting my blog!

Easy Forest Watercolor Painting for Beginners

Easy Forest Watercolor Painting for Beginners

This painting lesson is perfect for beginners. You’ll learn watercolor painting techniques as you follow the lesson and end up with a beautiful final painting!

Watercolor techniques used:

  • Masking areas with tape
  • Wet on wet painting
  • Dry on dry
  • Using salt
  • Softening lines with water
  • Adding details in ink

An easy introduction to watercolor that yields a beautiful final painting no matter what your skill level.

Supplies you’ll need:

This beginner painting lesson is available in two formats:

  • The video lesson explains and demonstrates each step of the painting process. Easy to follow!
  • The printable pdf – is a step by step tutorial with photos. Convenient and inexpensive!

In the video painting lesson:

  • Learn several watercolor techniques
  • 10 step, easy to follow 17 minute video lesson
  • Listen and/or read the easy to follow instructions, watch a video demonstrations of each step
  • Great for watercolor beginners

Click here to purchase access to the Birch Forest Online Video Lesson. 

Sign up for my newsletter for weekly watercolor tips:

Processing…
Success! You're on the list.

For more beginner painting lessons visit my website eileenmckenna.com/shop

Watercolor Seascape Tutorial Download

This post contains affiliate links to products/brands I use and recommend. I earn a small commission whenever you buy using these links, at no additional cost to you. Thank you for supporting my blog!

Easy Forest Watercolor Painting for Beginners | Learn watercolor techniques! #winter #forest #watercolor #beginners