I’ve aspired to capture the ocean in watercolor for years. In December I made “painting the beach” my New Year’s project. The snow was falling outside, but I was inside painting waves. With each painting I learned and improved.
Some of my firsts in early January.
I watched a few YouTube videos and learned from others (and wrote about it here.)
I tried new tools and supplies and incorporated them into my process.
I’ve kept with it and over six months later I still often paint the ocean. In some ways I feel like I’ve found my thing.
Yesterday I was standing in the ocean, watching the waves break, watching the foam churned up by the waves wash in and out. It was surreal, like standing in a painting and all I could think about was white gouache.
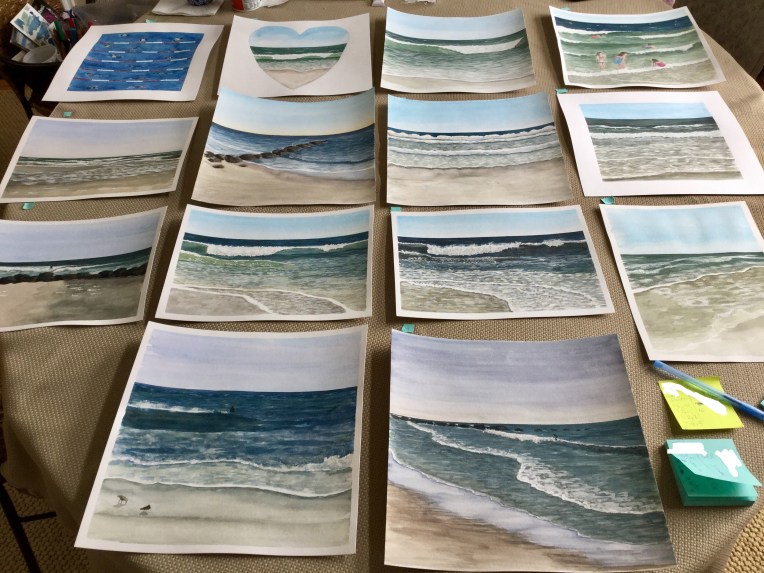
I asked for help in deciding which paintings to make art prints of. I laid many of my beach landscapes on the table, numbered them, and asked my family and a close friend to pick their favorites. One painting, was clearly a favorite. There was overlap on a couple of others.
At the giclee printer, I laid out the top choices. The woman there – Nadia – showed me how four of the paintings worked together because the color of the ocean in them was blue, while three others were green.
Wow, as soon as she grouped them I saw them in a new light. That was it for me. First we would make prints of the “Blue Collection,” and hopefully soon after the “Green Collection.” Nadia also pointed out that instead of going by the color, you could also group by shape – the square paintings, and the horizontals. But for me, this color grouping was perfect.
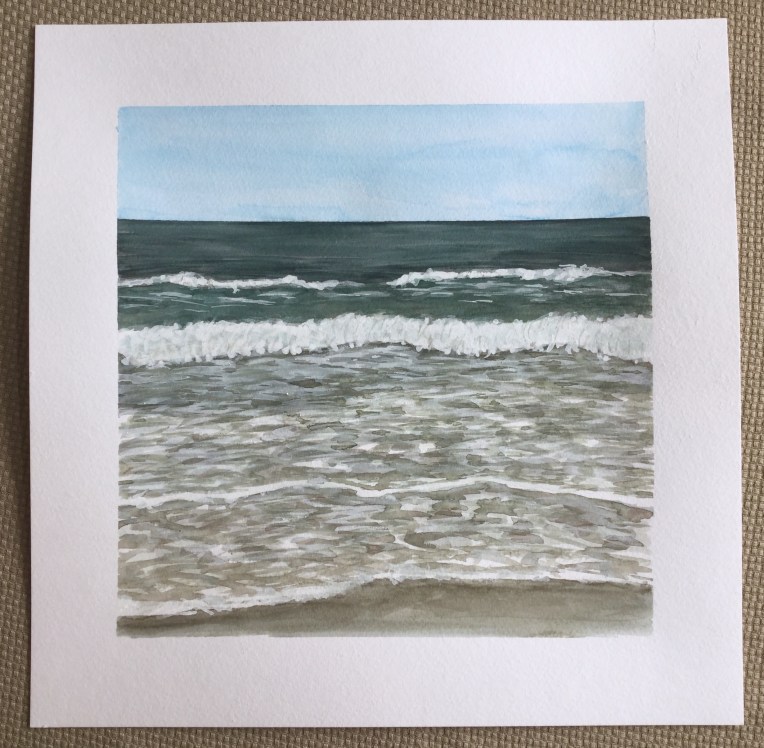
I was so happy to have time this weekend to start AND finish a new beach painting. On Saturday I painted the first layers.
On Sunday I added the details – more lights, more darks. I use a lot of white gouache!
I wasn’t sure it was done, but I propped the painting up on a shelf and looked at it from across the room. What a difference compared to staring at it up close. From across the room I declared, “It’s done.” 🙂
I added some darks to the rocks and a bird and now I’m considering this one done! Feels particularly good considering this one almost was completely abandoned.
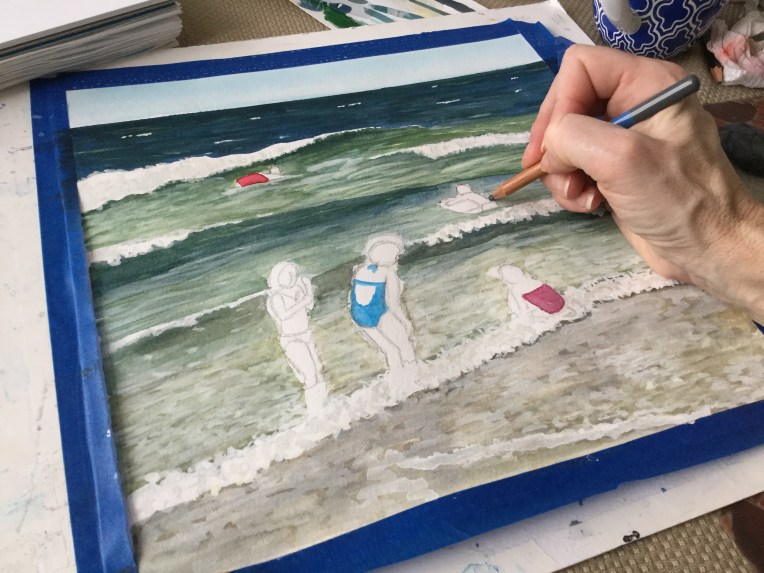
I’m proud of the progress I’ve made since starting to paint the beach on January 1st. I feel as if I’m finally capturing the movement of the waves. But something has been missing. Around here on a beautiful summer day the beaches are packed with people. Sometimes we struggle to find a good spot down by the water.
So, I’ve been collecting my photos that include people and trying to incorporate them into my paintings. Last night I did some loose brush sketches.
Today, I worked on refining the water in a painting where I had penciled in several people. Then I erased the pencil lines and using a watercolor pencil drew in the figures so I knew where to add paint. Figures don’t come easy to me and I have to work at a figure to get it right. Watercolor pencils are great because it’s easy to “erase” your lines by wetting them. You can mix the lines into the other colors or absorb them onto your brush.
I’m hoping if I focus on beach bodies for a while, I’ll see progress, like I’ve seen with my waves.
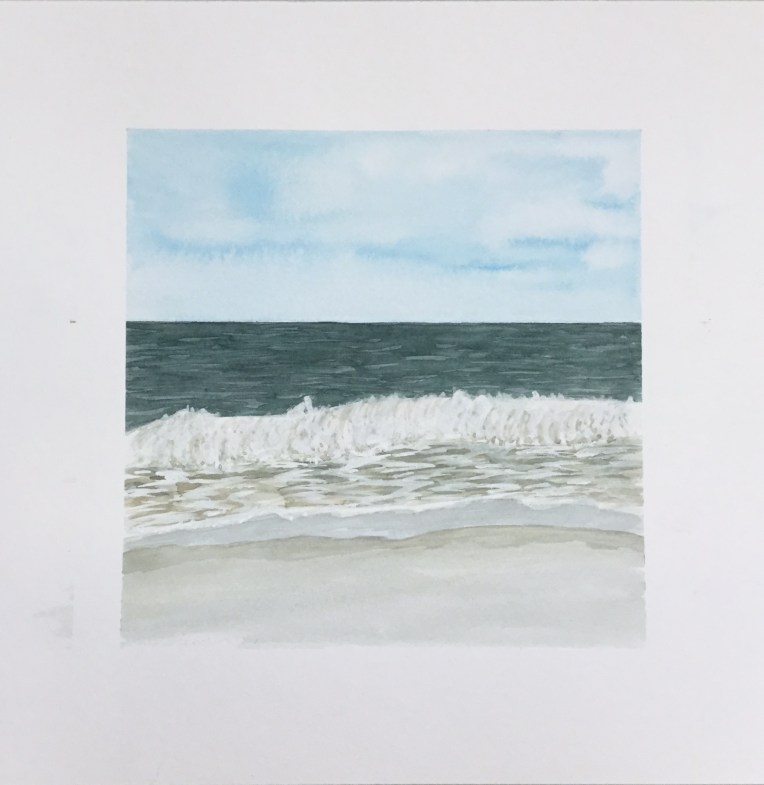
Here’s my favorite wave painting so far.
Have your read these posts yet?
Some posts contain affiliate links to products I use and recommend. I earn a small commission whenever you buy using these links. Thank you for supporting my blog!
For years I wondered how do you capture the ocean with paint? I decided to figure it out and painted the ocean over and over (and over). I learned and improved with each painting. Years later I still enjoy painting the ocean.
Here are my top tips for painting waves:
Study your reference photo.
To accurately paint or draw any subject you have to study that subject to really see the details – colors, lights and darks, shapes, composition, etc.
Identify the main colors and where the colors change.
Often the distant ocean is a darker blue. As the water gets closer it gets lighter and greener.
Near the breaking waves, where the sand is being churned up, the water is greener.
The shallow water close to the shore is brown.
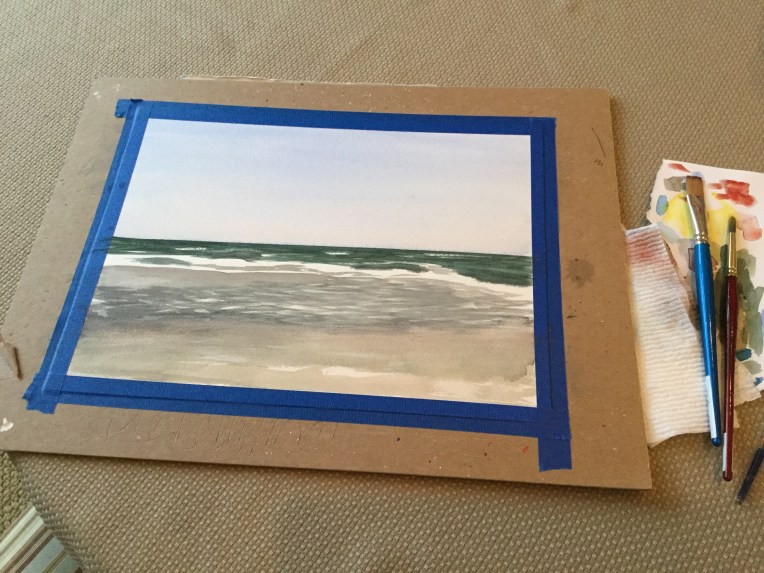
Paint Horizontal Strokes
After painting your base colors use a flat brush to add horizontal lines. Horizontal strokes in your painting make things look flatter. You can add dark thin horizontal strokes on top of the distant ocean color (waves in the distance). Add thicker strokes for cresting waves near the break area (where the waves are breaking).
Use White Gouache to add waves in the distance, crashing waves, foam etc. White Gouache is thicker (more opaque) than watercolor and you can use it to paint over watercolor.
Painting Waves in the distance
Simply use a flat brush to add distant breaking waves
Painting Crashing waves
Use gouache to create the crashing waves. Your brush strokes should mimic the motion of the wave.
Add grey shadows within the breaking wave to add depth.
Use a dry brush or blot with a tissue to create spray coming off the wave
Painting foam
Paint the water near the shore brown and use white gouache to add the foam on top of it.
A dark brown line at the edge of the foam makes it look thicker and more realistic. You can soften the line with a damp brush.
Want to learn more about painting seascapes?
I share my step by step process for painting seascapes in watercolor.
Whoops! There was an error and we couldn't process your subscription. Please reload the page and try again.
This post contains affiliate links to products I use and recommend. I earn a small commission whenever you buy using these links, at no additional cost to you. Thank you for supporting my blog!


 I’m proud of the progress I’ve made since starting to paint the beach on January 1st. I feel as if I’m finally capturing the movement of the waves. But something has been missing. Around here on a beautiful summer day the beaches are packed with people. Sometimes we struggle to find a good spot down by the water.


