Painting Larger

12" x 12" Watercolor beach paintings

Quite by accident I almost doubled the size of the watercolor paper I was using and I’m so glad. For years I happily painted on 8″ x 8″ paper. When I went on Amazon, I ordered the Fluid Watercolor paper in 12″ x 12″ instead of my normal 8″ x 8″. When the package arrived the pads looked huge!

At first I was disappointed, but then thought, “I’ll try them out. Maybe I’ve outgrown that small size anyway.” Months later I can’t imagine working so small! Lately I’ve been taking advantage of the fact that the pages are bound together on 2 sides. I sometimes paint with the paper still attached to the pad, instead of removing it and taping it down to a board.

Here is a collection of my “mini” 8″ x 8″ paintings.

8 inch watercolor paintings

This post contains an affiliate link. When you make a purchase using an affiliate link I make a commission. Thank you for supporting my blog!

11 Art Supplies I can't paint without

Polar Bear, Penguin Christmas pattern

polarpatternfinalrepeating
At this point, you’ve  probably put away your Christmas decorations. I apologize for being out of season, but I’ve designed a pattern with some of my Christmas countdown artwork, and am excited to share it.

In 2015 I designed a pattern a month. It was a very motivating challenge, so I’m doing it again in 2017. This Polar Bear, Penguin, Christmas pattern is my first design of the year. And I’m currently working on a design with my watercolor nutcrackers. Interested in pattern design? I’ve written a few helpful posts you may want to check out:

2015 Patterns

In 2016 I designed a handful of patterns, mostly using watercolors and hand drawn elements. I’m especially fond of the ink daisies overlaying the watercolor background. I plan on using this technique again.

I think the most successful patterns were created after the fact – when I didn’t set out to design a pattern. I created the artwork, and then said, “I like that, I think I’ll use it in a pattern.” Time to look through my sketchbooks and paintings! Many of my designs are available on Spoonflower as fabric, wallpaper, and gift wrap. 

Starting Can be the Hardest Part

img_1895
I can write all about the benefits of creating every day, but there are some days where I’m busy, or sick, or just don’t feel like it.

So what to do then? If I really don’t have a second, or I am sick like last week, I put in extra time the next day. Usually I’ll squeeze in some time in the morning to “count” for the day before. When I just don’t feel like it, I try to push through and tell myself…

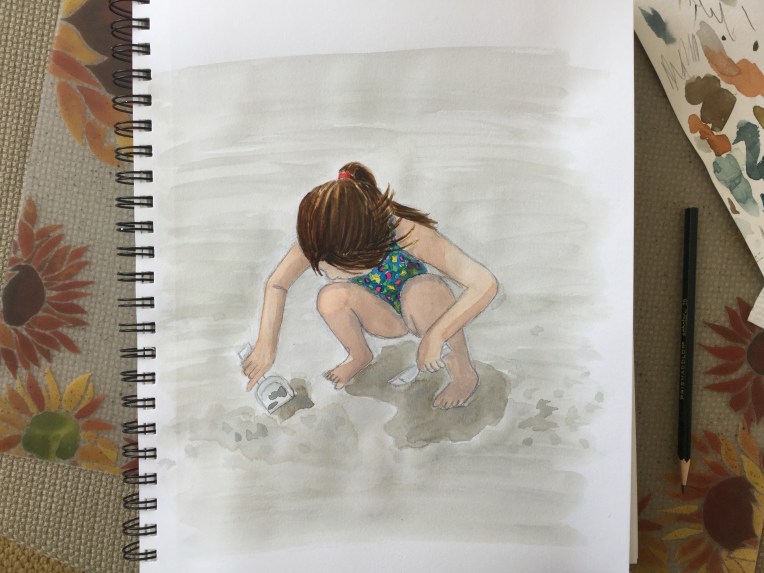
…just do a little. It doesn’t have to be a masterpiece. I don’t have to follow the same process like the previous days. Maybe instead of painting, I’ll just do a pencil sketch, or an ink sketch, or just add details to a painting I haven’t finish.

Anything is progress. Starting can be the hardest part and once I tackle that – my mindset often changes and I make a lot more progress than I thought I would.

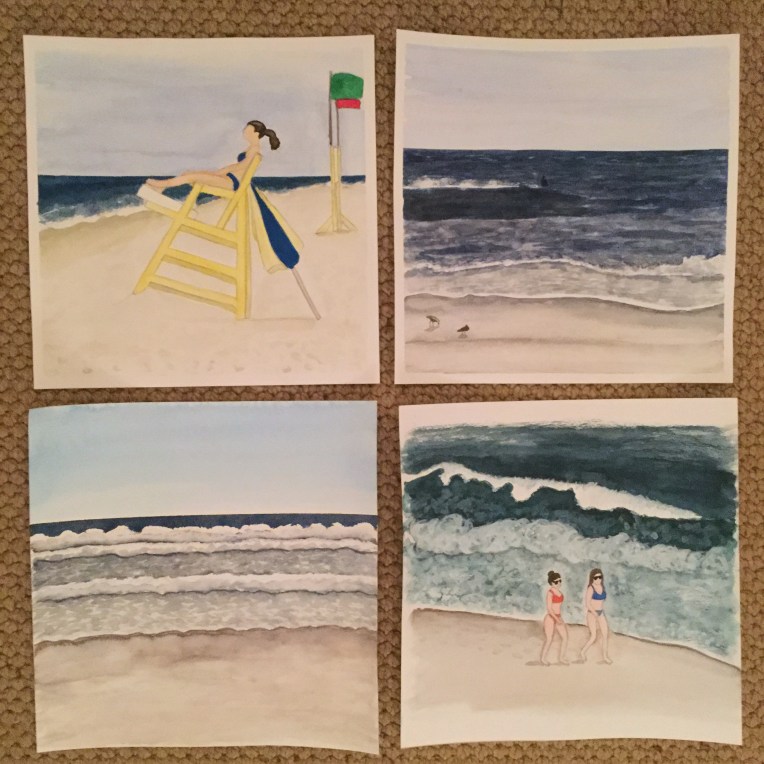
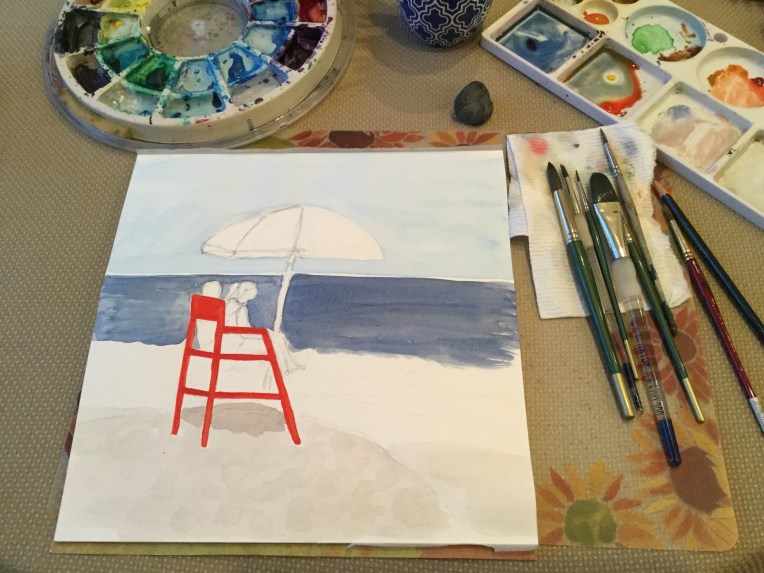
Today was one of those days. When I finally had spare time to paint, I didn’t want to, but the last two days were busy and I hadn’t done much, so I forced myself to get to work. I looked through my reference photos and decided to sketch the lifeguard chair. I figured sketching it would be progress. I liked my sketch and decided to add watercolor. My attitude totally changed and I was so glad I pushed myself to start.

Learning by painting every day

img_1848
I’m still amazed that painting every day is such a learning process. Some days of course aren’t great and/or they don’t yield great results, but other days I try things and learn so much, make so much progress – regardless of what the final result is. I guess when you create every day, you’re picking up where you left off, it’s a continuous thing. If I have a thought to try a different color for the skin or leave more white paper or whatever, I remember it the next day. When you paint only here and there – you’re practically starting over every time, instead of building on the previous day.

Over the last couple of months I’ve been very mindful of trying to capture highlights and shadows. And since I started working in the beach theme I’ve been thinking a lot about skin tones and the shadows on the skin. I was very happy with the results of the skin of the little girl. I mixed yellow ochre and permanent rose and then mixed in white gouache. The white gouache adds a creaminess that I like. For the shadows of the skin tone I mixed in a little franch ultramarine. When I can, I add the compliment of a color to achieve the shadow instead of black. I was happy with the results. 😀

Why Yes! My inner critic IS a big jerk

img_1839
I’m currently reading “Your Inner Critic is a Big Jerk: and Other Truths About Being Creative” by Danielle Krysa. I was hooked as soon as I read the title. My inner critic prevented me from being creative for many years and from having the confidence to major in art. It took about 20 years for the desire to be creative to win out over my inner critic. The winning argument I came up with was, “I don’t care if I’m good or not, creating makes me happy, and practicing will help me get better.”

I remember reading an article years ago about a female artist. I thought her life seemed so cool when she described her process and what inspired her. She lived in Maine by the coast and that inspired her artwork. I wondered, “Who gave her permission to be an artist, and create whatever inspired her? Her parents, her partner?” I don’t know if I realized immediately how ridiculous that thought was. Of course SHE gave herself permission. Maybe her parents or partner supported her art along the way (and supported her decision to be an artist), but she believed in herself.

Shortly after reading the article the desire to work on what inspired me took over. It was no longer enough to create the assignments the teacher in my continuing education drawing class gave me. I wanted to know, “What would I create if I was left alone to explore?” Discovering what inspires me has been the fun part of my creative journey these past 3 years.

“Art is in me. I couldn’t keep it buried.”
– Martha Rich, Artist/Teacher
(from “Your Inner Critic is a Big Jerk” by Danielle Krysa)

Currently I’m inspired by my favorite place – the beach. I ignore my inner critic by sitting down and creating every day…and often surprising myself by the results. Has your inner critic held you back?

This post contains affiliate links.

Practice practice practice

img_1830

My kids are asking why I am painting the same wave over and over. I’m practicing I tell them. My younger son also asked why I was painting the beach and not a snowy scene like what’s outside our window. I’m more into my beach painting project than a week ago. I’m not bored in the least and I feel like I’m learning so much by focusing on the same theme. Of course I don’t want it to be the same painting every time – and it hasn’t been. I did spend time today looking through our old photos for some subjects to paint – at the beach of course. 😉

Tips on painting waves in watercolor

For years I wondered how do you capture the ocean with paint? I decided to figure it out and painted the ocean over and over (and over). I learned and improved with each painting. Years later I still enjoy painting the ocean. 

Coastal inspired art | watercolor seascape by Eileen McKenna

Here are my top tips for painting waves:

Study your reference photo. 

To accurately paint or draw any subject you have to study that subject to really see the details  – colors, lights and darks, shapes, composition, etc.

Identify the main colors and where the colors change.

  • Often the distant ocean is a darker blue. As the water gets closer it gets lighter and greener.
  • Near the breaking waves, where the sand is being churned up, the water is greener.
  • The shallow water close to the shore is brown.
Easy Watercolor Seascape online video lesson for beginners

Paint Horizontal Strokes

After painting your base colors use a flat brush to add horizontal lines.  Horizontal strokes in your painting make things look flatter. You can add dark thin horizontal strokes on top of the distant ocean color (waves in the distance). Add thicker strokes for cresting waves near the break area (where the waves are breaking).

Painting a crashing wave in watercolor

Use White Gouache 

Use White Gouache to add waves in the distance, crashing waves, foam etc. White Gouache is thicker (more opaque) than watercolor and you can use it to paint over watercolor.

Painting Waves in the distance

  • Simply use a flat brush to add distant breaking waves

Painting Crashing waves

  • Use gouache to create the crashing waves. Your brush strokes should mimic the motion of the wave.
  • Add grey shadows within the breaking wave to add depth.
  • Use a dry brush or blot with a tissue to create spray coming off the wave
Blue Wave #11 by Eileen McKenna https://shop.eileenmckenna.com/

Painting foam

  • Paint the water near the shore brown and use white gouache to add the foam on top of it.
  • A dark brown line at the edge of the foam makes it look thicker and more realistic. You can soften the line with a damp brush.

Want to learn more about painting seascapes?

Easy Watercolor Seascape online video lesson for beginners

I share my step by step process for painting seascapes in watercolor.

Choose the format that works best for you:

Printable Watercolor Seascape Tutorial

For Weekly watercolor tips and tricks…

Processing…
Success! You're on the list.

This post contains affiliate links to products I use and recommend. I earn a small commission whenever you buy using these links, at no additional cost to you. Thank you for supporting my blog!

Week 1 of painting the beach

img_1805

I’m really enjoying focusing on painting the beach this month. I kicked it off with a walk on the beach – of course taking lots of photos. I’ve taken the pressure off myself to finish a painting every day and post it. Instead I’m enjoying the process of mixing paints to find the right colors for the ocean and the sand, of starting one painting, and adding details to another, of trying different techniques to capture the depth and movement of the water, and of looking through our old photos to use as reference.

My goal is to sit every day for about an hour and paint or draw the beach. I wrote out a list of prompts, but am only using them as a guide on days I don’t know what to focus on. So far, 6+ days in (I started early), it is very relaxing, but I do worry that without the motivation/accountability to post a final piece, I’ll revert to old habits and not finish anything.

For now I’m going to continue as is. I may not have 6 completed paintings, but I’ve definitely learned a thing or two this week. I can re-evaluate how things are going next week.