Figure Drawing – the inside of the body

skeletonmuscles

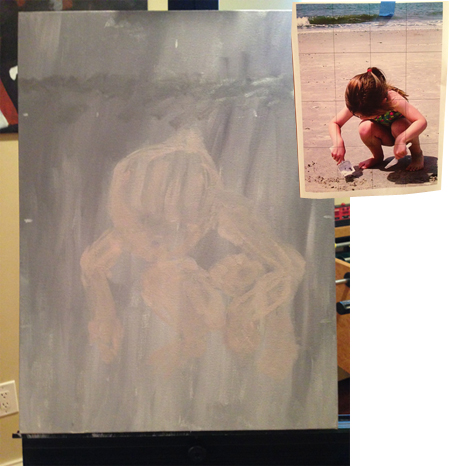
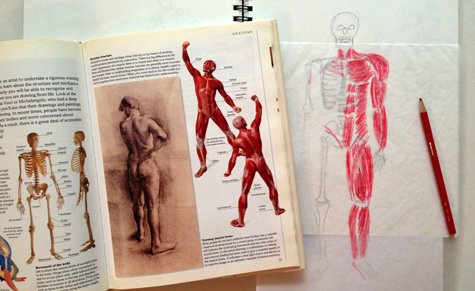
I know, you’re probably laughing at my picture right now, but I thought sketching the inside of the body would be a helpful exercise. I started with a skeleton sketch, then laid tracing paper over it and sketched in some of the muscles. I’m hoping this will help me next time I sketch a figure.

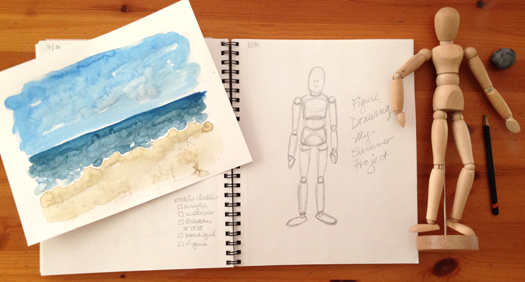
Currently, I’m using a book I found at the library, “Drawing Figures,” by Ray Smith. But I’m looking for others. If anyone has any recommendations on books or videos – that would be great!

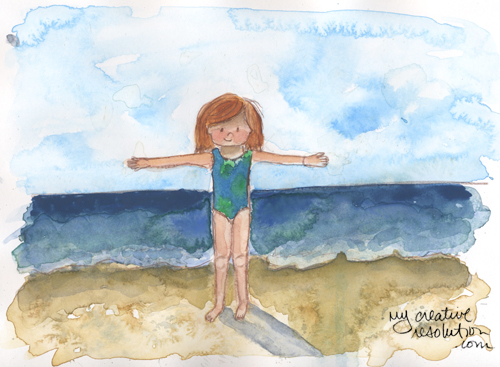
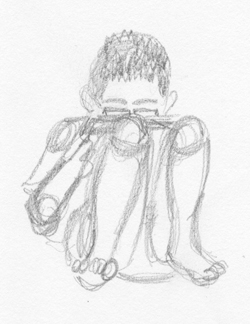
I’ve done a couple of sketches of the kids this past week.

sketchjsketcho

I’m already excited about my progress on my summer project (figure drawing)! To give credit where credit is due – Here is a link to a post on “A Thing Created,” which talks about understanding the skull underneath the face for portrait drawings. Thank you Erisha!

Figure Drawing – My Summer Project

figure drawing
I realized the other day that even though there are a couple of weeks left til the kids are out of school – I only have 3 days of quiet “me” time left! Ahhhh! I’ve been doing so well since I made my creative resolution. I can’t let it fall apart now. 🙂

With this in my mind, I went paper shopping and took my time looking at all the art products in the store. As soon as I saw the figure drawing books, I knew how I was going to stay motivated this summer. I needed a summer project and it was going to be figure drawing.

When I got home I took the wooden figure from my daughter’s room and started my first sketch. Later on, I took out a book from the library to help me with my project.

My weekly checklist is getting longer and longer by the minute! lol. But I’m excited to see how I can progress in figure drawing if I can keep at it over the next 13 weeks. I’ll keep you posted!

Beach girl – 2 different approaches

beachgirl3
I decided to try my recent approach to watercolors: Start with the background and play. I wet the paper, brush on color, add drops in areas, even splatter! It’s amazing what a difference in the backgrounds (above and below). Which is better? Hmmm. I love the sky above. (btw – This exercise was more about the background than beach girl herself.)
beachgirl2a

It’s been a while since I worked on my beach girl! Last time I worked on her, I practiced her face. I found a face I liked, but I’m having a bit of difficulty. When I redraw her, she looks different and if I use pencil instead of ink, she looks different. There is more playing and practicing to be done!

The inspiration to try the “background first” approach to beach girl came from an interesting blog post – “10,000 hours” and the link contained in it (Alina Chau’s watercolor tutorial.) Wisteria Interior’s post inspired me to not give up and keep trying. And as I read Alina Chau’s tutorial I started to wonder, “Why wasn’t I using all my watercolor techniques on beach girl?” It was like an “aha” moment. So, thank you!

Creating stencils for lettering a canvas

finalbythesea

I finished adding the lettering to my cabana stripes canvas! I played with the layout on the computer:
cabana letters computer
Then I figured out the sizing of the letters and printed them on cover stock. Using an exacto knife, I cut out the letters. When there was a shape inside a letter I left a thin connecting strip (like on the letter b).
stencils1 stencils2

Creating the stencils was easier than I thought it would be. The transparent white was a little too light, especially on the yellow. The letters didn’t pop enough, so I added the brownish glow around them. I’m happy with the end result. Finishing is such a great feeling!

Painting a Figure (Little Girl Digging – Part I)

girldigging
I may have bitten off more than I can chew, but I’m excited about this painting! I started by mixing a grey base color for my sand. I mixed thalo blue, cadmium red, and cad. yellow (as opposed to using black and white) because I wanted the sand to have color in it. I’ve struggled before with painting sand! I covered the entire canvas in this color, even where the ocean and little girl will be.
sandbackground

I added little ticks on my canvas to show where the grid is.
grid on digging

I mixed cad. red and white and added some cad. yellow to get a flesh tone, which I mixed with my base color. I wanted a color that would work as a base for the little girl, that wasn’t far off from my original (sand) base color. This way, I won’t feel intimidated to loosely sketch in the girl. Hopefully, I’ll easily be able to change any area “back” to sand if necessary.
mixingskintone

Following the grid closely, I added in the shape of the little girl. I plan on flipping the canvas over and refining her shape (with the same color). As I start to feel confident in her shape, I’ll start adding colors that will define her and pull her out of the sand. I’m developing this process on the fly – wish me luck!

Cabana stripes on canvas

cabanastripes
I painted these stripes and plan on adding the words “by the sea.” The stripes make me think bleached/weathered wood, beach, cabana. I was inspired by a small sign I have. I’m going to experiment with layouts and transparency on the computer. Once I have a layout, my plan is to print out the letters and make a stencil. I’ve never really painted letters before. I’m glad I can play on the computer before touching the canvas!

Here’s how I created my stripes.

  • I used a ruler, to make sure the stripes were somewhat straight. First I added the base color of the stripe.
    cabana1
  • While, the base color was still wet, I blended in a lot of white (to make it look bleached) and a little light brown (in streaks). I also added the a thin stripe of the light brown on the edges of the colored stripes.
    cabana2
  • I made the stripes different widths. I wanted it to look like different sized slats of wood
    cabana3

Read Part II – Creating Stencils to add lettering to a canvas

In a beachy kind of mood

crabfinal
I am really looking forward to summer. I’m a beach girl, so naturally I love painting anything that has to do with the beach.

Here are the steps I took to paint my crab:
1. After sketching the crab, I wet the background and added paint. I really love doing the background first. I think I feel more free to play with the watercolor, adding splotchy areas and even flicking spots on it. I tried hard to make it look like sand.
crab1

2. I worked on the crab, adding in the red parts on the claws and legs and the dots to the shell. It still needs work, it looks too flat, like it’s one with the background.
crab2

3. I added shadows under the crab and to the shell added shadows and more details.
crab3
I added even more detail to arrive at the final crab.

I was inspired by fellow blogger, Sara Gourley’s painting of a blue crab. I decided to paint one that looks like the kind of crabs we see at the beaches around here.