My growing collection of pattern designs

img_0685
The other day a swatch of my Christmas Elves pattern arrived. It’s so exciting to see my designs off the sketchbook page, off the computer screen, and printed. And even more exciting…last week someone ordered my gardening fabric. I wish I could see what they make with it! I’m so proud of my growing collection.

See all my designs here.

With Digital Design the Possibilities are Endless

newchristmaspatternfinalrepeatw
As I sat down at the computer to design a pattern around my elf sketches, I quickly realized the sketches were just the tip of the iceberg. What kind of background did I want? A snowy scene? Or maybe a plaid background? When working with pens, paper, watercolor – basically any tools not on the computer – we have choices and options but once we move forward with a decision, things can only be changed so much. On the computer anything can be undone, changed, resized, rotated, colors altered, layers overlayed, etc. It’s a bit overwhelming! And I work as a graphic designer for a living. It must be the blending of the two – the hand drawn and the computer – that has my head swimming!

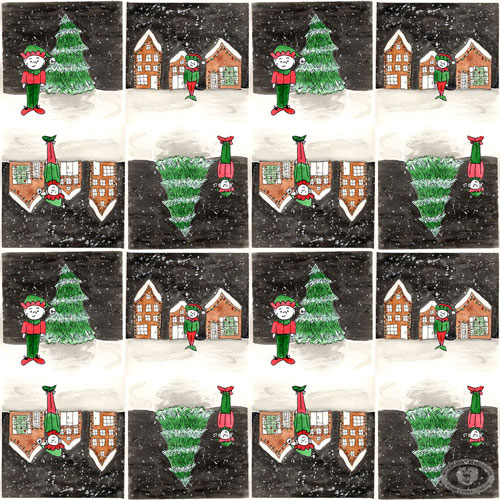
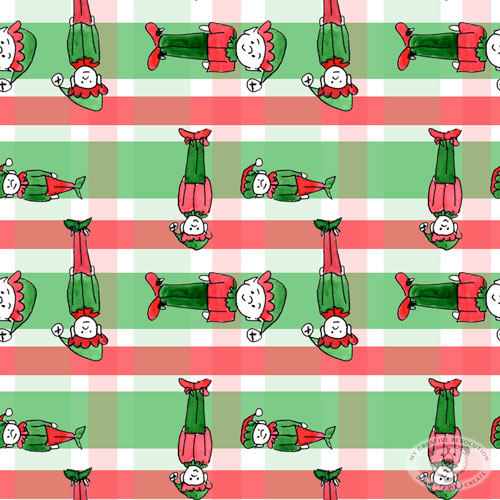
I started with the elves from my sketchbook and added this snowy night background behind them. It was interesting, but the dark sky didn’t seem right for Christmas gift wrap. I tried the plaid background, but I didn’t like the computer drawn plaid behind the watercolor. But, I ordered a fabric swatch of the snowy night out of curiosity.
gingerbreadhousesrepeatw elvesplaidrepeatw

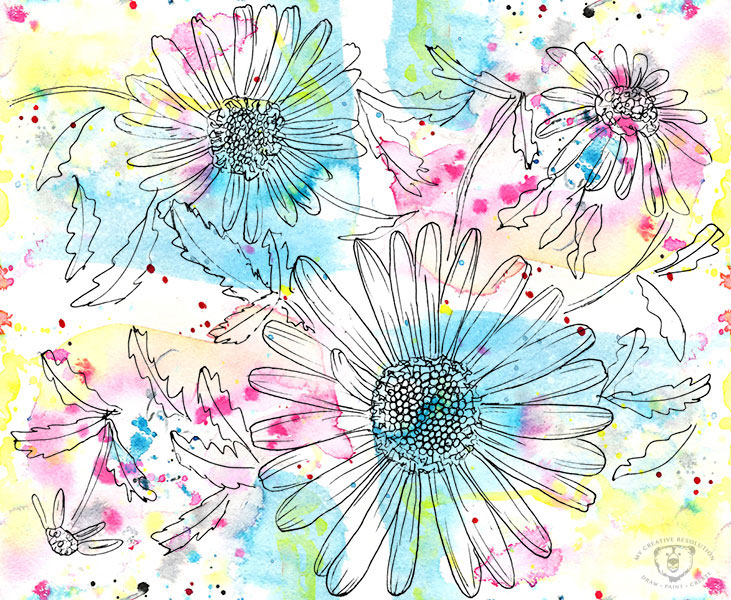
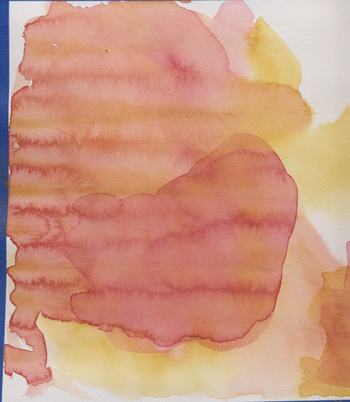
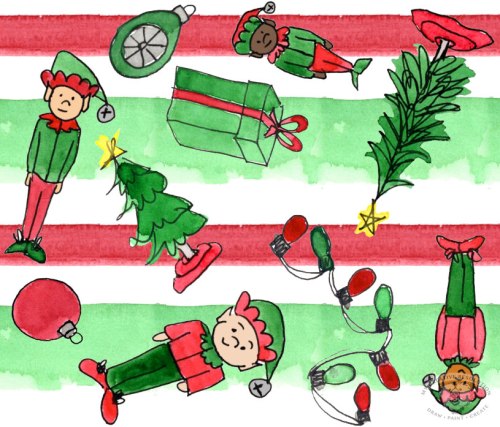
Another day I went back to the sketchbook and drew Christmas elements, and eventually added watercolor to them. I also painted stripes in red and green. Back at the computer (on another day), I scanned and played around with the different elements. I liked using the watercolor stripes much better than the computer plaid. Although it was a challenge to get the stripes to look right when I repeated the pattern. I’ve order a swatch of this pattern, so I’ll keep you posted!

Here’s the Christmas Watercolor Stripes design without the repeat:
newchristmaspattern2w

I’m interested in your thoughts! Out of the 3 designs, which do you like the best?

  1. Christmas Watercolor Stripes
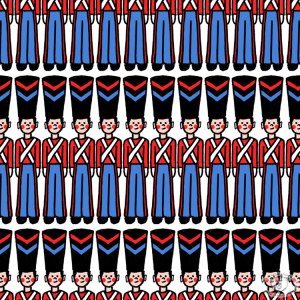
  2. Snowy night at the North Pole
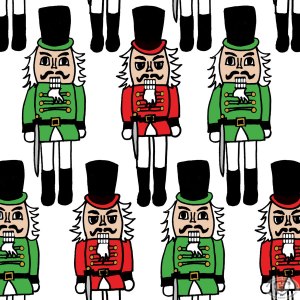
  3. Elves on plaid

Leave me a comment and let me know. Thanks!! 🙂

If you’d like to see my other gift wrap and fabric designs, please click here.


Overlay designs to create a new design and a pattern

montaukdaisypatternwm
I recently came across a watercolor painting I did in pinks, blues and yellows. At the time I was trying to paint abstractly. The other day for my InkTober challenge I drew Montauk daisies, which are in bloom in the yard. I immediately thought of that watercolor and thought it would be cool to overlay the daisies over it.

inkdaisieswatercolorpost

I did something a little different with this pattern. I set up the watercolor painting so the edges don’t fall in the same place as the edges of the ink drawing. (They fall in the center.)

I’m happy to be designing patterns again and remembering how to have the background line up differently was a small victory for me! Last time I was working with a pattern I was struggling with having it be organic and actually lining up when it repeated.

If you’d like to learn more here is a post on how to create a pattern. Let me know if you’d like more info on the subject. 🙂

Here is the design on repeat:

montaukdaisypatternrepeatwm

Dreaming of Christmas gift wrap designs

Christmas gift wrap
Last year I achieved a personal goal of mine by designing holiday gift wrap. Through Spoonflower I was able to have the designs printed and also made available to anyone else who might be interested in purchasing them. It was really cool to wrap gifts for the kids and family in wrapping paper I designed! Some of my supportive family bought the gift wrap and I saw presents wrapped with them at two family parties!

img_0492
The gift wrap at Spoonflower isn’t cheap, but the quality of the paper is beautiful! And it’s reusable for wrapping other gifts or for crafts. Spoonflower also prints on fabric (their main business). I wish I sewed so I could make Christmas pillows to decorate the house. Maybe some day.

toysoldiers2_5inchhigh nutcrackersrepeating

I’ve been going through the sketchbooks I filled last December for inspiration for a new holiday design. The elves caught my eye! They’ll probably make it into this year’s holiday gift wrap design.

A Crab Pattern

crabrepeat

crabset
Another pattern design for you. I forgot all about pattern design last month until the 29th. But, once I remembered, I went straight to my crab sketch. One of you commented that you knew I’d turn it into something. Well with your encouragement I have. 🙂
crabsketches

I painted the backgrounds separately in watercolor. And put everything together in Photoshop. With the spring weather here, summer can’t be far behind!

crabback-1 crabback sand

Learn more about how I create patterns here.


Gardening Fabric Print

gardeningswatch
Sunday was so warm, we could almost imagine working in the garden. Which reminds me … I recently uploaded my “Love Gardening” print to Spoonflower. I love the little swatch I ordered! I’ve been pinning ideas for projects I could make with the print. See my Pinterest board here.

Since my sewing skills are nil, I really need to team up with a sewing blogger. It could be a mutually beneficial relationship – I’ll design the prints, and you sew them into something great! Let me know if anyone is interested, or knows someone. 🙂

The “Love Gardening” print is available as fabric, gift wrap, and wallpaper! Click here to check it out.

Try String Art! A heart shaped tutorial.

finalstringartheart
I’ve been wanting to try string art for months. When I saw my Valentine’s Day pattern printed – I knew it would make the perfect background. Have you been wanting to try string art? If so, gather these materials and read on.

  • 8″ x 10″ frame with the glass removed
  • 8″ x 10″ piece of cork board (or use an additional piece of corrugated cardboard)
  • 3 pieces of 8″ x 10″ corrugated cardboard
  • patterned paper cut to 8″ x 10″
  • red embossing thread
  • nails – I used wire nails (#18 x 3/4″), approx. 50 nails
  • hammer
  • scissors
  • spray mount or other adhesive
  1. Take the glass out of the frame and use the frame backing to cut the cork board, cardboard pieces, and patterned paper.
    cutpaper
  2. Apply adhesive to the patterned paper and secure to cork board
    spraysmooth
  3. Place paper and cork board (facedown) into the frame. Put one – three cardboard pieces behind it. If frame backing fits, use it. Otherwise use tape to secure cardboard to the back of the frame. Use enough cardboard for a tight fit. Flip frame over.
    cardboardtapepaper
  4. Cut out heart to use as template
    cuttemplate
  5. Place heart in the center of the frame and use a nail to poke holes (equally spaced) around the heart.
    poke
  6. Remove the heart and hammer nails into the holes.
    nail nails
  7. Knot one end of the embossing string to one nail. Trim loose string.
    tie
  8. Wrap string around a nail on the opposite side of the heart. I wrapped the string fully around the nail, before string the next nail.
    firstwrapstring1
  9. Continue stringing the heart by wrapping around nails on the opposite sides (randomly). String until the heart is filled in, and every nail is wrapped at least once.
    string2 string3
  10. Then, wrap around each nail in clockwise order, completing an outline of the heart.
    stringedge
  11. Display your beautiful creation!
    finalstringart

I want to see your creation! Post your work and tag me on Instagram @eileenmckenna. Use #mcrstringheart. See more of my pattern designs here.

Valentine’s Day Patterns

squarewrap
Last February I designed my second pattern, ever, in the Valentine’s Day theme. As I continued throughout the year, designing more patterns, my style evolved and my techniques changed. I wanted to design another pattern, this year, in the same theme, to see how I would approach it differently. Even though last year’s design was created with hand drawn elements – it was painted digitally.

Last year’s pattern:
valentine2015sm
Learn more about that process here.

This year I painted, in watercolor, several squares in pinks and reds. I thought it would be interesting to arrange them as tiles. The squares would be uneven and irregular because they were hand painted. Then (separately) I painted several hearts and the word love. In Photoshop, I arranged the watercolor squares, and “knocked” the hearts and words out of the squares, and created a repeating pattern.

The original artwork:
heartssquares

This year’s Valentine’s Day Pattern:
redpinksquaresfinal

I got extremely enthusiastic about my design and, even though I haven’t purchased a single Valentine’s Day gift, I ordered a roll of gift wrap from Spoonflower.com. I either have to start shopping for things to wrap, or start crafting. Hmmm, I have some ideas!

Bananas for Monkeys

monkeypatternrepeat
When I was little I wanted a pet monkey so badly. I told my mom, “Don’t worry, I’ll keep it in the closet when we go out.” As if that was the least of her worries. I doubt monkeys were on the approved pet list in my NYC suburb.

The latest Spoonflower design challenge is “Year of the Monkey.” A couple of weeks back, I played around in my sketchbook, but nothing great emerged. But, I couldn’t get the contest out of my mind. So, with just a couple of days left until the deadline, I started sketching again. See my sketches here and what I’m learning about surface design.

It feels great to follow through and enter the contest. Before I started “My Creative Resolution” in 2014, I was notorious for having an idea and not following through, especially if my first draft wasn’t successful.

If you’d like to check out the other “Year of the Monkey” submissions, or vote for someone you know’s design (wink wink) click here. 🙂