
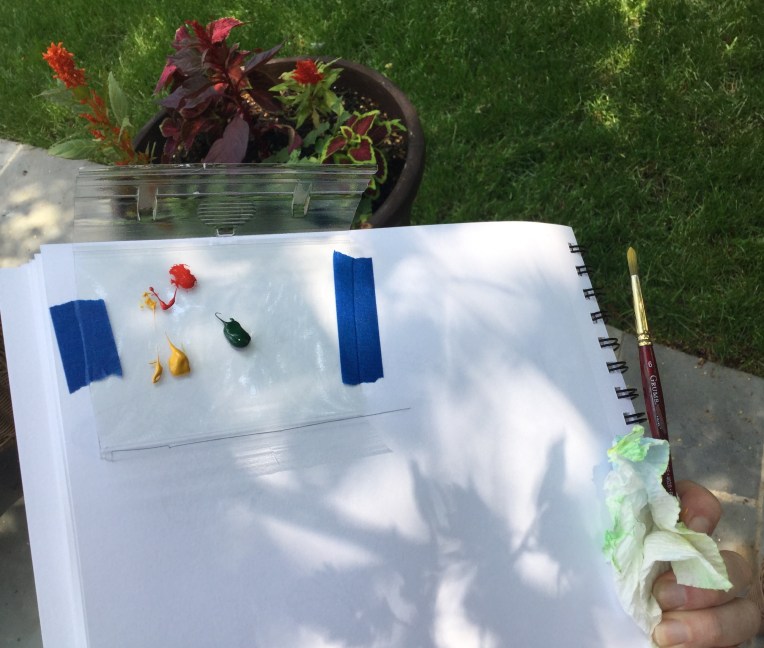
On a whim I created this palette – a sliver of an egg carton – so I could easily roam around the yard. I was inspired to play around with the different shades of green and different textures growing in the yard. I’m happy to be back at it after being away!
 Have you read:

Tools

11 art supplies I can’t paint without!

Painting Essentials:
- Canson Multimedia sketchbook. Love the thicker paper in this sketchbook. I can add watercolor without the pages buckling.
- Fluid Cold Press watercolor paper. I especially love the square shape of this high quality thick watercolor paper!
- Uniball signo 207 bold gel pen. I love how smooth these pens are when I want to add ink details to my paintings.
- Palette with cover.
- Painters tape – to tape down my paper
- Grumbacher watercolor brush. Favorite sizes: 8, 6, 4, and 2
- Van Gogh watercolor paints
- Holbein Gouache mixing set of 5. I love adding the opaque look of gouache to my paintings!
- Derwent drawing pencils. Especially with figures, I like to sketch in pencil before starting a painting.
- Kneaded eraser. For erasing and leaving only faint lines when I begin to paint.
- Paper towel – I have to have a piece of paper towel to suck water off the brush when I need a drier brush. Or to blot the brush after dipping in the water. It’s a good way to check the brush is clean.
Other Essentials:
- iPad – I do everything on my iPad – google reference photos, take photos, write posts, create digital art, look through and post on Instagram, read WordPress blogs, and more. I made the investment when my Kindle cracked and it was the best thing I did. I couldn’t live without it!
- ZXU Stylus pen – for drawing on the ipad. I use the apps Adobe Draw and Adobe Sketch because they link up with Photoshop and Illustrator on my desktop.
Other stuff in my supply tray:
- Reeves watercolor pencils for adding details
- Tombow markers for handletter
Recycled stuff:
- Tray from a holiday gift “basket” to hold everything
- Plastic egg container for mixing colors to keep the paints in my palette “pure”
- Back of the watercolor paper pads – to tape down my paper so it doesn’t buckle when it gets wet
- Recycled container (Ricotta or sour cream) for water
- Cracked mug for my brushes. It was too pretty to throw away!


This post contains affiliate links to products I use and recommend. I earn a small commission whenever you buy using these links, at no additional cost to you. Thank you for supporting my blog!
Share this:

Reindeer

Day 9 of the Christmas countdown. I started my painting this morning with a pencil sketch of 8 reindeer pulling Santa’s sleigh. First I painted the night sky, then I added shapes for the reindeer that looked like blobs. But I wasn’t giving up – even when my 11 old said, “Want some advice? Don’t post that.” I added ink details, then I gave up, and started drawing one reindeer. It’s so much easier to add detail and work at something when you are working big.
For the night sky I used the same technique as my first attempt. Salt. If you’ve never used salt with watercolor before – you sprinkle the salt on the painting when it’s wet. The salt absorbs some of the paint causing this cool crystal like effect. When the paint is completely dry, brush the salt off.
Marion has been drawing along with me. Here is her reindeer. On Instagram Teri is painting along. See her reindeer here. If you’d like to join in, tag adventmcr when posting.

Share this:

My 8 inch square paintings
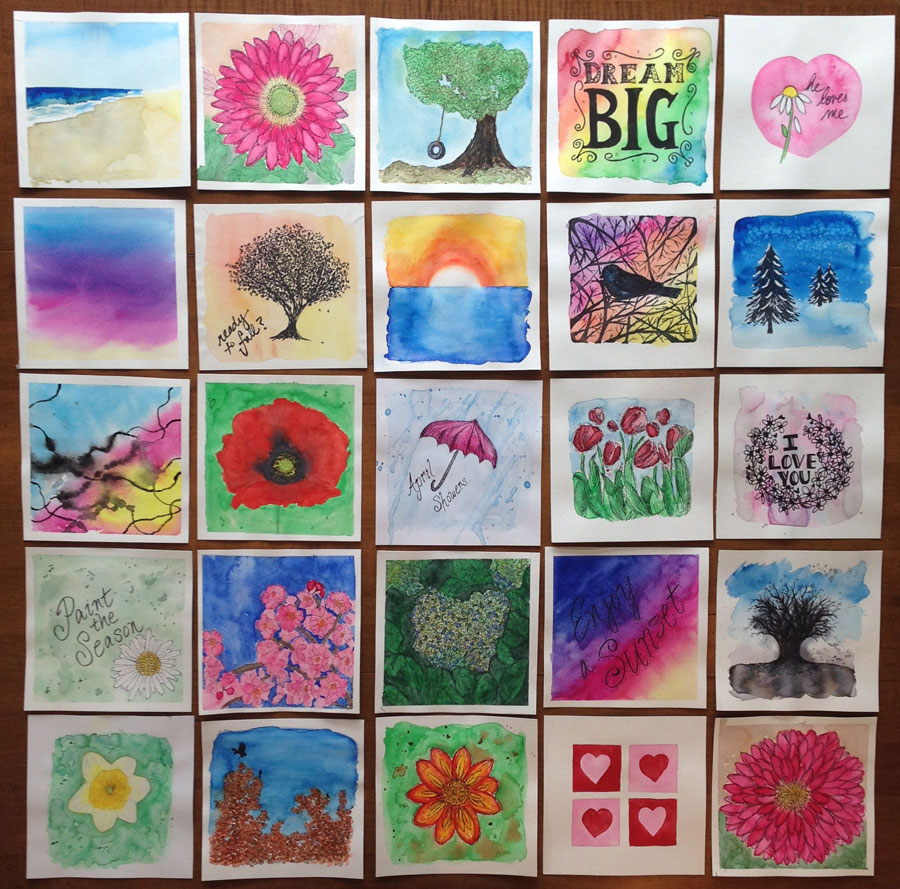
What size, shape do you like to work in? When I finally started using watercolor paper (I know what was I waiting for?) I came across Fluid Watercolor Paper 8″ square pad or “Easy Block” as they call it. I love working with this size and shape!
As you can tell by the image above, I do it often. I don’t know what it is, but I love the square shape and the size is small enough that I don’t feel…intimidated. I tape down the edges and end up with a .5″-1″ border which I love.
After falling in love with my first Fluid pad, I went back to Blick to get more and they didn’t have any!! I figured no big deal, I’ll just cut the paper, but it wasn’t the same. On my next trip to Blick they had it in stock, so I bought a couple. I’m out again so I’m anxious to get back to Blick and get more.
I’m starting to envision having a show, where all my pieces are 8″ x 8″. I can dream right? 🙂
Share this:

Cutting away the mistake

and I cut my first mat too! Mom’s painting is finally done. I’ve been struggling with it since Thanksgiving, when she requested it. I love the beach and feel so inspired by it, but I often struggle with trying to paint it. She requested a landscape. Sometimes I think I’m more of a “zoom in” and paint the details type of person. When things are so far back – you can’t even see the details. My attempts at beach paintings often look a little flat and boring. But she asked for it, so what could I say?
I decided this time I’d add ink to the painting and try to incorporate my “still developing” style. I was so nervous to add the first ink marks! You can’t get rid of them or cover them up, the way you can with watercolor. Another challenge for me – perspective! The photo I chose was perfect for my mom, but the perspective was a challenge for me. After I added the lamppost, I knew I’d messed up. It was way too tall. To be honest, if the painting wasn’t for my mom, I would have ditched it.
But I persevered. I pulled it out every so often and continued working on it. I already bought a frame. This week I measured the frame and decided to cut the painting and get rid of the too tall lamppost. In doing that, I’d need a custom mat. About 3 months ago, inspired by the Frugal Crafter, I bought mat board and a mat cutter. It was the first time I’d seen a tool that wasn’t an expensive table top cutter. The Logan 2000, has a line that you line up to prevent you from cutting past the corners. Since I already have a cutting mat and a straight edge, and am used to trimming with an exacto knife, it seemed perfect for me.
Isn’t it amazing how something sits for months and then in two days, you’ve completed the job. (It only took 2 days, because on the first day I mistakenly thought the Logan 2000 didn’t come with the blades. I was so disappointed! Eventually I realized I had everything I needed.) I found it a little hard, especially the corners, but I was happy with the outcome! I think with practice it will get easier.
I posted Mom’s painting on Instagram (mycreativeresolution) to see if she’ll notice. I hope she likes it! Wait, breaking news: She saw it and she likes it! 🙂 And it feels good to be done and to finally have used my new cutter!
My Steps:
See the start of this painting in the post “Pressure and Painting,” and the middle in the post “Mom’s present has entered the ugly phase. Can it recover?”
Cutting off the lamppost.

Figuring out the correct height of the lamppost, before drawing a new one.

Logan 2000


