

Last week the rainy weather inspired the black and white doodle below. Yesterday I colored it in Photoshop. Perfect timing for today’s downpour.

lettering

Practice, practice, practice…
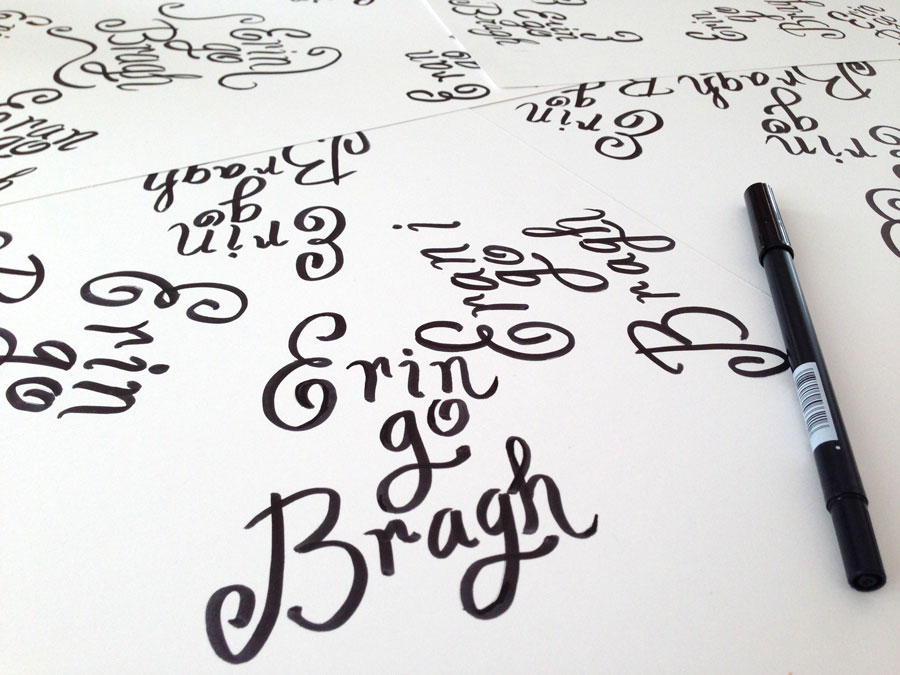
Last week I participated in an online hand-lettering workshop. Impatient person that I am, I quickly realized that this craft takes a lot of practice! Today I sat down to write a Gaelic phrase, “Erin Go Bragh,” which means, “Ireland Forever.” (It’s March, I can’t help but celebrate my Irish roots.)

I wanted to write the phrase perfectly, so I kept practicing. After a couple of tries I started to “get” how the words best fit together. Thirty-four tries later, an hour later, my hand was tingling and it still wasn’t perfect! My letters were definitely improving, but I have a long way to go. To get the hang of hand-lettering, I’ll have to work at it. And this is only one style of the alphabet!
I’ve hit on several of my goals for 2015 and it’s only March. Here’s the list of things I wanted to try:
- Linocut
- Lettering
- Online workshops
- Painting on dark paper
- Doodling
- Video
- Patterns
- Maps
- Digital Brushes
- Watercolor Parties
I’ve tried linocut, practiced lettering (with the help of the online workshop), doodled, made a few patterns, and used digital brushes. I’m happy I’ve achieved this much already. The problem is – to excel at any one thing, takes time and work. And time is in limited supply. As I continue trying these things, I have to decide which things I’ll stick with and which I’ll have to say goodbye too. 😦
Share this:

So excited! (Calligraphy Workshop)

Today I started an online Calligraphy workshop. I really like it. One of the supplies for the workshop is a Tombow brush pen. I have smaller Tombows, but this pen is awesome! This is exactly what I was looking for – hand lettering with a brush (not a nib and ink). The pen makes it almost easy.
The workshop is about an 90 minutes. I made it halfway through. I still have to do the lowercase letters. I’m so impatient, I want to jump right to the fun stuff! I know taking the time to learn each letter and practice will pay off. Can’t wait to show you!
Share this:

2015 – off to a great start!
So far I’ve been working on several of my 2015 goals and it’s only the first week of January! Here’s what I’ve hit so far.
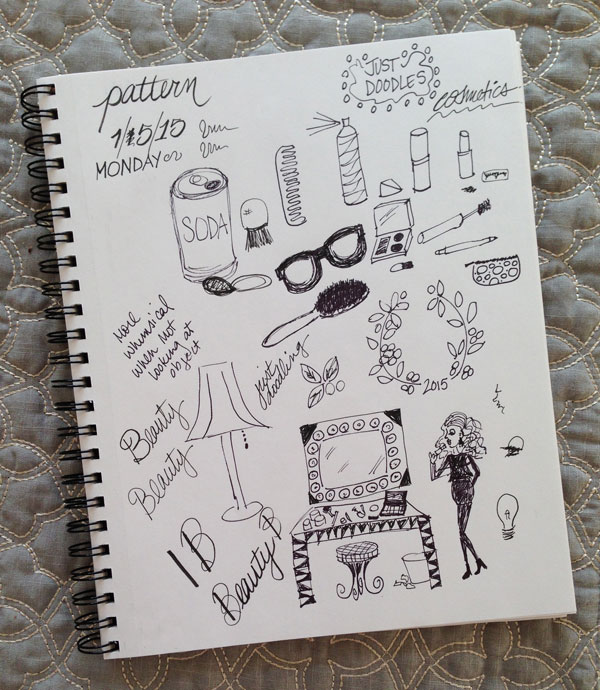
Lettering and Doodling – Every couple of days I pull out my sketch book and doodle and practice my lettering. I’m finding that I can create more whimsical, simpler illustrations if I’m not looking at the object. If I’m looking at an object, I feel compelled to make it realistic looking.
Patterns – While I was doodling the other day, I realized that some of these doodles could be made into a pattern. This pushed me to continue with a theme – cosmetics. So my pattern plan is to continue doodling and at a later date, I’ll look through my sketchbook to find things to use.
Linocut – I’m totally intimidated by all those tools! But, I haven’t forgotten about my number one goal! Right now I’m sketching out some ideas and I promise (oh no, why did I just write that?) that in the next few weeks you’ll see my first linocut. I’m planning on trying it on dark paper, which would encompass goal #4 too!
Video – I made my first videos. I wanted to share one with you, but I need to first figure out how to make the videos compatible with WordPress. Even though I compressed my videos, they weren’t in a format that I could upload to WordPress and I’m not ready to open a youtube account. Don’t worry, you aren’t missing much – it was a shaky video where I’m painting some branches!
Here is my complete list of 2015 goals in case you missed that post.
Things I want to try in 2015:
- Linocut.
- Lettering.
- Online workshops.
- Painting on dark paper.
- Doodling.
- Video.
- Patterns.
- Maps.
- Digital Brushes.
- Watercolor Parties.
I hope you are off to a good start too! 🙂
Share this:

10 things I want to try in 2015 and links to those who inspire me!

I can’t wait for 2015! (my creative resolution.2) There are so many things I am excited to try! The above image is the Christmas present I bought myself (see item #1).
Things I want to try in 2015:
- Linocut. It seems like a lot of work but the results are awesome! I am inspired by Andrea Lauren who I follow on Instagram (@inkprintrepeat). Check out her nutcracker – amazing!
- Lettering (“modern calligraphy”). I’d like to continue practicing my lettering. I follow @illustrationbyj on Instagram. She recommended Tombow markers which are awesome!
- Online workshops. There is so many resources online and I’d like to take advantage of them. I’m thinking about this workshop on modern calligraphy.
- Painting on dark paper. I love this look and I want to try it – check out my pinterest board to see!
- Doodling, especially flowers and wreaths. I’m so inspired by @kristinnohe on Instagram. She fills her journals with beautiful doodles.
- Video! I love seeing the progression of a project, which is why I often show my steps. I’d love to show you this in video form.
- Patterns. I’ve wanted to try this for awhile. I am inspired by glizadesign.com.
- Maps. I’d love to create a whimsical map. I love Linzie Hunter’s style.
- Digital Brushes. I am a Graphic Designer and don’t often like to mix my art with my computer work, but maybe it’s time?! There is so much cool stuff you can do.
- Watercolor Parties. Friends, watercolor, a glass of wine – what could be more fun?!
What new thing are you excited to try this year?
Share this:

Freehand vs. Computer Lettering

I’ve been playing around with this project – practicing the lettering in my sketchbook, playing with fonts on the computer. I even scanned my watercolor background and printed it with type I set up on the computer. I don’t usually do this. I create on the computer enough as a Graphic Designer and when I signed up for that first drawing class 7? 8? years ago, the point was to use anything but the computer. I like the lettering in my sketchbook the best. It’s ironic because that was my first try at it. Maybe I’ll scan it in and print that on the watercolor background. 🙂

Share this:

Beach Lover Wooden Sign

I bought a piece of wood and had it cut into pieces at the hardware store. Using acrylic paints – teal and white – I added streaks of both and blended them, to get achieve a beachy, sun bleached look.

I set up the lettering on the computer and outlined it. Last time around I cut custom stencils which was a lot of work. This time I found advice on hand lettering. I laid the printout on the wood and using a hard stylus pen (from my kid’s old DS), traced the outline of the letter. When I was finished I could see the outline impression on the wood.
Following the outline impression on the wood, I painted the letters black. When they were dry, I painted white steaks over the letters with a very dry brush to capture the distressed look. I’m happy with the results!
Click here to learn more about how I painted the background.
Share this:

Painting Wooden Signs

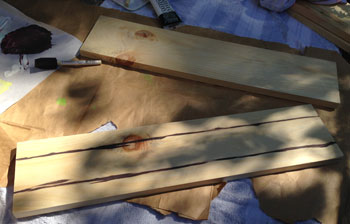
Finally, I’m tackling a wood project! I’ve been interested in painting on wood, and creating handmade signs. It was surprisingly easy to walk in to Ace, pick out wood and ask them to cut it. And cheap!
I pulled out the hand sander, which made me feel like a pro, and gave the wood a light sanding. Then I added streaks of different colors and blended them, sometimes adding water to dilute a color. I wanted to create a bleached, weathered look.
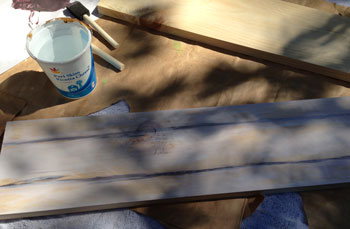


I’m happy with how they came out. See how I added lettering to them here.
Share this:

Practicing Painting Lettering
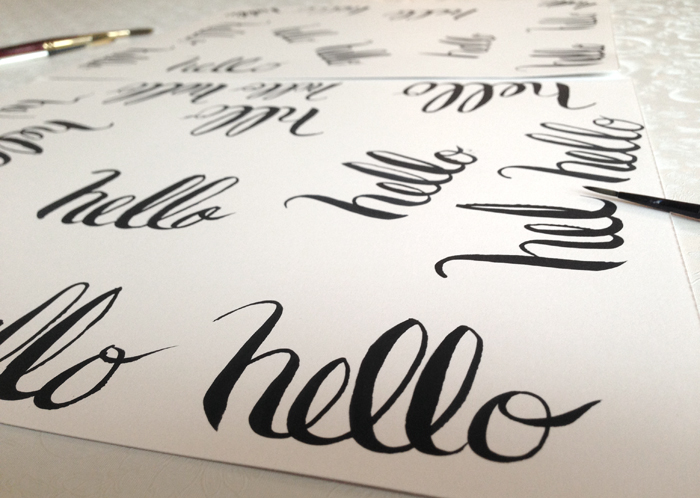
I’ve been practicing! The other day I copied an alphabet from a book (2x). Today I wrote “hello” many times! It’s interesting what you learn by doing, especially when you keep repeating something.
Here’s what I’ve learned:
- Too much coffee makes my hand and my letters shaky
- Light touch – thin line, more pressure – thicker line. I learned this from watching this video.
- Painting downward is easier than upward
- The brush needs to be wet enough. I re-dip before each letter.
- Paint in sure strokes. I wish I could remember where I got this tip from. It is so true. When I hesitate it shows.
I practiced the alphabet below from the book, “Hand Lettering for crafts” by Sandra Salamony. The book was helpful because it showed what part of the letter to paint first and what direction to paint each part in.


