
Can’t find all 13? Let me know. 🙂
Can’t find all 13? Let me know. 🙂

 One of the ways I’ve been able to incorporate creating into my daily life, is by having my supplies close by. I use a closet close to the kitchen table for storing my paints, brushes, paper, sketchbooks, inspiration magazines, and more. It makes it so easy to pull stuff out and work. Clean up is quick too. Since I recently organized my art supplies, I decided to give you a peek! Happy Sunday!

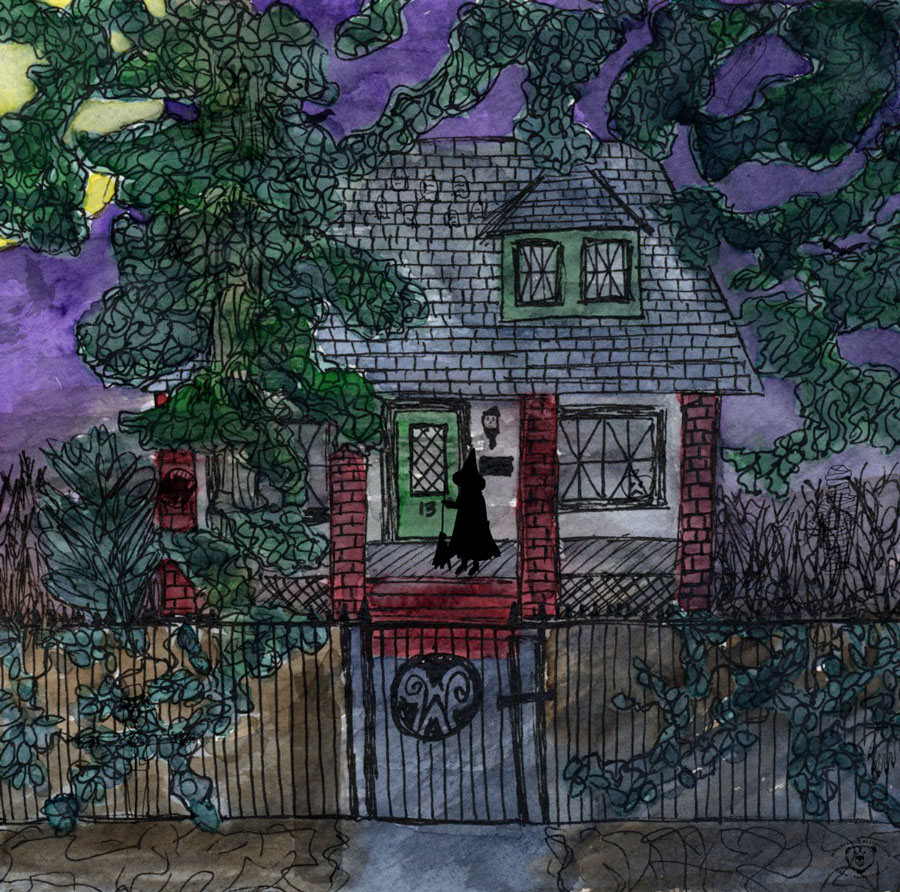
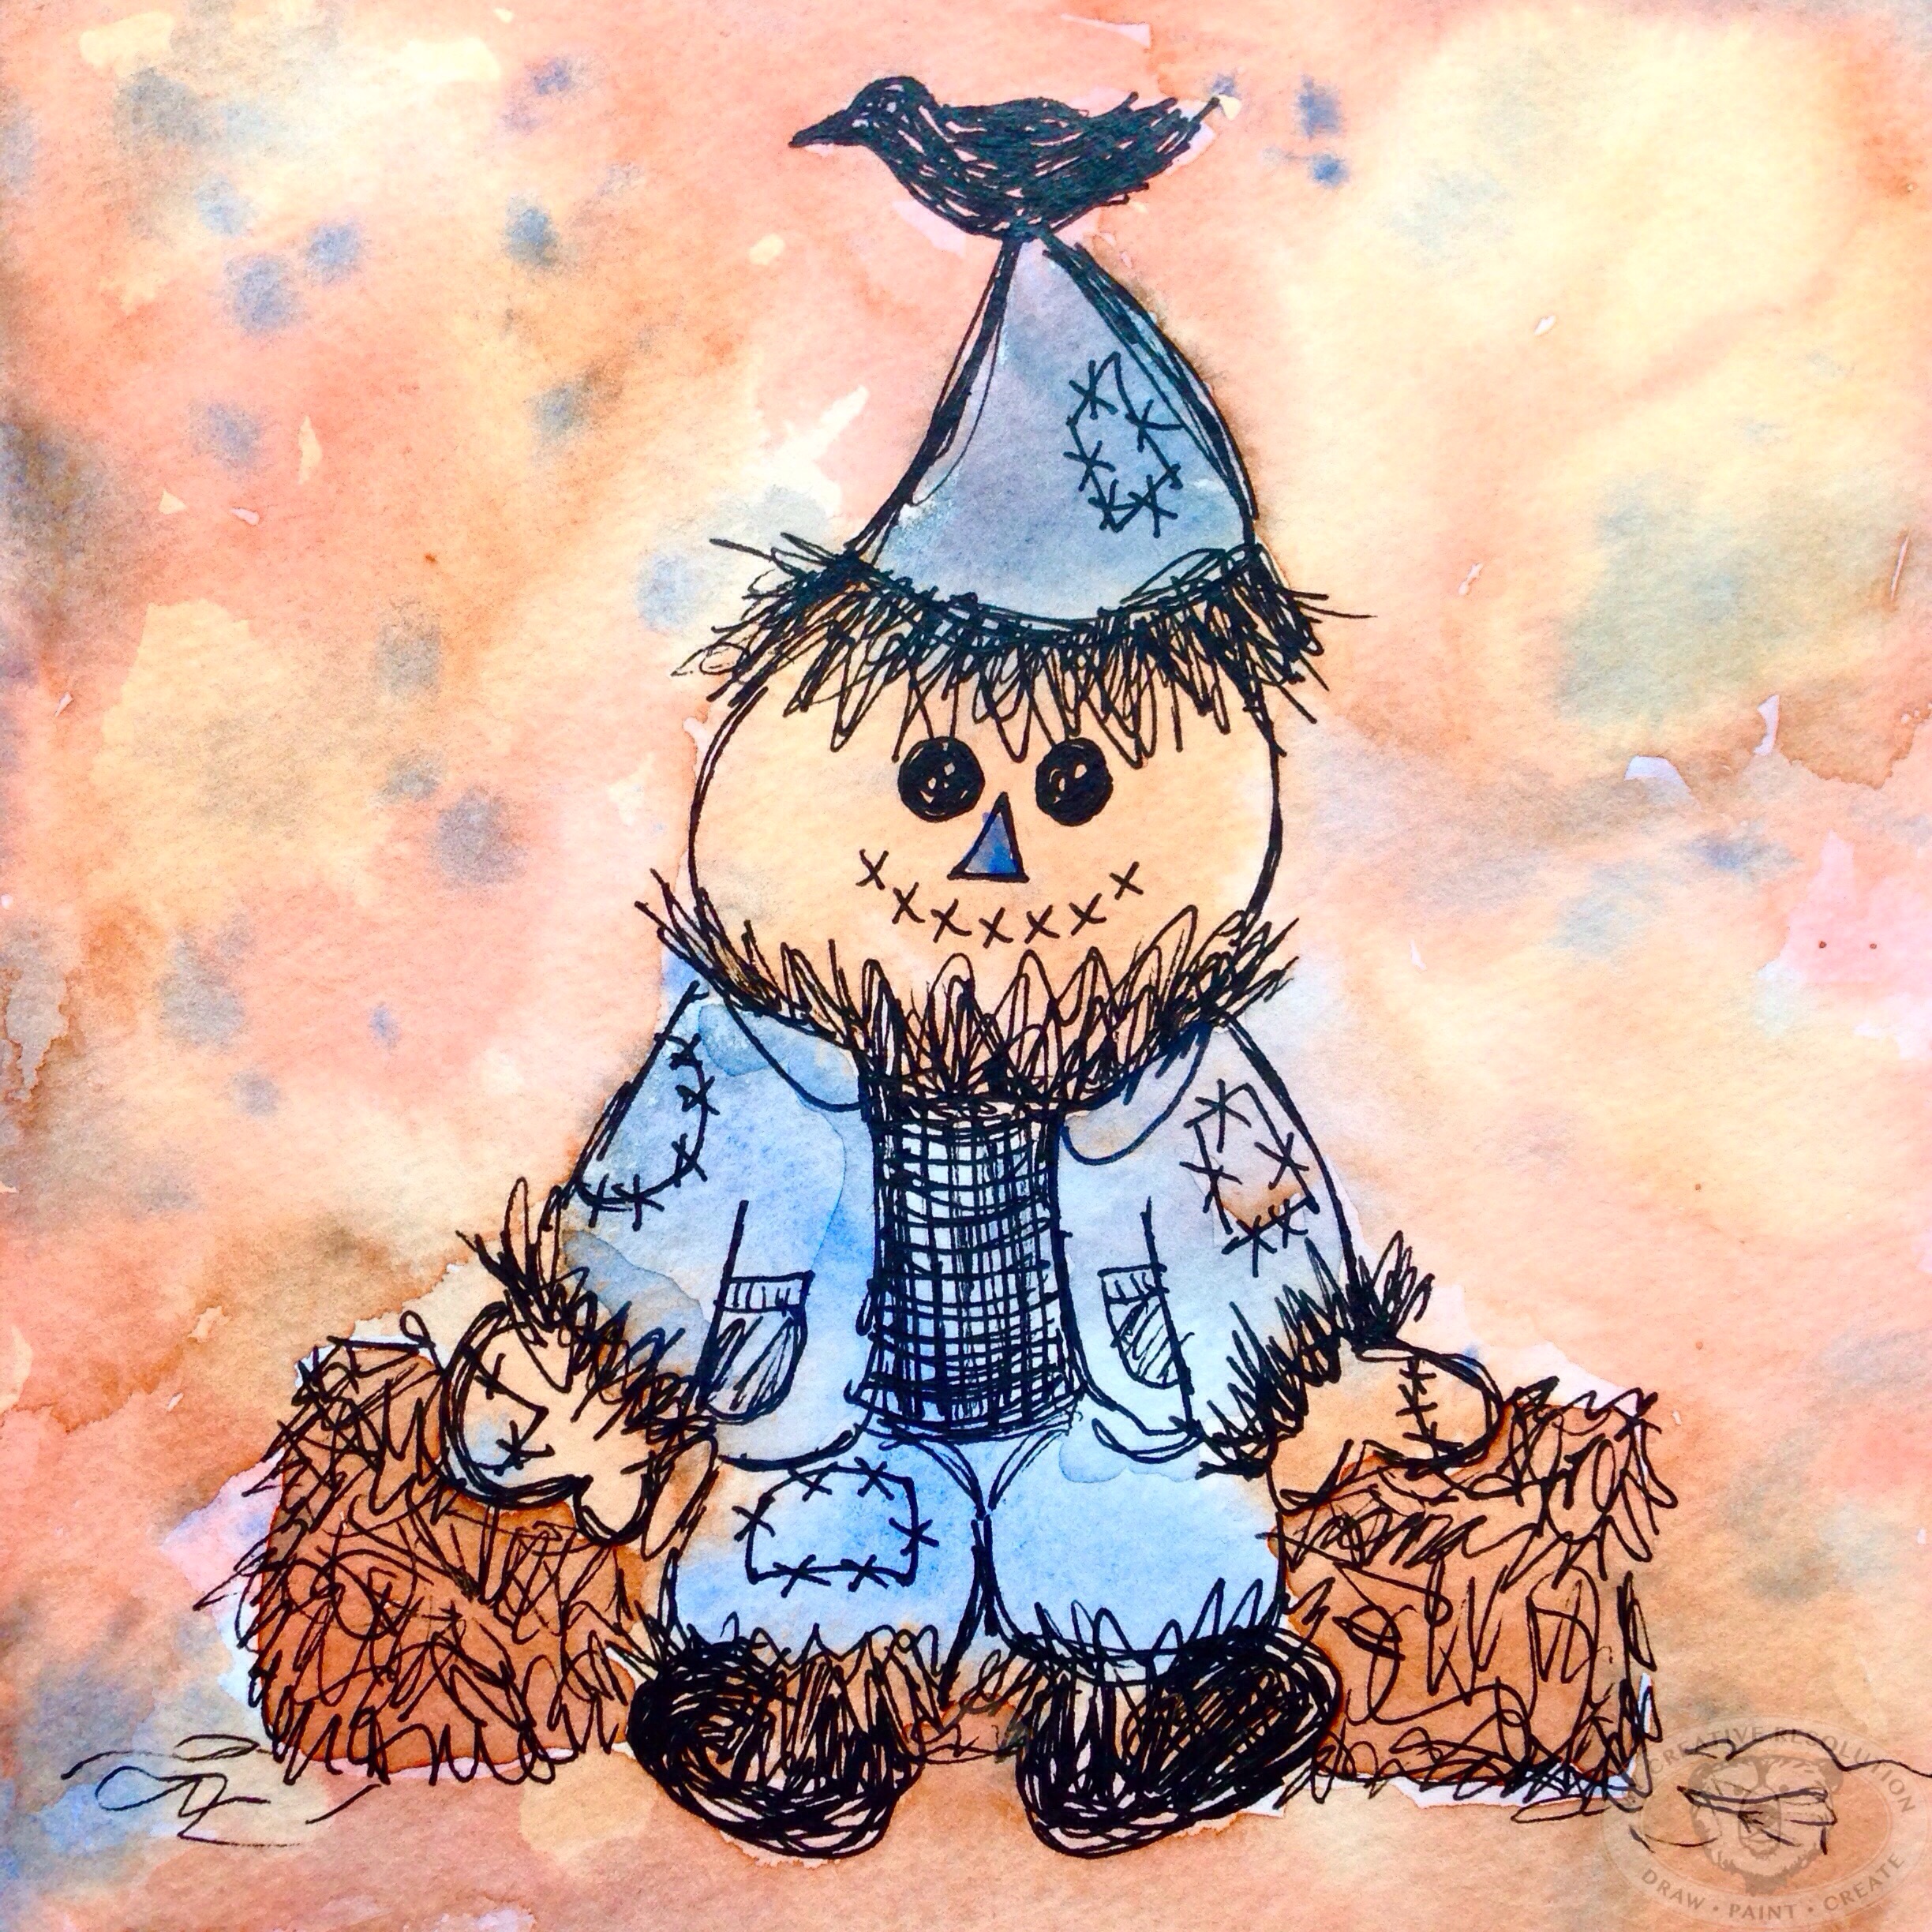
Try to find the hidden pictures: scarecrow, witch’s hat, broomstick, bat, owl, eyeball, spider, hands, tail, and a face (profile).
Last year I doodled a few Halloween scenes in my sketchbook. In one of them, I hid a few things. This year I’ve been inspired to do more of these. The illustration above is only 8″ x 8.” So hiding things was a bit of a challenge. It’s hard to draw details that small!
I think a better way to do this, is to create an illustration. Then, create the items to be hidden, separately, and a bit larger. And put it all together in Photoshop. I’m working on a second haunted house illustration now, so I’ll give it a try.
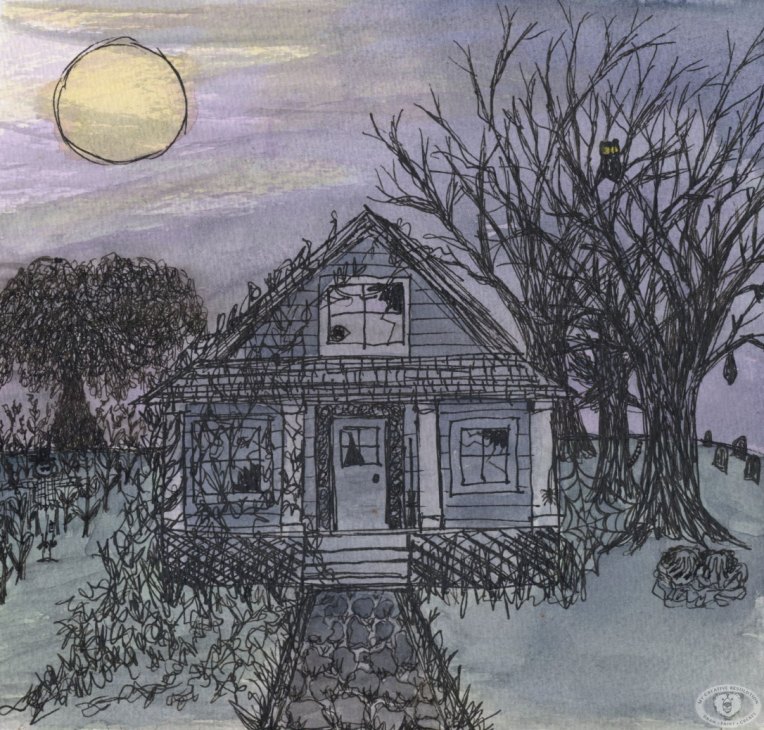
Last year’s Halloween sketches:


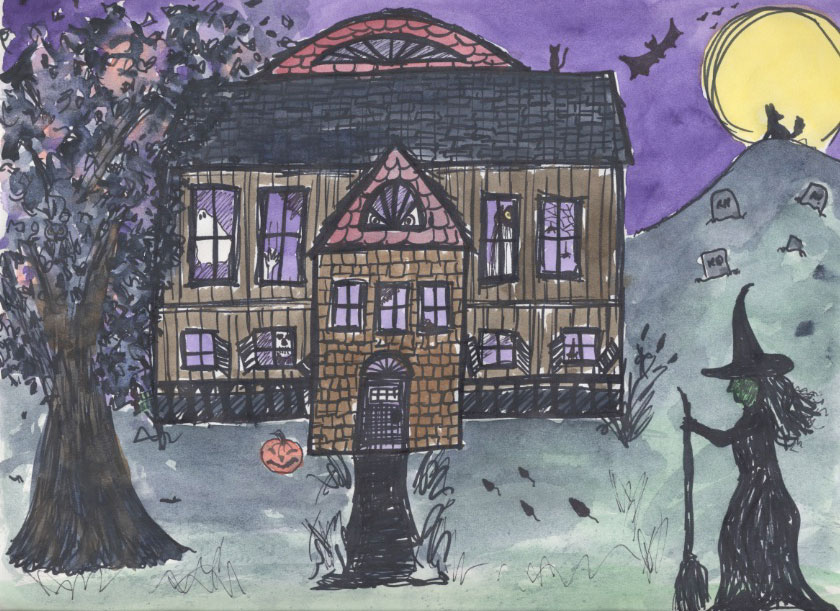

It’s interesting to look back on last year’s illustrations. I’m noticing that the thicker marker conveys a more playful feel.
Did you have trouble finding any of the items? 🙂


One of the side effects of living a creative life is your senses become super charged. Plainly stated you notice things. On a recent walk with a friend, I stopped her a few times to say, “Look at that!” Her response, “I forgot I was with an artist.” I was finding beauty in things she didn’t even notice. I mean just look at these flowers!

I love this “stop and smell the roses” mentality. As a runner, I see things all the time that I’d never notice driving by in a car. I often stop running and snap a photo. A common caption on my Instagram is “Found during my run.” Many times these photos are inspiration for my paintings.
I’ve realized over the last year and half, how much the seasons inspire me. Here in New York, the leaves are just starting to turn. I see hints of it here and there. And I can’t wait. My recent artwork reflects how Fall is inspiring me.
I’m already doodling Halloween stuff in my sketchbook…can’t wait to share! 🙂

Hi everyone! A little over a week ago, I received a really sweet email from someone in Germany (I’m in NY isn’t it amazing how WordPress connects us?), asking if I would like to be a guest blogger. I have to share with you a part of the email. I was beyond flattered!
“You are the first person I contact for this matter. I would be honoured if you would like to attend my blog as guest blogger, and write about a learning experience, testing a new medium etc. I decided to take this step and approach you after your post about how to make a pattern in photoshop. It’s inspiring, and that’s exactly how I would like my small audience to feel when going through my blog.
I don’t wanna take much more of your time, please let me know if the idea is appealing. I don’t mind if you say no 🙂
Best wischen from Germany – you have fans here!”
Anamaria
Of course I said yes! I decided to write about painting in watercolor. Ana’s response to the topic and post was:
“WOW, thanks a lot! looks awesome and it’s great, it will help me in starting my first experiments with watercolor. Couple of day ago I bought the supplies, and I am ready to give it a try, so your post comes just in time! I always wondered how the “wet on wet” effect it’s made ;)”
Sharing feels really good! 🙂
I hope you’ll visit Ana’s blog. Here is the link to my post: Ana’s Learning Lab


I’ve learned so much since starting my creative resolution in 2014. About how important setting a goal is. But, not only do we have to set a goal, we need to outline the tasks that will get us there.
My 2014 creative resolution, or goal, was very simply to “be creative.” Early on I wrote (and adapted as I went on) a “weekly checklist” or a set of tasks that would help me achieve my goal. They were:
My 2014 Weekly Checklist:
As the year went on I added things like “figure drawing” to my list, and, as I focusted more on watercolor, acrylic painting moved to my monthly list.
My 2014 Monthly Checklist:
My 2015 creative resolution or goal was to “continue my creative journey.” Right from the start of 2015 I wrote a list of things I have always wanted to try. Some of these things were one time “tries,” while others I incorporated into my checklist (see the last three items).
My 2015 Checklist:
As the new year gets closer and closer, I’m excited to set a new goal, a new creative resolution. I’ve grown so much, I can’t wait to see what 2016 brings! 🙂

Have a good weekend! And if you are on the East Coast – stay dry.


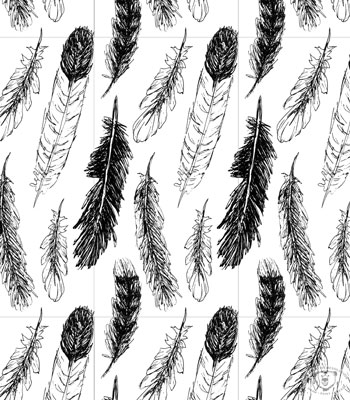
Here is my pattern design for September. As you may have seen, I’ve been drawing and painting feathers all month, so it’s seemed appropriate to turn them into a pattern. I pieced this pattern together from my sketchbook (see below). I wanted this pattern to be much tighter than ones I’ve designed so far this year. This tighter pattern, required more playing and arranging in Photoshop becauses once I thought the pattern was “set” and I tried repeating it, things would overlap and I’d have to readjust and try repeating it again.

If you know Photoshop and want to try creating a pattern, I’ve included my steps below.
Creating a pattern in Photoshop:
Below, you can see my boxes. The center box is where I have my guides (which are not visible).
Slight variations on my feather pattern.
No distress in the background.

Distress shows yellow.

Which one do you like best? 🙂
Copyright 2015 Eileen McKenna. All rights reserved.

 Supplies:


 This post contains affiliate links to products/brands I use and recommend. I earn a small commission whenever you buy using these links, at no additional cost to you. Thank you for supporting my blog!
Want a dose of creative inspiration? Sign up for my newsletter “My Creative Collection” by clicking here. Learn more about the newsletter here.
This post contains affiliate links to products/brands I use and recommend. I earn a small commission whenever you buy using these links, at no additional cost to you. Thank you for supporting my blog!
Want a dose of creative inspiration? Sign up for my newsletter “My Creative Collection” by clicking here. Learn more about the newsletter here.
