Watercolor Painting Ideas for Beginners

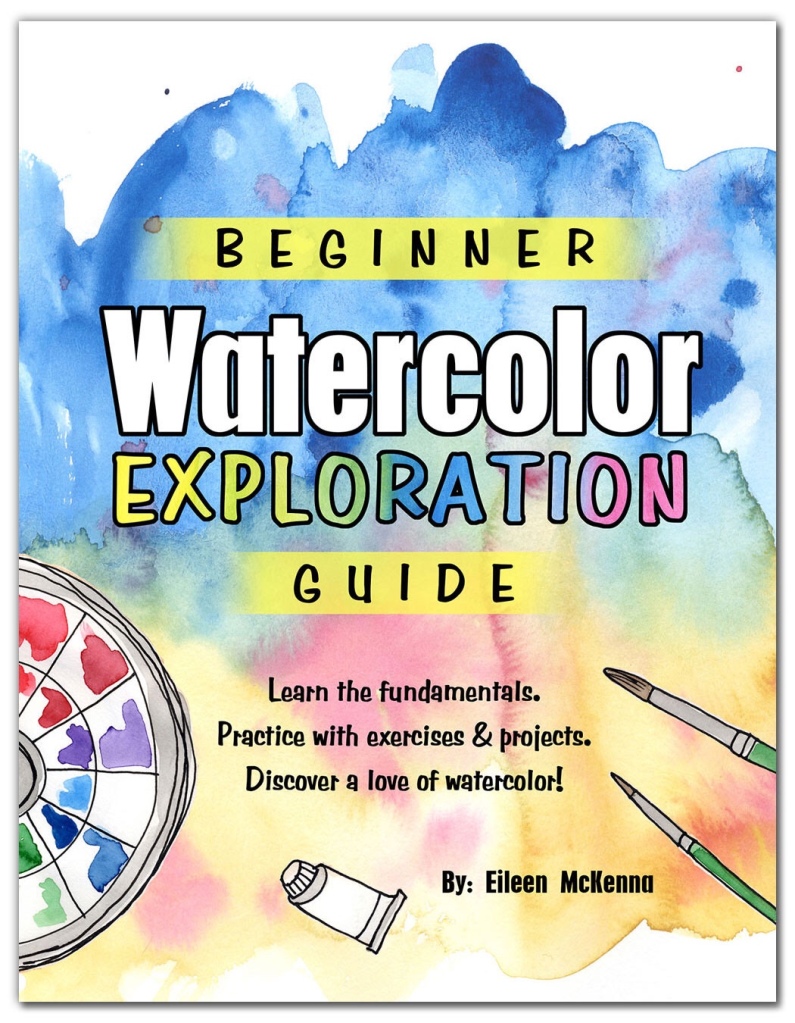
I remember when I realized I loved watercolor. It was during the early days of my blog, when I was exploring mediums. I pulled out my watercolors to make working in my sketchbook more fun and that was it! Watercolor has been my primary medium ever since. It has a magical quality that I love!

I enjoy sharing everything I have learned. There are tips and techniques that can make a world of difference for a beginner. I love designing watercolor painting projects that not only teach fundamentals but allow beginners to have the success of a beautiful final painting!

Beginner Watercolor Lessons

Below are beginner watercolor painting lessons that are a great way to experience watercolor! Each lesson is available as an inexpensive printable PDF with step by step instructions and photos. Some lessons are also available in video format.

Watercolor Coneflower Painting Lesson

Watercolor flowers - painting ideas for beginners

Embrace the fluidity of watercolor while creating this beautiful background. Learn to paint realistic looking flowers. Perfect for spring!

Processing…
Success! You're on the list.

Starfish Watercolor Painting Lesson

Beginner Watercolor Painting Lesson Starfish

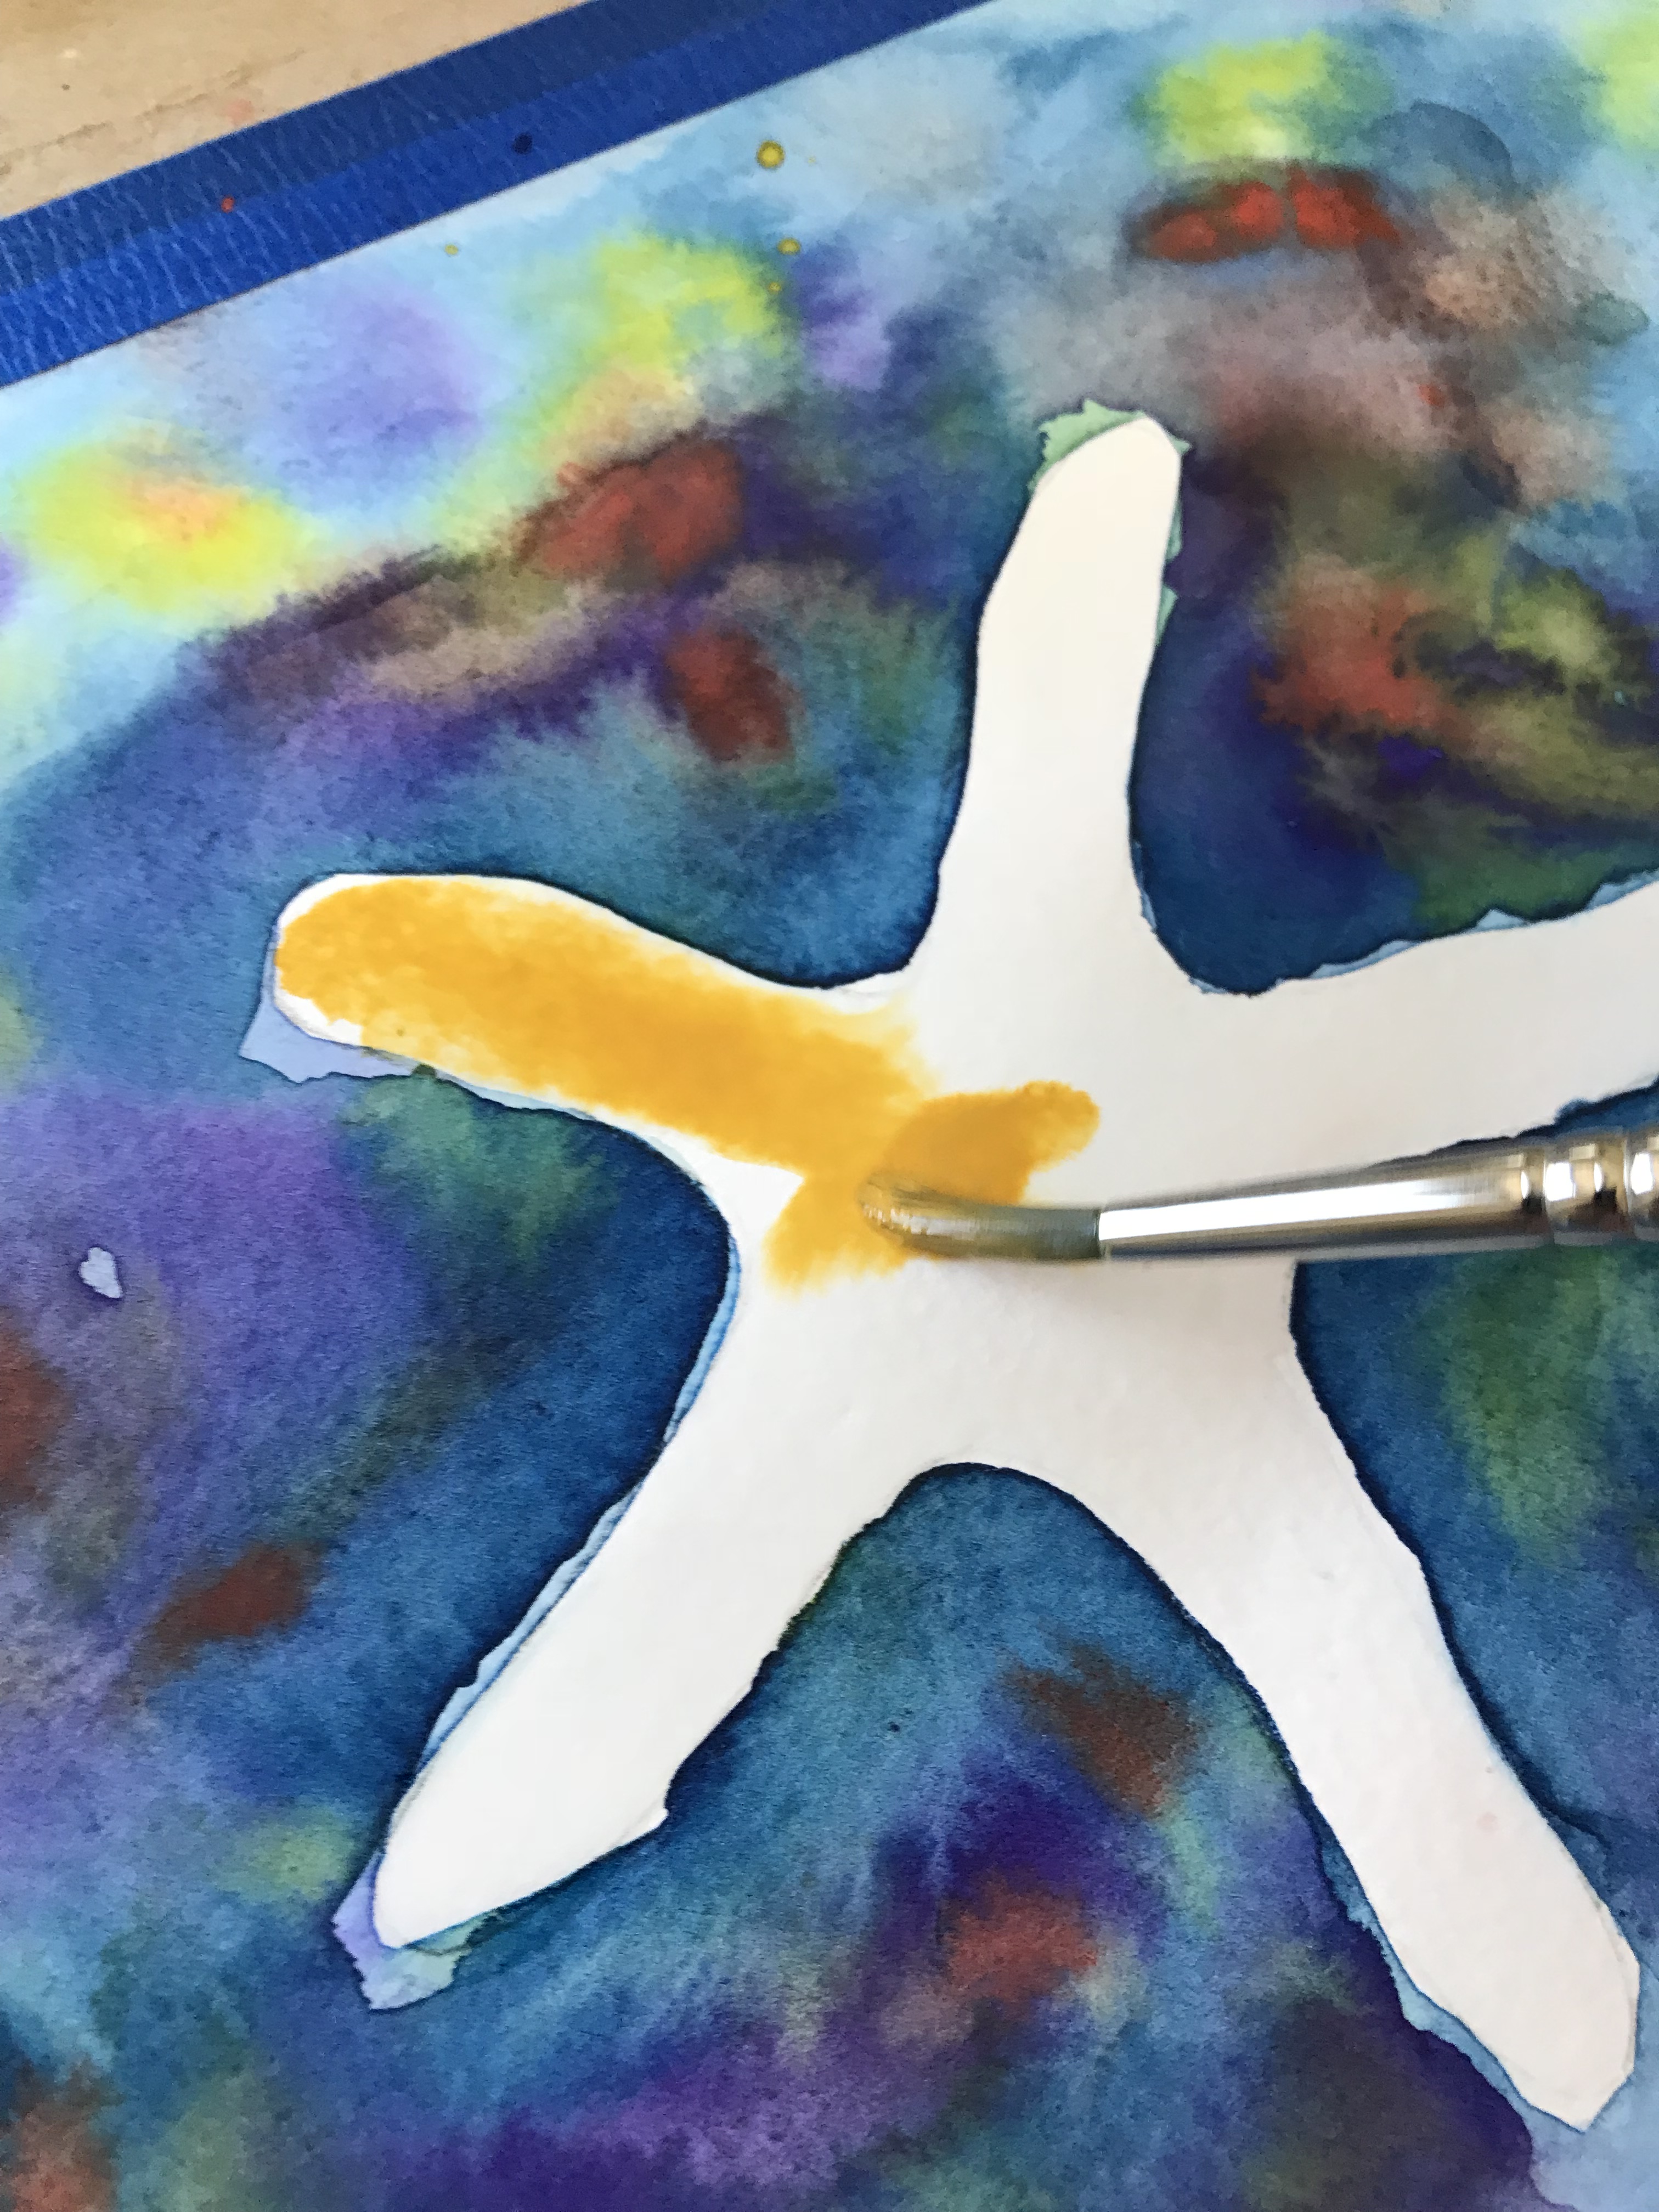
I created this lesson while teaching a friend about watercolor. I wanted something easy, no pressure – where someone could experience creating a beautiful background with colors bleeding into one another. In the later steps experience painting layers to create the details of a starfish.

Birch Forest Lesson Watercolor Painting Lesson

Beginner Watercolor Lesson Birch Forest

This painting lesson is fun and easy. There is no pressure to draw – we let the tape do the work. In the early steps experience the magic of colors bleeding and blending. Use any colors you’d like! In later steps we work “drier” to create realistic looking birch trees.

The Birch lesson is also available in video format – click here to learn more.

Woodland Creatures Forest Watercolor Painting Lesson

Easy Beginner Painting Idea Woodland Creatures

Very similar to the above lesson, but with the added fun of cute animals! Simple steps will help you create this glowing painting!

Ice Cream Cones Watercolor Painting Lesson

Easy Painting Idea for Beginners - Ice Cream Cones

This painting lesson is a a color explosion! Creating the background is so fun as you learn to embrace watercolor bleeding and blending. And for painting each scoop of ice cream – a different technique is used!

The Ice Cream Cone lesson is also available in video format – click here to learn more.

Fall Pumpkin Farm Watercolor Painting Lesson

Fall Painting Idea for Beginners

Embrace the vibrant colors of fall with this step by step tutorial. Trace the barn and create the farm house with a few pieces of tape – no drawing required!

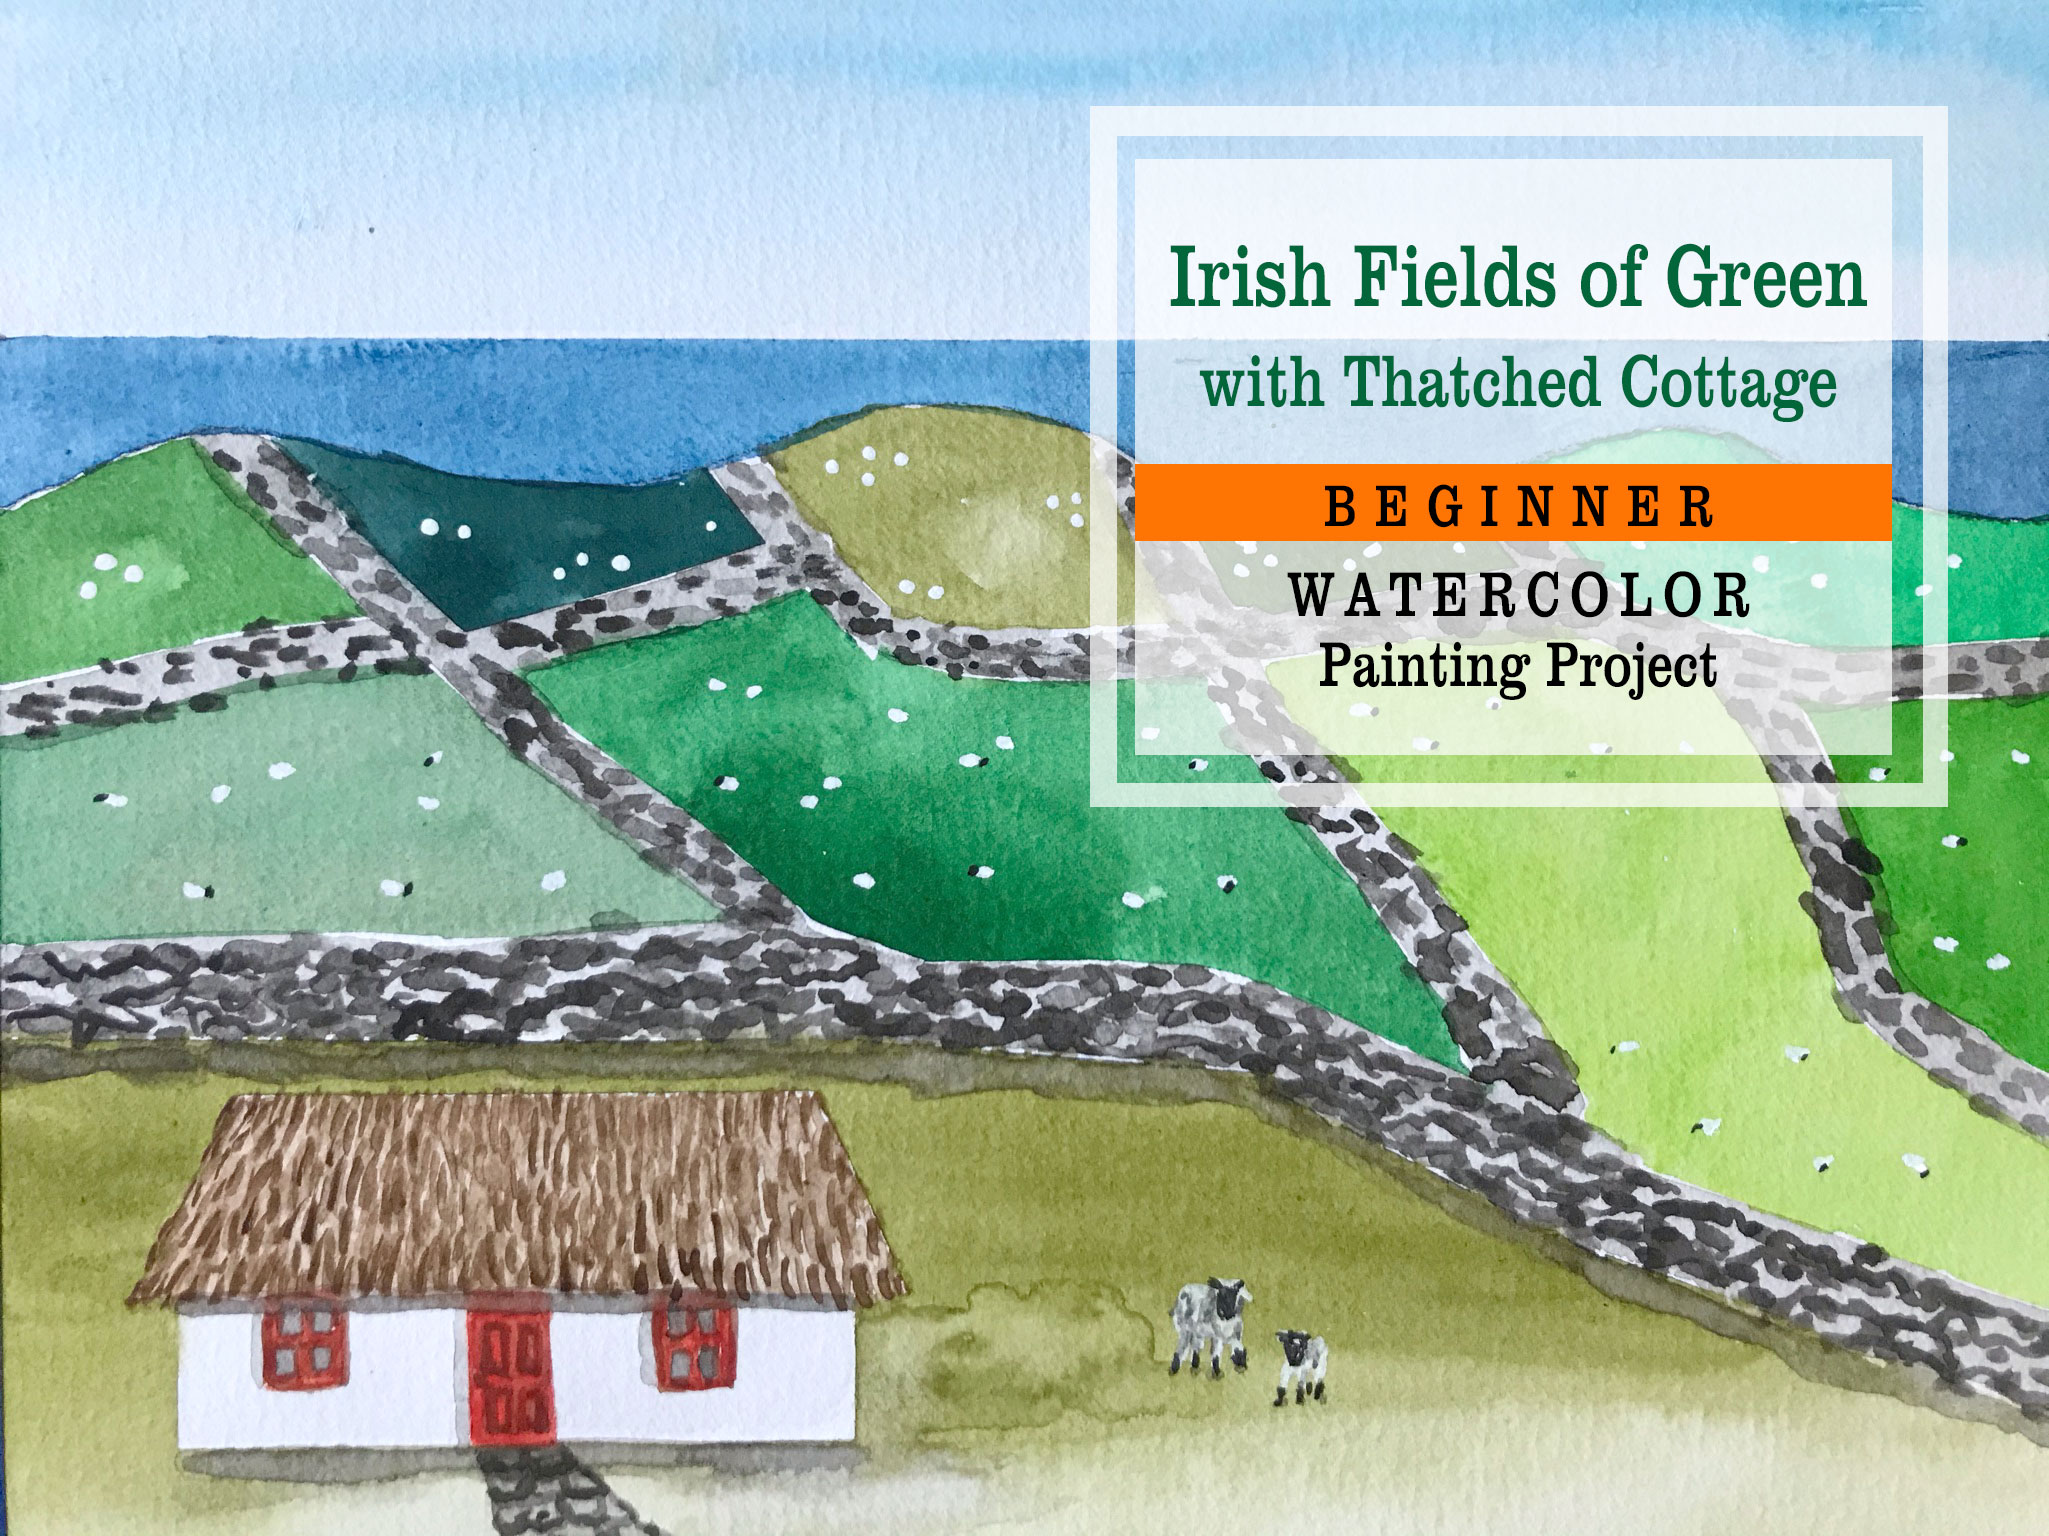
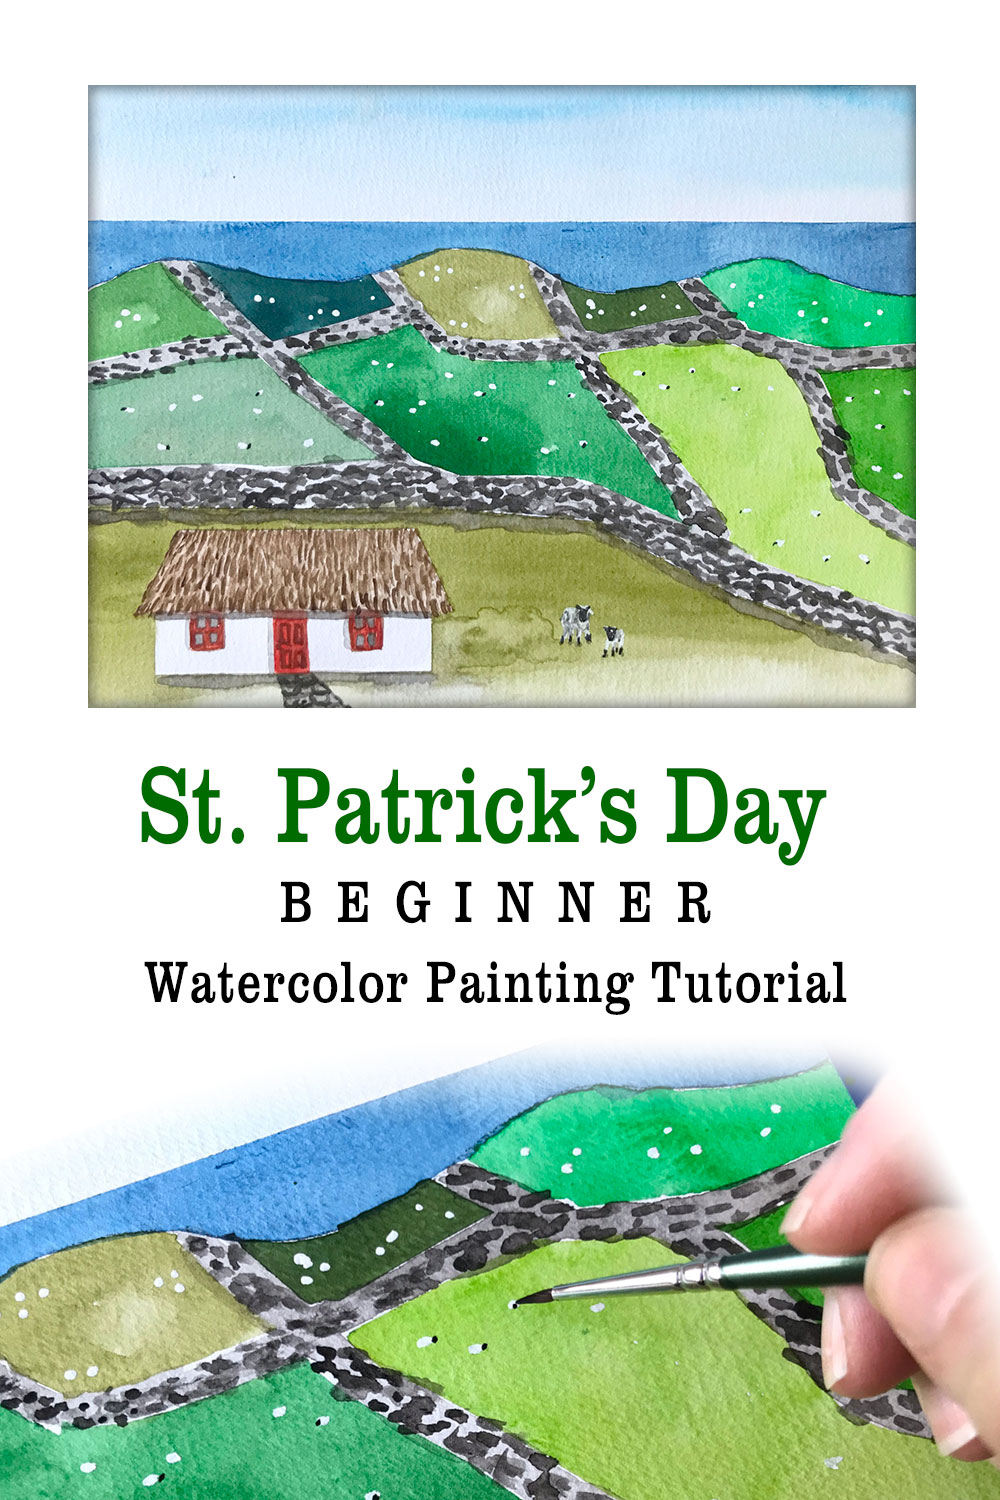
Irish Fields of Green Irish Landscape Watercolor Painting Lesson

Painting an Irish Landscape in Watercolor

This landscape of Ireland may look difficult but don’t let it fool you! With the help of painters tape and following the step by step directions, you’ll be painting the greens of Ireland in no time!

Polar Bear Northern Lights Watercolor Painting Lesson

Beginner Painting Idea for Winter - Northern Lights

The Northern Lights look like watercolor in the sky! Create your unique lights by following simple steps. A template is provided for you to trace the polar bear – no drawing required. Magic results await you!

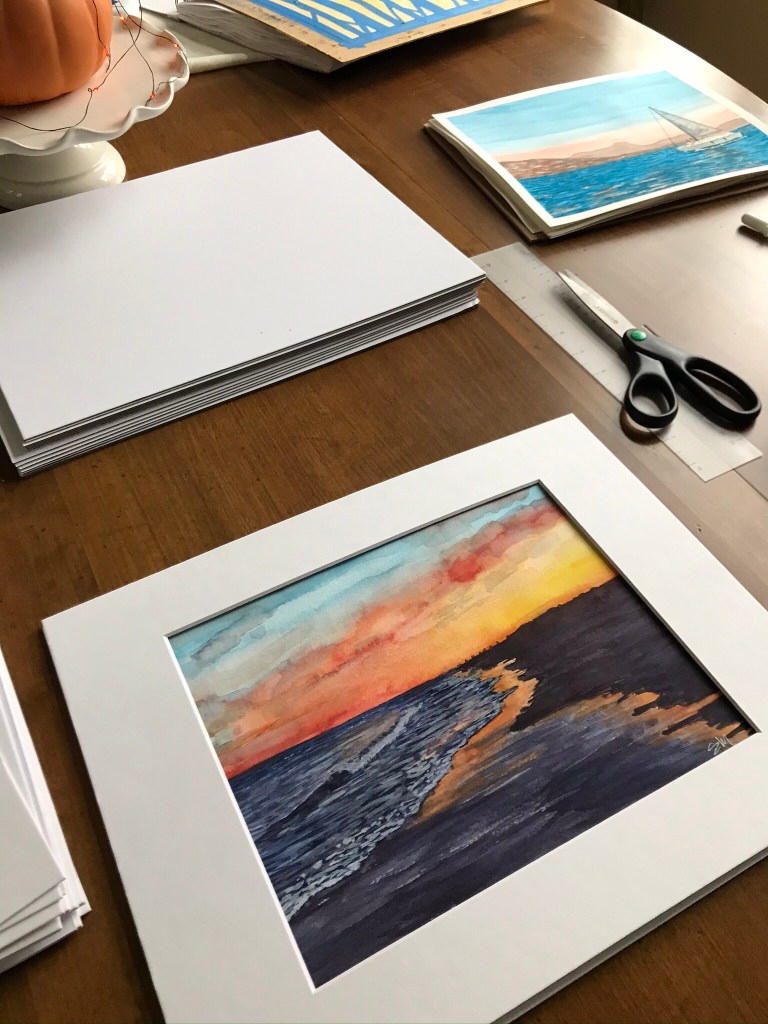
Seascape Watercolor Painting Lesson

Watercolor Seascape Painting for Beginners
Seascape Painting Lesson

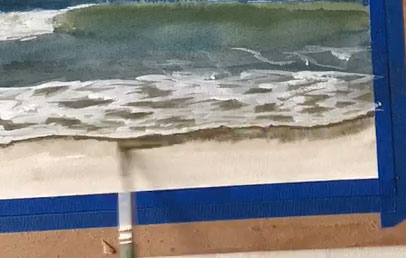
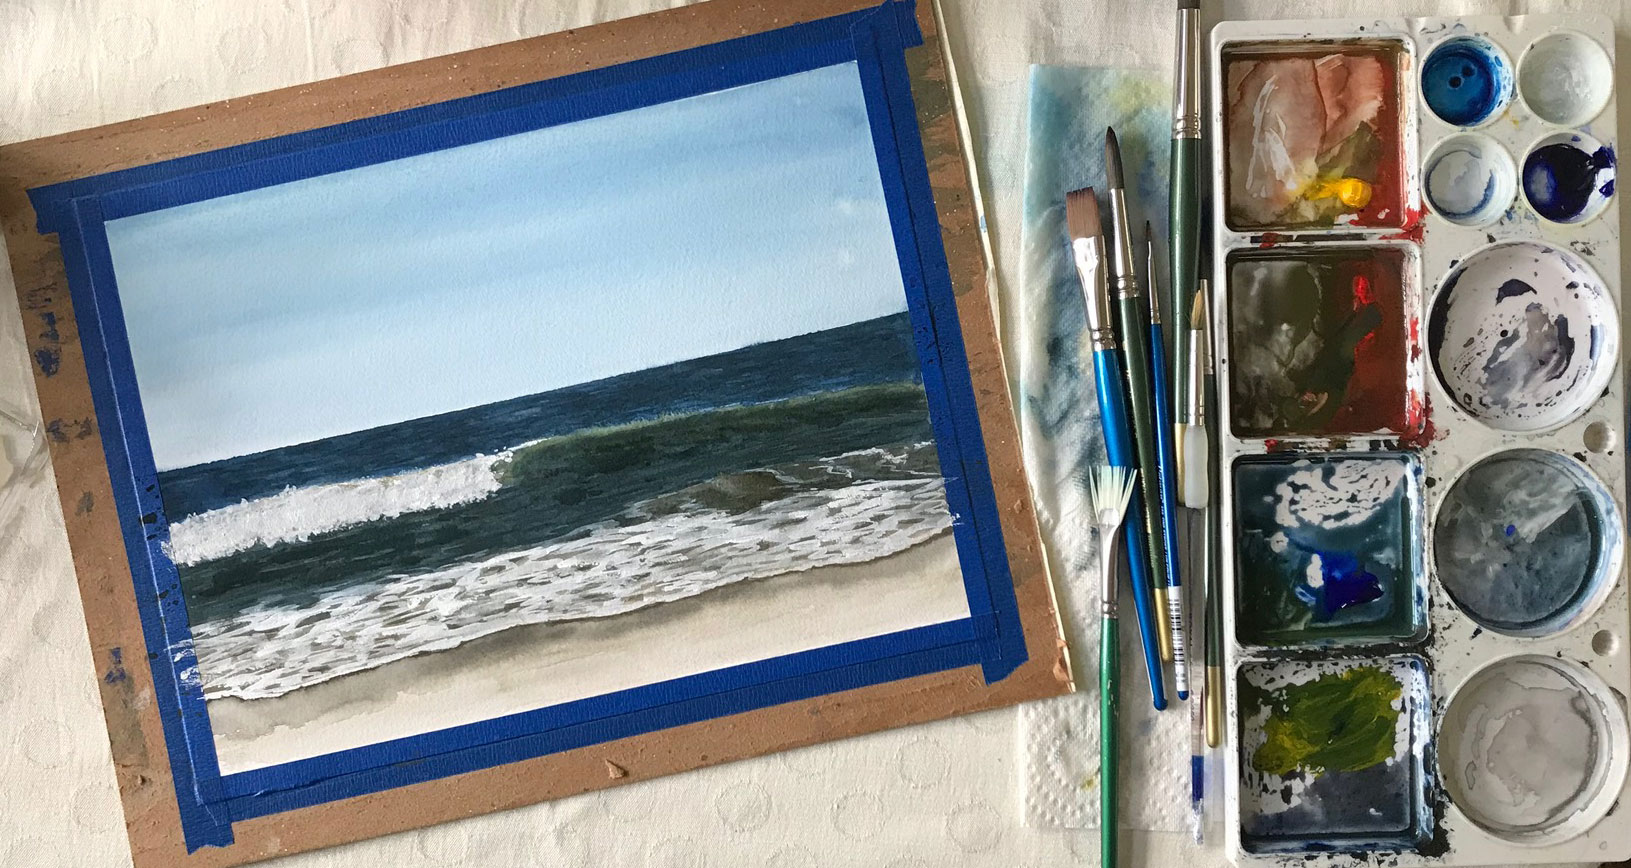
After practicing seascapes over and over, I developed a process to follow. In this lesson you’ll paint from a specific photo and learn the seascape painting process. Going forward you can use this process to paint any seascape! A basic understanding of watercolor is all that’s required. You’ll surprise yourself with the results!

The Seascape lesson is also available in video format – click here to learn more.

I’m excited to see what beginner painting lessons you try!

Tag me on Instagram @EileenMcKenna.

Watercolor Supplies

The supply list is included once you download a lesson. Besides more common watercolor supplies, I often use painter’s tape. I use it to tape down my paper – so it doesn’t buckle when it gets wet. I also use it to create straight horizon lines and in many painting lessons to mask areas. It takes the pressure off of having to draw.

How to tape down your watercolor paper

Painters tape is available on Amazon and at your local hardware store. See more of the supplies and brands I use here.

Coming up with your own painting ideas and other tips for beginners

  • Take photos when you are out and see something that inspires you.
  • Search on Google and Pinterest for photos that will make a great reference for an idea you may have. Pinterest is a great place to collect reference photos. (You can pin photos from Google to Pinterest also.)
  • Look through your photos and write an ideas list.
  • When you select a photo to use as your subject, make a note of the specifics (date and time). It’s frustrating when you come back to a project and can’t find the reference photo.
  • Use scrap paper or your sketchbook to test and plan out color mixes for your painting.
  • Consider a trial run of your painting. I sometimes do smaller thumbnail versions to try out different variations. If I have plans for a painting to be a tutorial, I often paint a smaller version to work out the exact steps of the painting before painting the final painting.
  • Consider painting two versions. This makes a painting feel less “precious.” You’ll feel freer to try out different things without worrying about ruining a painting. It also comes in handy when you have to wait for the layers to dry. Just switch paintings. Two versions can be a great learning experience.

Processing…
Success! You're on the list.

This page contains affiliate links to products/brands I use and recommend. I earn a small commission whenever you buy using these links, at no additional cost to you. Thank you for supporting my blog!

Eight Watercolor Painting Ideas for Beginners

Easy Watercolor Valentine’s Day Cards for Beginners Painting Lesson

These four Watercolor Valentine’s Day cards are easy to paint! And you’ll learn several watercolor techniques along the way!

Watercolor Techniques you’ll learn:

  1. Tape your paper
  2. Painting wet
  3. Painting dry
  4. Fading edges with a damp brush
  5. Splattering
  6. Allowing colors to bleed and blend.

Supplies you’ll need:

  • Painter’s Tape
  • Watercolor Paper
  • Cardboard larger than your paper
  • Watercolor Paint – red and pink
  • Container of water
  • Paper towel
  • Medium sized round brush (#6 or #4)
  • White crayon

Before you get started:

Fold and trim your watercolor paper to create cards. If you have envelopes on hand, trim your cards so they’ll fit in your envelopes. Now let’s paint!

Please like the video and subscribe for more painting videos!

For more watercolor tips sign up for my weekly newsletter:

Processing…
Success! You're on the list.

Ready to start in watercolor?

Try my “Beginner Watercolor Exploration Guide” where I walk you through the fundamentals of watercolor with exercises and projects. Learn by doing. Discover a love of watercolor today –> Learn more here!

Beginner Watercolor Exploration Guide
Easy Watercolor Valentine's Day Cards for Beginners Painting Lesson

St. Patrick’s Day Painting Project

This Fields of Green Watercolor Painting Project will get you in the spirit of St. Patrick’s Day and take you on a “visit” to Ireland!

Fields of Green Ireland Painting Tutorial

Beginner Watercolor Painting Idea for St. Patrick’s Day

Ireland is said to have “40 Shades of Green” and in this beginner watercolor project we’ll use as many shades as possible! Beginner friendly! Step by step tutorial with photos walks you through painting this Irish landscape.

In this tutorial you’ll learn:

  • Masking with tape
  • Painting fades
  • Painting layers
  • Painting dry on dry
  • Using gouache – more opaque than watercolor
Painting an Irish Landscape in Watercolor

In addition to learning all these techniques – you’ll have a beautiful final painting when you are done!

Supplies you’ll need:

  • Watercolor paper. I use 9” x 12” Arches 140 lb. cold pressed paper. Trim to 9” x 11” to create a painting that works well in a 8” x 10” mat.
  • Painter’s tape – 1” wide
  • Watercolor paint. Colors: shades of green and/or blue and yellow for mixing greens (a touch of red can be added too), blues for sky (turquoise or other blue) and ocean (prussian or ultramarine blue), black, and orange (can mix with yellow and red) AND… 
  • Gouache – White Gouache (Gouache can go over watercolor. It is less translucent.)
  • Paint brushes – 1 large round brush – #6, one thin round brush – #1
  • Container of water
  • Paper Towel
  • Palette for mixing paint with water and mixing colors. Use a plastic lid or the top of a plastic egg carton.
  • Pencil, eraser (kneaded is best), ruler and scissors
  • Scrap of paper. Always test color mixes before touching your painting with your brush.

For a list of brands I use visit: https://mycreativeresolution.com/supplies/

Download the Tutorial

For more Seasonal Art Project Ideas:

Processing…
Success! You're on the list.

More St. Patrick’s Day Art Projects

how to draw a leprechaun printable tutorial
Printable Ireland St. Patrick's Day Coloring Pages make a Coloring Book Kids Class Activity Digital Download is a great way to teach kids about Ireland. Color and fold to create a book! Perfect for St. Patrick's Day.

For more creative St. Patrick’s Day Ideas:

Read Teaching Children about Ireland.

St. Patrick's Day Art Project

6 Tips for Watercolor Success

Watercolor Seascape by Eileen McKenna

Watercolor is such a magical medium! I love it. As I sit and paint I often think that no matter what the subject – a landscape or illustration – the painting process is similar. There are basic concepts that apply to almost every painting.

If you are new to watercolor – welcome! Think about these concepts as you paint:

Basic Watercolor Concepts

  1. Work light to dark.
  2. Work wet to dry.
  3. Work bigger brush to thinner brush.
  4. Build up the layers of paint, remembering tips 1-3. Allow time for paint to dry between layers.
  5. Unless you want colors to bleed into one another, do not paint next to wet paint.
  6. Find opportunities in your subject for the bleeding and blending of colors – that is the magical quality of watercolor! 

Basic Watercolor Concepts explained

1-3. Work light to dark. Work wet to dry. Work bigger brush to thinner brush.

When you begin a painting your brush should be fairly wet (with paint and water). The paint should glide onto the paper. You can even wet the page or an area of the page with water before you touch the brush to the wet surface.

These beginning blobs are the first layer of your painting. Usually they are the lighter colors. After they dry you can add more paint on top of them. With each layer your brush should be less drippy, so you can paint finer and finer details. With a drier brush the paint spreads less when it touches the paper.

4. Build up the layers of paint

The stages of a watercolor painting are like a camera coming into focus. The first layer is blurry. Each layer gets more and more crisp and detailed. Let the paint dry before adding another layer, so it doesn’t bleed into the last layer. As you paint the later layers, work with a thinner brush. It makes it easier to paint fine lines.

5-6. Watercolor bleeding and blending

When you want it to happen, the bleeding and blending of colors is beautiful. It creates such interesting effects. The watercolor paint is doing the work for you! Think reds and greens bleeding into one another to create fall foliage. When you don’t want this happen, let paint dry before adding wet paint near it.

For more watercolor tips sign up for my weekly newsletter:

Processing…
Success! You're on the list.

Ready to start in watercolor?

Try my “Beginner Watercolor Exploration Guide” where I walk you through the fundamentals of watercolor with exercises and projects. Learn by doing. Discover a love of watercolor today –> Learn more here!

Beginner Watercolor Exploration Guide
Six tips for Watercolor Success

How to Motivate to Finish Creative Projects

Watercolor Sunset Painting by Eileen McKenna

For three months this sunset painting sat unfinished. I couldn’t motivate to pick it up and work on it, until now. What changed?

For one thing, with the holidays behind us and a new fresh year ahead, I recommitted to creativity. My goal is to sit and paint every morning for at least 15 minutes. So far this year, I’ve done just that plus a few days at the end of 2020.

When I sit down to paint I usually have no plan. Sometimes I start by organizing my art supplies. That’s when I uncovered this painting (but immediately set it aside). I often start by playing in my sketchbook. There is no pressure with a sketchbook. I feel free to explore. As I paint, ideas come to me.

It’s so interesting how you can go from no idea…to painting bananas…to “It’s time to finish that sunset.” It just proves how important it is to regularly sit down to paint, to show up every day.

There are days that nothing exciting happens on the page, but that’s part of the creative process too. No matter what the results, time spent being creativity clears my mind.

I encourage you to paint, draw (or whatever) for 15 minutes each day. You never know what it will lead to!

*****

Ready to get started in watercolor? The “Beginner Watercolor Exploration Guide” is for you!

  • Learn the fundamentals.
  • Practice with exercises & projects.
  • Discover a love of watercolor!

Learn more here!

Beginner Watercolor Exploration Guide pdf download | how to guide beginner watercolor

Northern Lights Homeschool Art and Science Lesson

The Northern Lights are a magical phenomenon! They make a great subject for an art and science combo lesson.

The Northern Lights also know as Aurora Borealis is the result of “charged particles from the Sun reacting with particles in the air. Although the magnetic field protects Earth from most of these particles, some slip through in the weaker areas near the North and South poles, creating amazing light shows such as the one seen in the video above.”
Source of explanation: https://www.sciencekids.co.nz/videos/earth/northernlights.html

The video below gives an easy to understand explanation of how and why these lights form.

After showing the above videos, allow kids to create their own Northern Lights. Use the step by step printable painting tutorial – available on Etsy – to guide the kids to create a beautiful painting! With this tutorial, kids will have the opportunity to play with watercolor and build their artistic confidence.

This fun painting project produces beautiful results! Practice five watercolor techniques including:

  • Masking areas with tape
  • Wet on wet painting
  • Splattering
  • Dry on dry painting
  • Painting layers

The Northern Lights Polar Bear painting tutorial is available for download on Etsy here.

Watercolor Zoom Lessons coming in 2021!

I have exciting plans for 2021 and I want you to be a part of them! Last New Year’s we had the privilege of visiting Paris. It was amazing. After the trip I revisited my photos and memories by painting them. Instead of doing it alone, I developed the “Let’s Paint Paris in Watercolor” program so participants could virtually “visit” Paris and improve upon their watercolor skills. This year – I’m so excited – I’m expanding on the “Let’s Paint Paris in Watercolor” program by also offering online zoom lessons.* We can meet and paint together! It is going to be so fun. Zoom lessons will start mid January. Please note – the zoom lessons will be an additional fee.  

You can start the “Let’s Paint Paris in Watercolor” program at any time. If you are interested in the upcoming small group zoom lessons please email me and let me know. There is no commitment at this point – I just want to make sure you receive all the details!

*The zoom lessons will be an additional cost to the current “Let’s Paint Paris in Watercolor” program. The zoom lessons are not included in the cost of the “Let’s Paint Paris in Watercolor” program.

__________________________________________________________

Ready to get started in watercolor? The “Beginner Watercolor Exploration Guide” is for you!

  • Learn the fundamentals.
  • Practice with exercises & projects.
  • Discover a love of watercolor!

Learn more here!

Beginner Watercolor Exploration Guide pdf download | how to guide beginner watercolor

__________________________________________________________

Hoping for a creative new year but don’t know where to start? Try my book Creative Exploration: A Six Week Process for Introducing Regular Creativity into your Life – Develop a regular practice of creating, explore mediums and subjects in search of your thing, and experience the joy that creativity brings. Creativity is for EVERYONE! Talent is just a starting point!

Creative Exploration book -

Woodland Creatures Birch Forest Watercolor Painting Project

This watercolor painting project is a new spin on a my original birch forest painting tutorial. The woodland creatures – an owl, a fox and a bunny – make this new beginner project fun for all ages!

It’s easier than it looks! The final painting may look complex but the instructions – with photos – walk you through the entire project step by step. It’s a great project for home schooling, for a group, or even painting on your own.

Watercolor techniques used:

  • Masking areas with tape
  • Wet on wet painting
  • Splattering
  • Dry on dry painting
  • Painting layers

Supplies you’ll need:

  • Watercolor paper. I use 9” x 12” Arches 140 lb. cold pressed paper. 
  • Painter’s tape
  • Watercolor paint. Colors: orange, yellow, cobalt blue, black
  • Paint brushes – 3 round (1 thick, 1 medium, 1 thin) and 1 flat.
  • Container of water
  • Paper Towel
  • Palette for mixing paint with water. You can use a plastic lid or the top of a plastic egg carton.

The printable pdf instructions are available in my Etsy shop here.

Let me know if you try it – I’d love to see!

*****

Ready to get started in watercolor? The “Beginner Watercolor Exploration Guide” is for you!

  • Learn the fundamentals.
  • Practice with exercises & projects.
  • Discover a love of watercolor!

Learn more here!

Beginner Watercolor Exploration Guide pdf download | how to guide beginner watercolor

Fun Beginner Winter Art Project Learn Watercolor Kid Art

Take Time to Appreciate your Work

Tar time to appreciate your work

If you’ve been creating for a while – whatever the medium – I encourage you to take time to look through your work. I guarantee you’ll be pleasantly surprised by your progress and proud of the work you’ve created.

When I first started painting I realized that while you are working on something you are hypercritical of a piece. It makes sense – you are working at it to achieve the best work you can. After some time passes, when you are “removed” from a piece, you can appreciate it with a less critical eye. 

There is so much to learn from simply reviewing our work – what subjects and themes we are interested in, new phases in our style or technique, what areas we may want to work on, pieces we’d like to finish, and ideas for new projects.

I’ve been reviewing my watercolor paintings and recent sketchbook work from the last 7 months. It’s like a time capsule. So much good stuff from such a weird time in the world! I enjoyed the Monet inspired practice work I did. So fun! It was inspired by “The Masters” week from my “Let’s Paint Paris in Watercolor” program. 

As I collected and reviewed my paintings, I decided to restock my shop with a selection of original paintings. Keep an eye out for the restock announcement because with originals – once a painting is sold it’s gone!