Most creative people have an abundance of ideas. At least that’s how it is for me. It’s the follow through that can be a challenge. Here are my tips for weeding through your list and getting stuff done:
Write it down
Keep a list of your ideas. It feels good to empty your head and write everything down. You’ll be less likely to forget an idea this way. I take it a step further and on a daily basis I write, in a notebook, the status on what ideas I’m working on.
Reflect on your list
Every so often, go back over your list or notebook pages, so you know where you stand on your ideas. You may decide an idea is no longer interesting. That is ok! You might be reminded of an idea that you forgot about. It’s important to prioritize your list because you cannot follow through on everything. Trying to follow through on every idea is like taking a step in many directions. You will never get anywhere. Need help prioritizing your list? Read this post.
Follow through and finish
With a prioritized list, you can select ideas to follow through on. Once you’ve started on an idea, don’t abandon it! Even if the project is coming out crappy, I strongly suggest you finish it. There is a sense of accomplishment from finishing. If the idea didn’t work out, you have learned something for the next time a similar idea comes along. Finishing is addicting and motivating for the next idea on your list!
Don’t fear the hard part
I was a “serial quitter” until starting my blog held me accountable. The first thing I did was finish a bunch of abandon projects – it felt so good! I also learned that the hard part is part of the creative process. Working through it is immensely satisfying.
Sign up:
Processing…
Success! You're on the list.
Whoops! There was an error and we couldn't process your subscription. Please reload the page and try again.
Last week, I participated in a virtual art workshop. A small piece of canvas was supplied to participants prior to the workshop. I taped my canvas square to a piece of paper, so I could paint to the edges without getting paint all over. After the workshop was over and I removed my canvas square, I had areas of acrylic paint on the edges of my paper. Over the next few days, I mindlessly doodled on these patches of paint. It was so fun!
In fact, it was so enjoyable, I purposely made more patches of acrylic paint to doodle on! Art shouldn’t always be about the final piece. The creative process and the fun of exploration are just as important.
SIGN UP For weekly tips on creativity:
Processing…
Success! You're on the list.
Whoops! There was an error and we couldn't process your subscription. Please reload the page and try again.
Yesterday, when I pulled out my new patches of paint to doodle on – I was so excited! The bright colors were so inspiring.
When you have a chance – Play. Try my acrylic doodling idea or doodle on a newspaper, catalog, or scrap paper. Just have fun and play.
You don’t need any specific materials to play – grab what you have on hand. But if you want to know what I used:
This post contains affiliate links to products/brands I use and recommend. I earn a small commission whenever you buy using these links, at no additional cost to you. Thank you for supporting my blog!
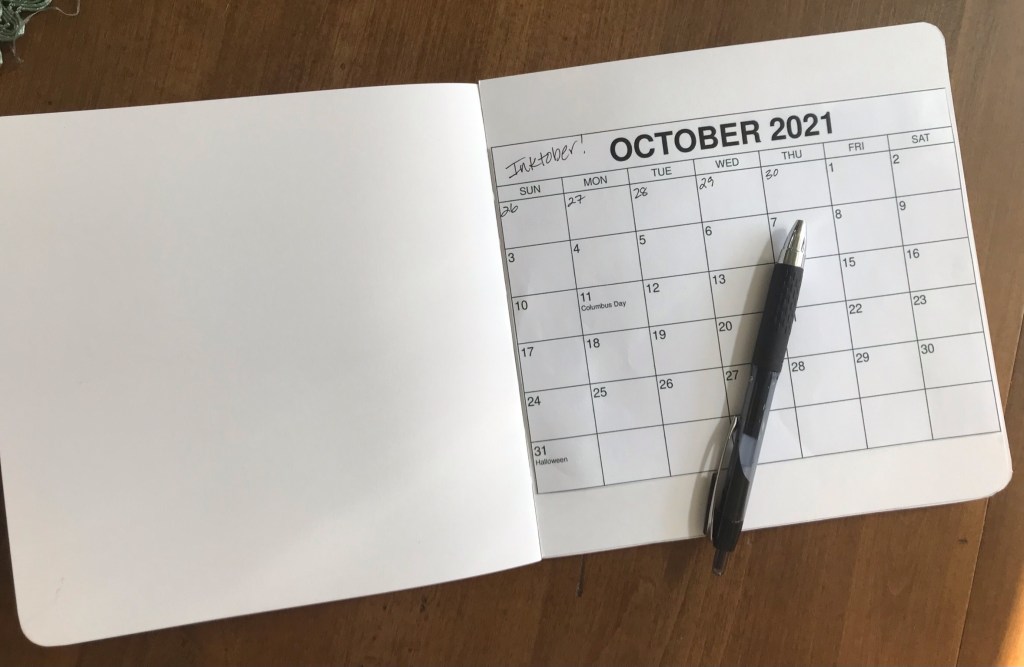
I’m excited for Inktober, excited to get back to daily creativity. I’ve adjusted to my new work schedule and am ready to fit drawing and painting in. This is how I’m setting myself up for a successful October and how you can too!
Inktober check off calendar – Eileen McKenna
Organize your supplies. I’ve selected the tools I’ll be using for daily ink drawings – a sketchbook that isn’t great with watercolor but the smooth white pages are perfect for ink. I have enough pages left for all of October plus a few warmup pages. I even dated all the pages to make sure. And I have my favorite ink pen ready – a Uniball signo.
Find something or someone to hold you accountable. I printed a small calendar for daily checking off. I plan on posting my daily work on Instagram. When we feel we have to check in with someone or something (like social media) it helps keep us on track.
Schedule creative time. Pick the time of day you plan on creating. For me it’s early morning before work. It’s a nice relaxing way to start the day. If something gets in the way, I can always catchup later in the day.
Creative Exploration: A Six Week Process for Introducing Regular Creativity into your Life”
Make a plan. The more detailed your plan the better. I recommend in my book Creative Exploration that you start simple – pencil and paper. Each week after that you can try out different mediums. I’m participating in Inktober so I’ll be using an ink pen. When the mood strikes I’ll add watercolor. The benefit of some kind of plan is to prevent you from either not sitting down to create because you don’t know what to do or from sitting down and not having any direction. In Creative Exploration I recommend keeping a running list of subject ideas to refer to when you need it.
Find a creative space. Having a designated creative space makes a big difference. Years ago I took over our dining table and leave my supplies out. It makes sitting down to create so easy. No setup needed. Sometimes when I want to get back in the zone, I spend time organizing my supplies and space. By the time I’m done, I’m so ready to get to work!
Be kind to yourself. No one is perfect. Missing a day here or there isn’t the end of the world. Forgive yourself and pick up your pen or paints the next day. Don’t let one day turn into a week.
weekly creativity:
Processing…
Success! You're on the list.
Whoops! There was an error and we couldn't process your subscription. Please reload the page and try again.
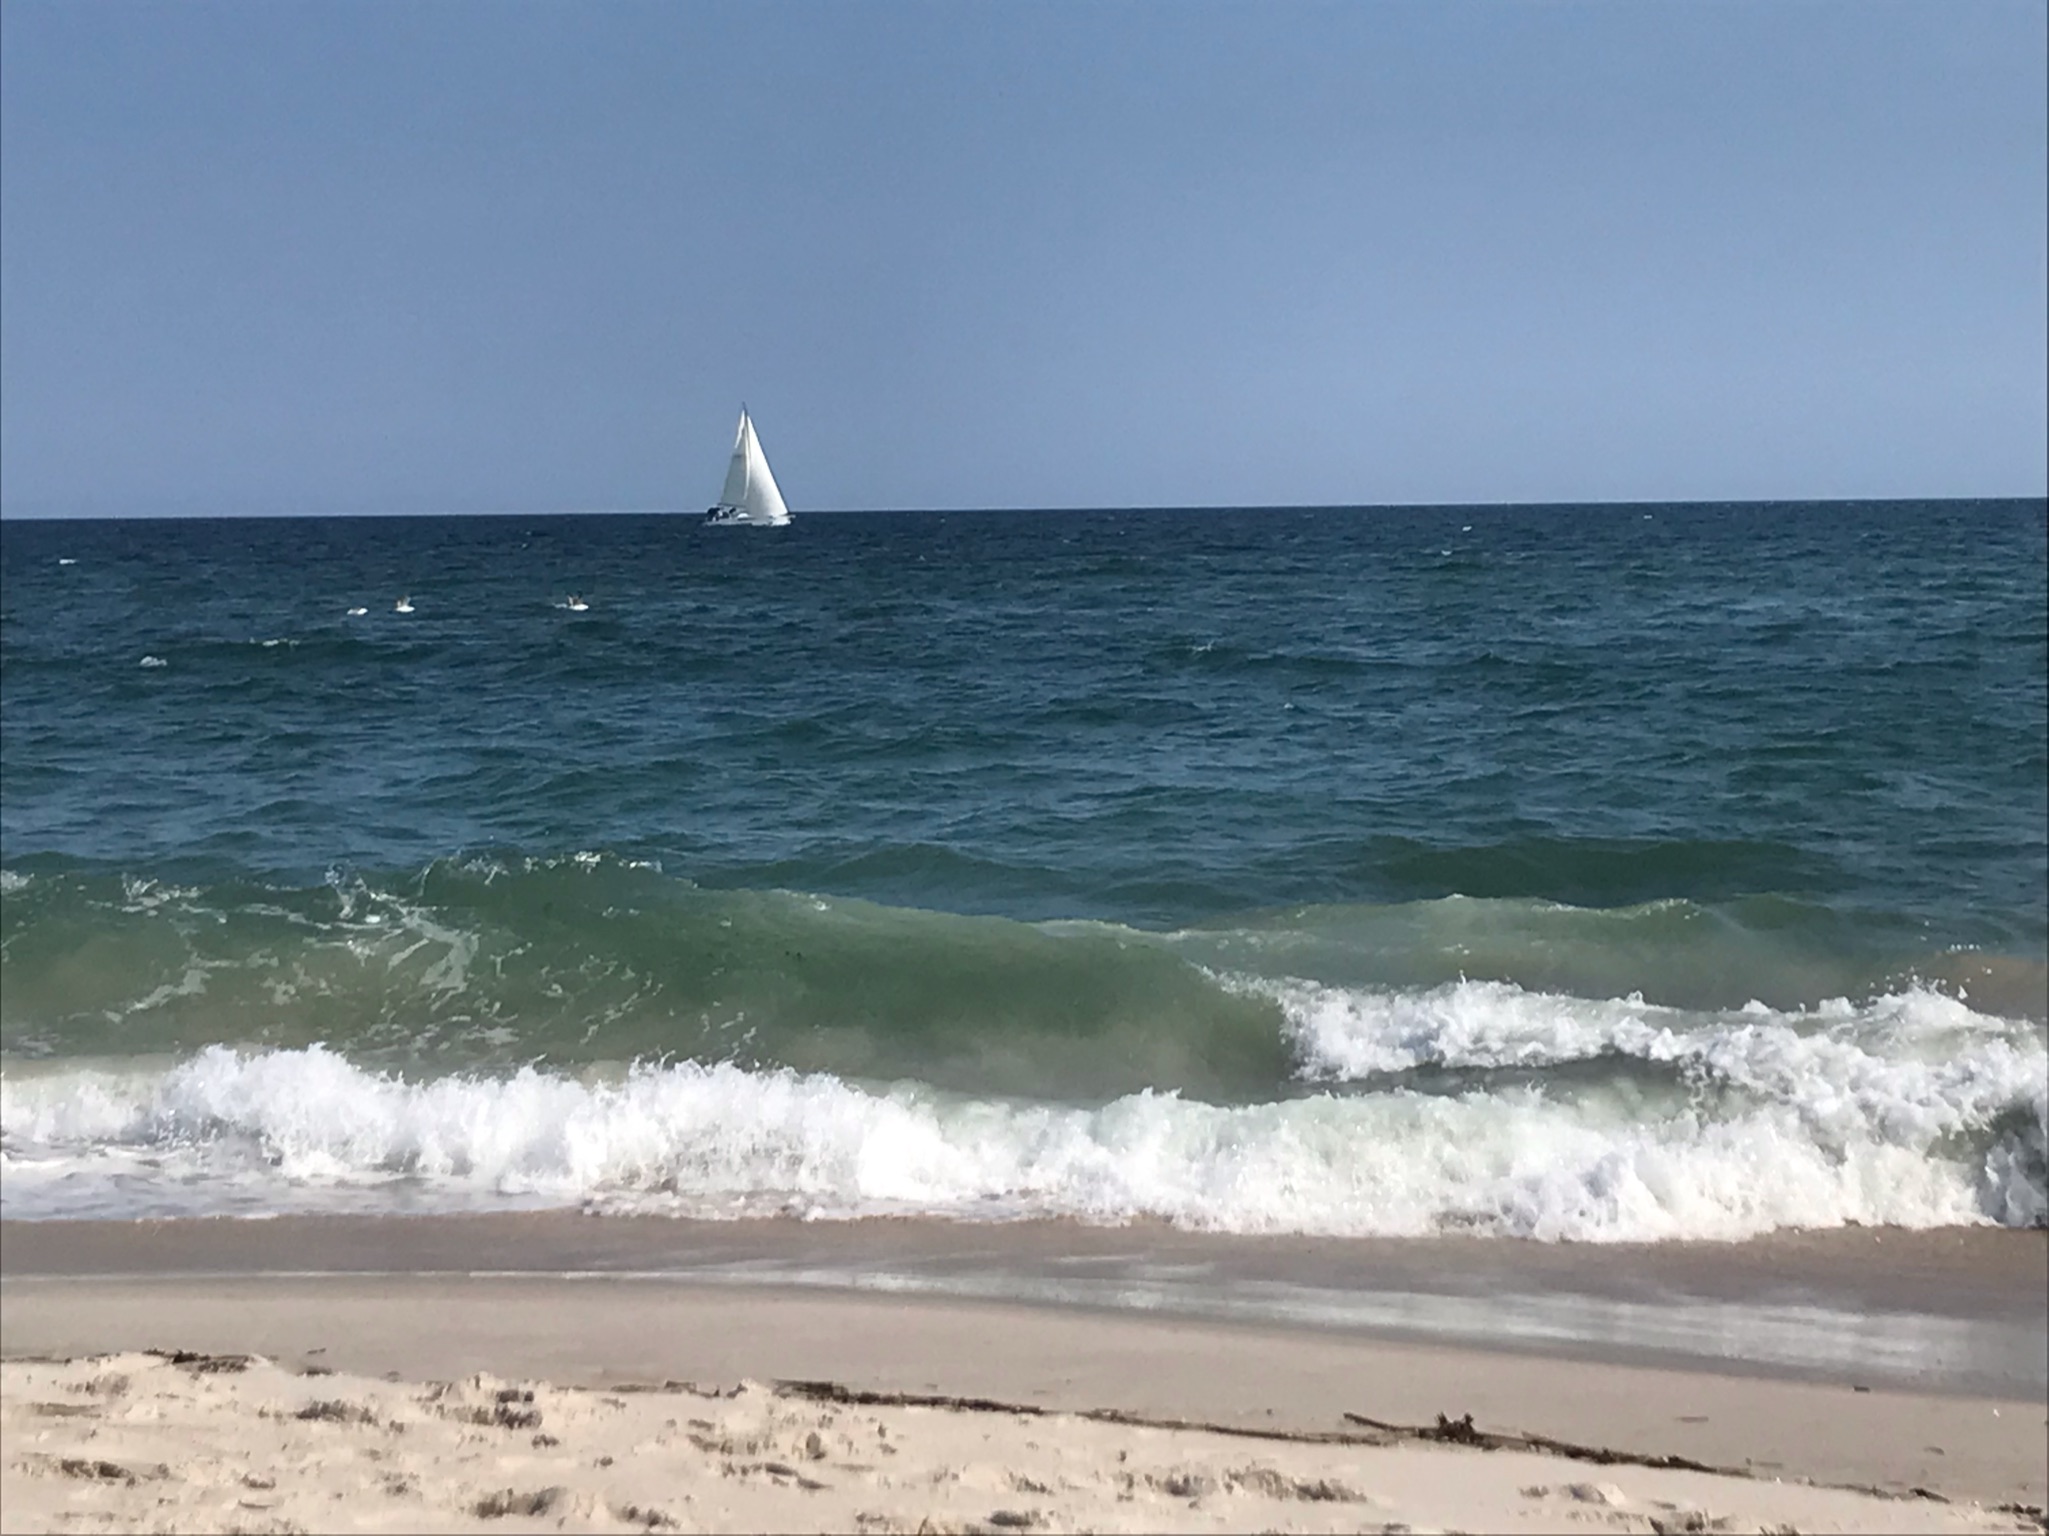
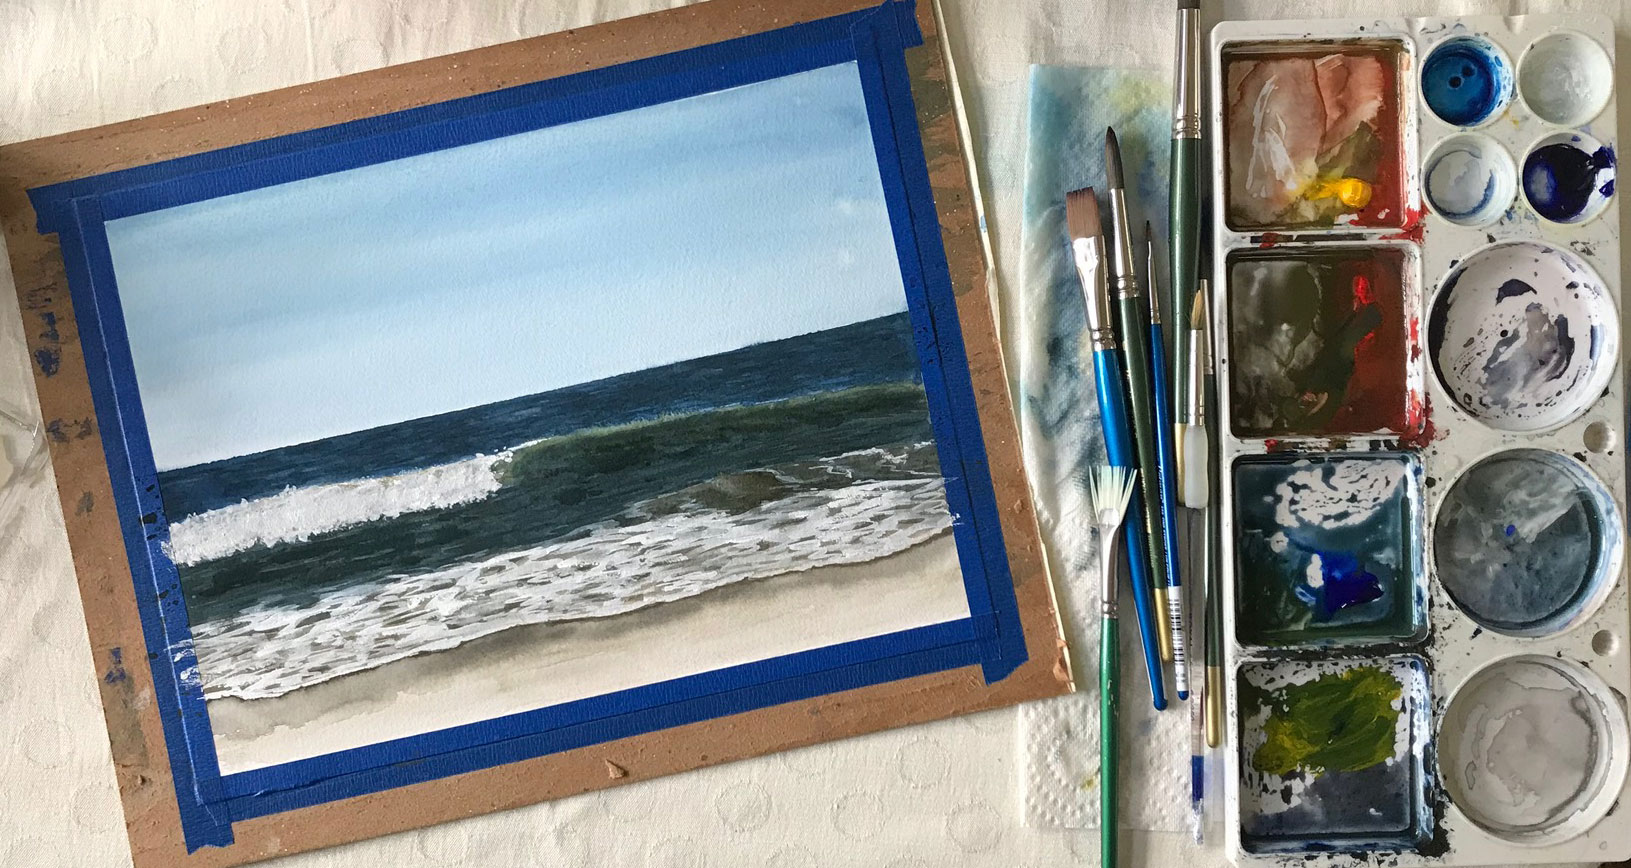
I originally planned to write about looking towards fall, but after scrolling through my photos I was inspired to paint a seascape and sunset. Thankfully, even though we are away, I had my supplies with me and some time to sit and paint. I haven’t painted enough lately and it felt SO GOOD.
In NY the weather has been spectacular. Without the oppressive heat and humidity we’ve had some beautiful “top notch” beach days. And what’s more inspiring than standing in the surf watching the waves roll in?
Soon enough the blue, green and brown color palette will be replaced with red, orange and yellow. For now I’m holding on to summer a bit longer.
Summer inspiration – standing in the ocean watching the waves roll in.
Summer started early for us. Without sporting events to attend, we were on the beach in June as soon as the weather allowed.
In July, I was busy teaching – acrylic painting classes, watercolor workshops and mixed media camp weeks. I love teaching the kids at the art studio, helping build their creative confidence. I also taught an adult watercolor workshop at my local library. It is so satisfying teaching adult beginners, many who think they aren’t creative. It’s my goal to convince them otherwise. I was so happy to hear the women say how relaxing painting was.
During most of August I was traveling – helping two of my kids move into new housing (in two different states). Just like college visits, this one on one time is priceless!
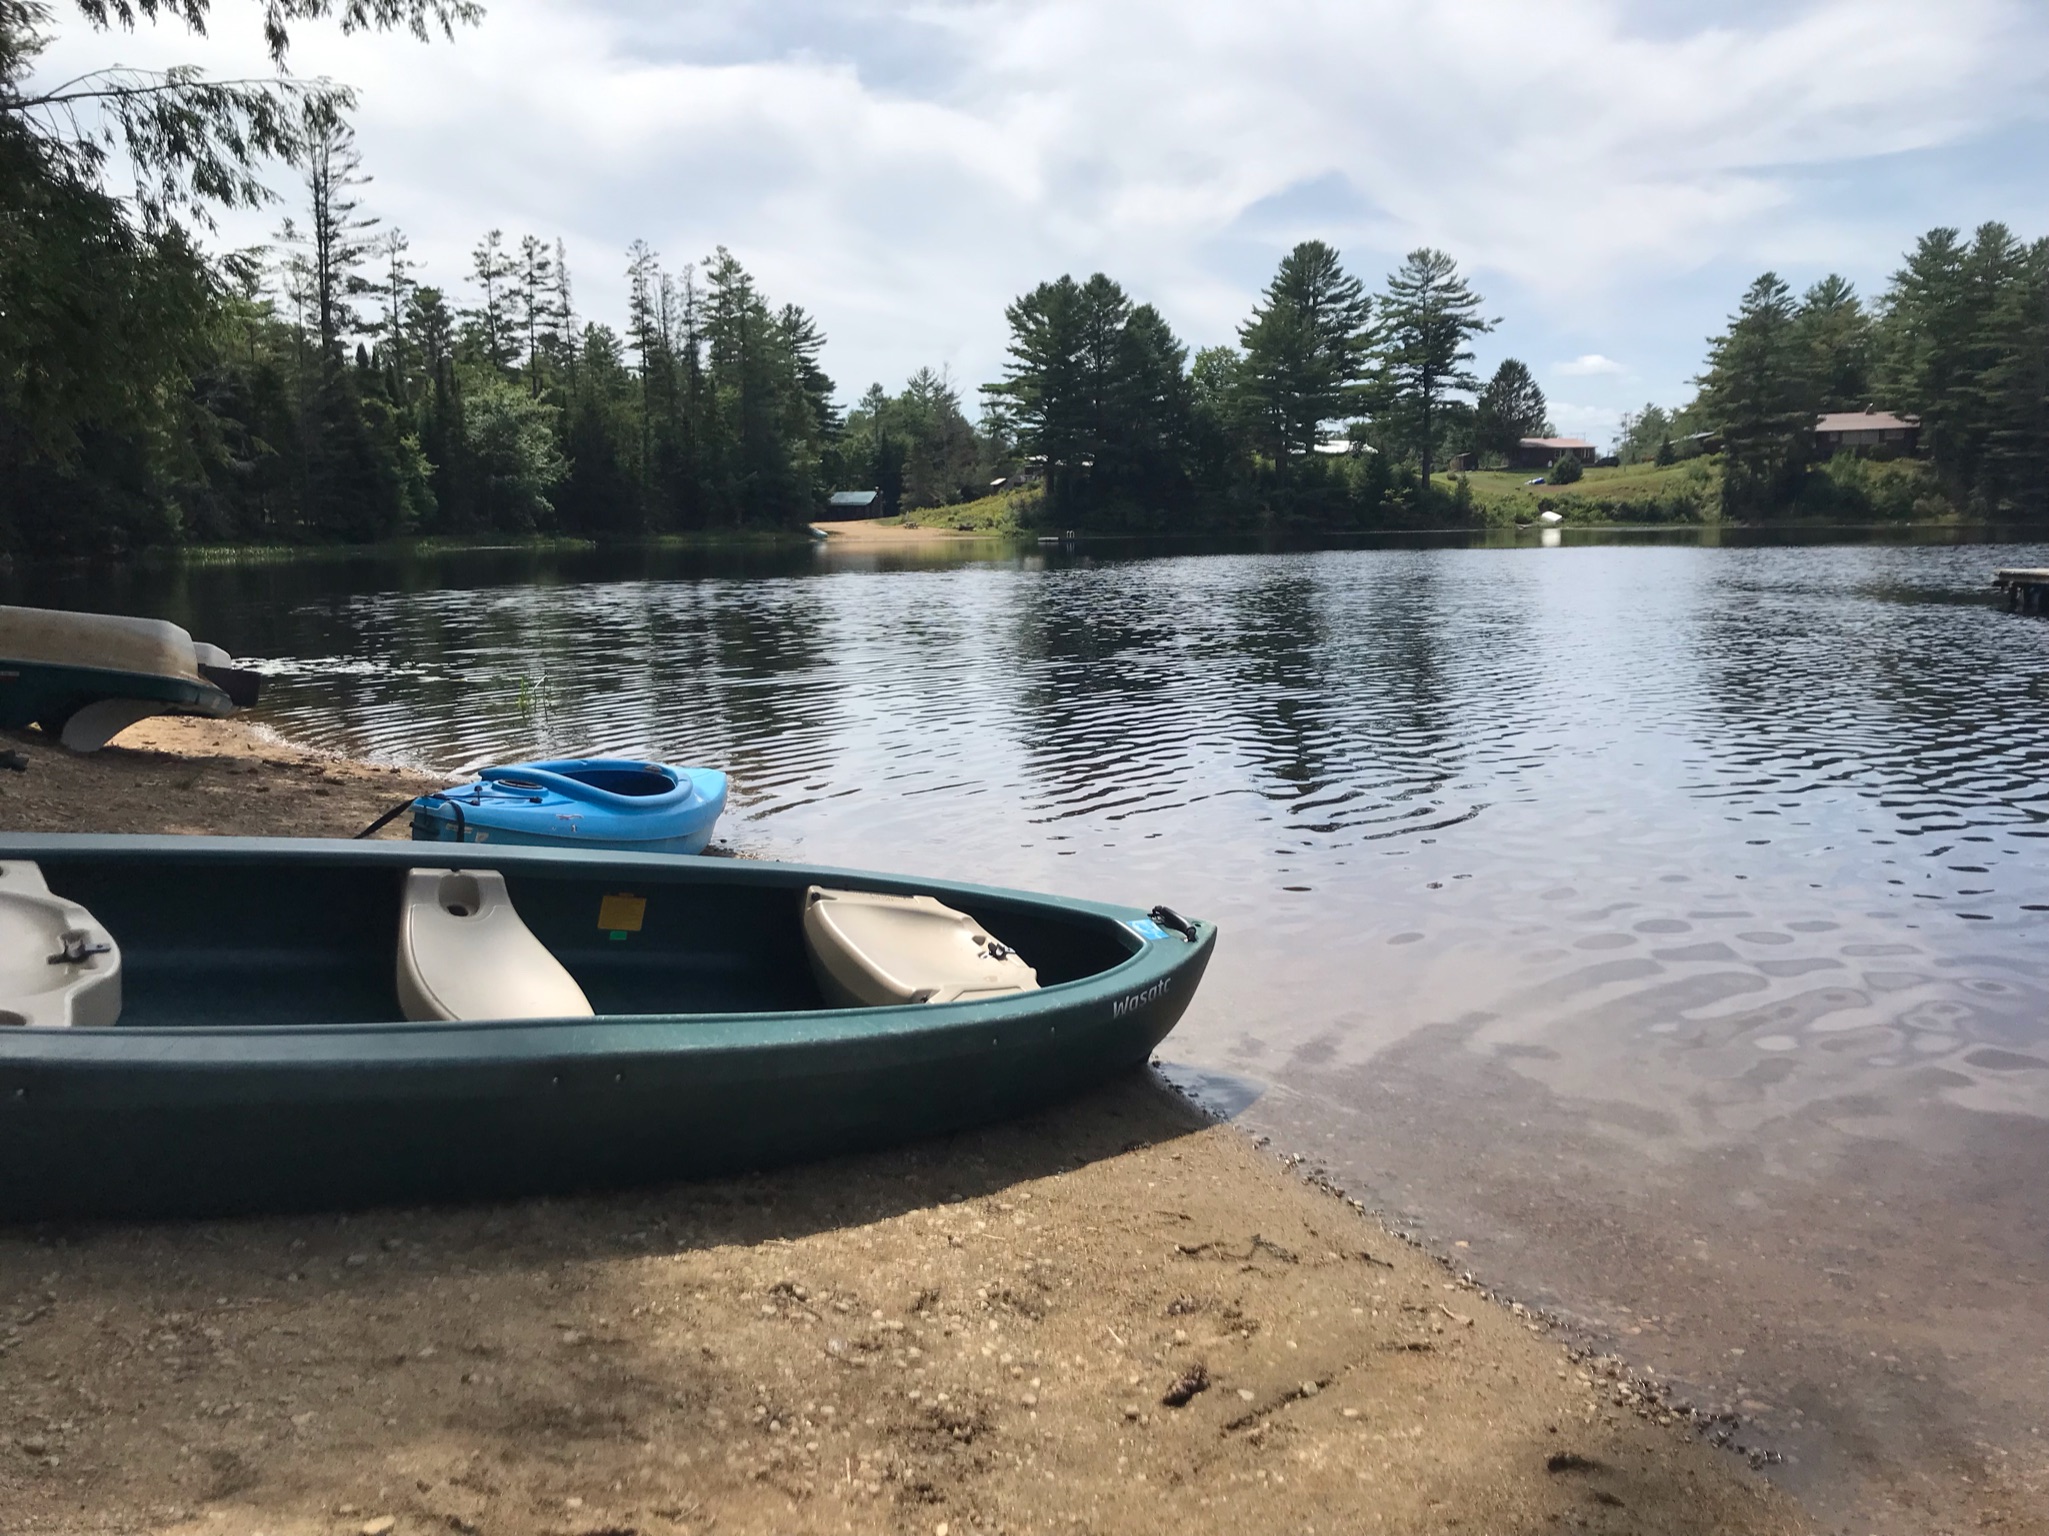
Last week we went to a family reunion on Harrisburg Lake in upstate NY. As a born and bred beach girl, spending time on a lake is such a novelty! I loved this peaceful lake – no motor boats, just canoes, kayaks, and paddle boards. Harrisburg Lake is such a beautiful spot. Lots of inspiration for painting!
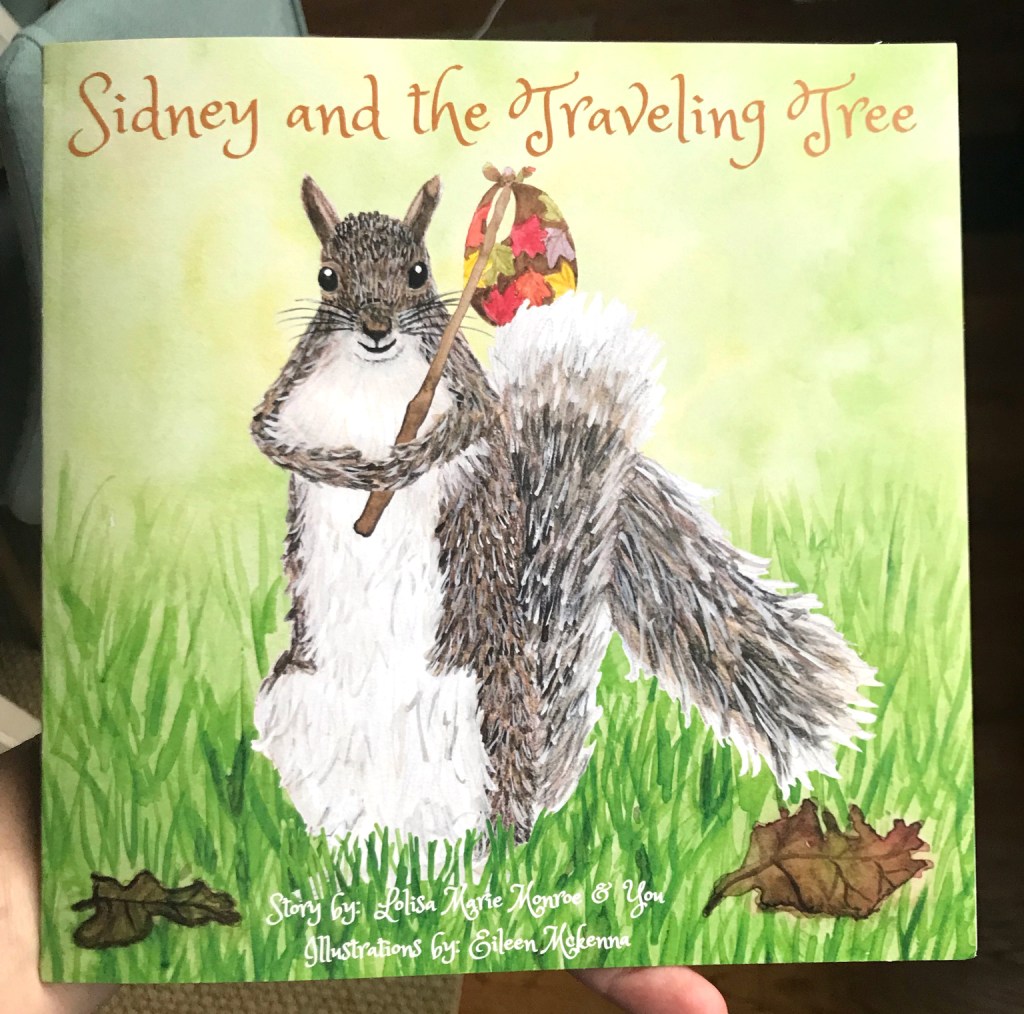
Like a squirrel storing nuts for winter, I take tons of photos over the summer to paint from. Speaking of squirrels – have you met Sidney? Sidney is the squirrel I’ve been painting recently for author Lolisa Monroe – learn more here.
I love the beach and am usually a little sad for the sun to set on summer…
but Fall is a great season too! The crisp weather, Fall holidays and activities, new routines…
Watercolor is a fun, convenient medium. It’s easy to set up and clean up. If you are just getting started with watercolor you may be wondering…
What supplies do i need to paint in watercolor?
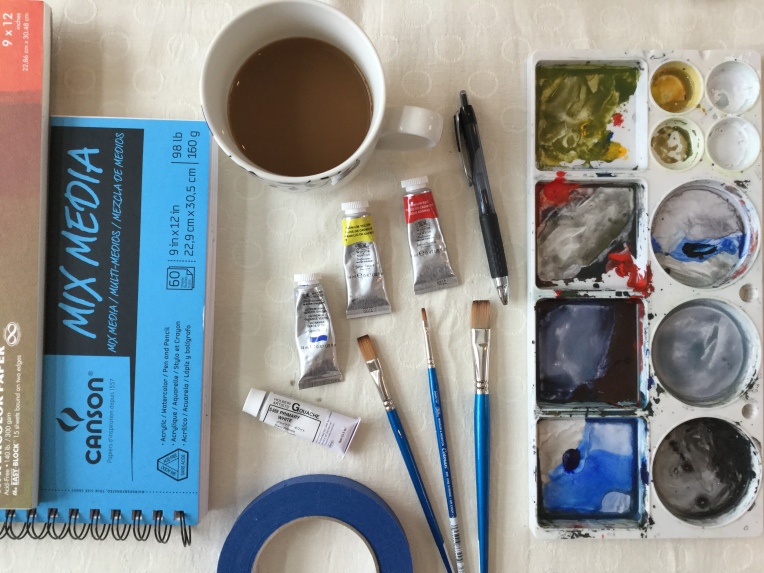
There are several things you need to paint in watercolor – some of which you have around your home! Here is what you’ll need:
Watercolor paint (see below for specifics)
Watercolor brushes (see below for specifics)
Watercolor paper (see below for specifics)
Cardboard larger than your paper
Painter’s tape to tape down your paper to the cardboard
Container of water
Paper towel
Scrap paper
Palette to mix paint with water or mix colors – try the top of a plastic egg carton
You are probably wonder – Ok, but what kind of paint, brushes and paper? I’ve created a FREE downloadable pdf – “Watercolor Basics” – that covers what kind of paint, brushes, and paper you should use.
sign up here to receive the “Watercolor Basics” free pdf:
Processing…
Success! You're on the list.
Whoops! There was an error and we couldn't process your subscription. Please reload the page and try again.
How should I set up my supplies?
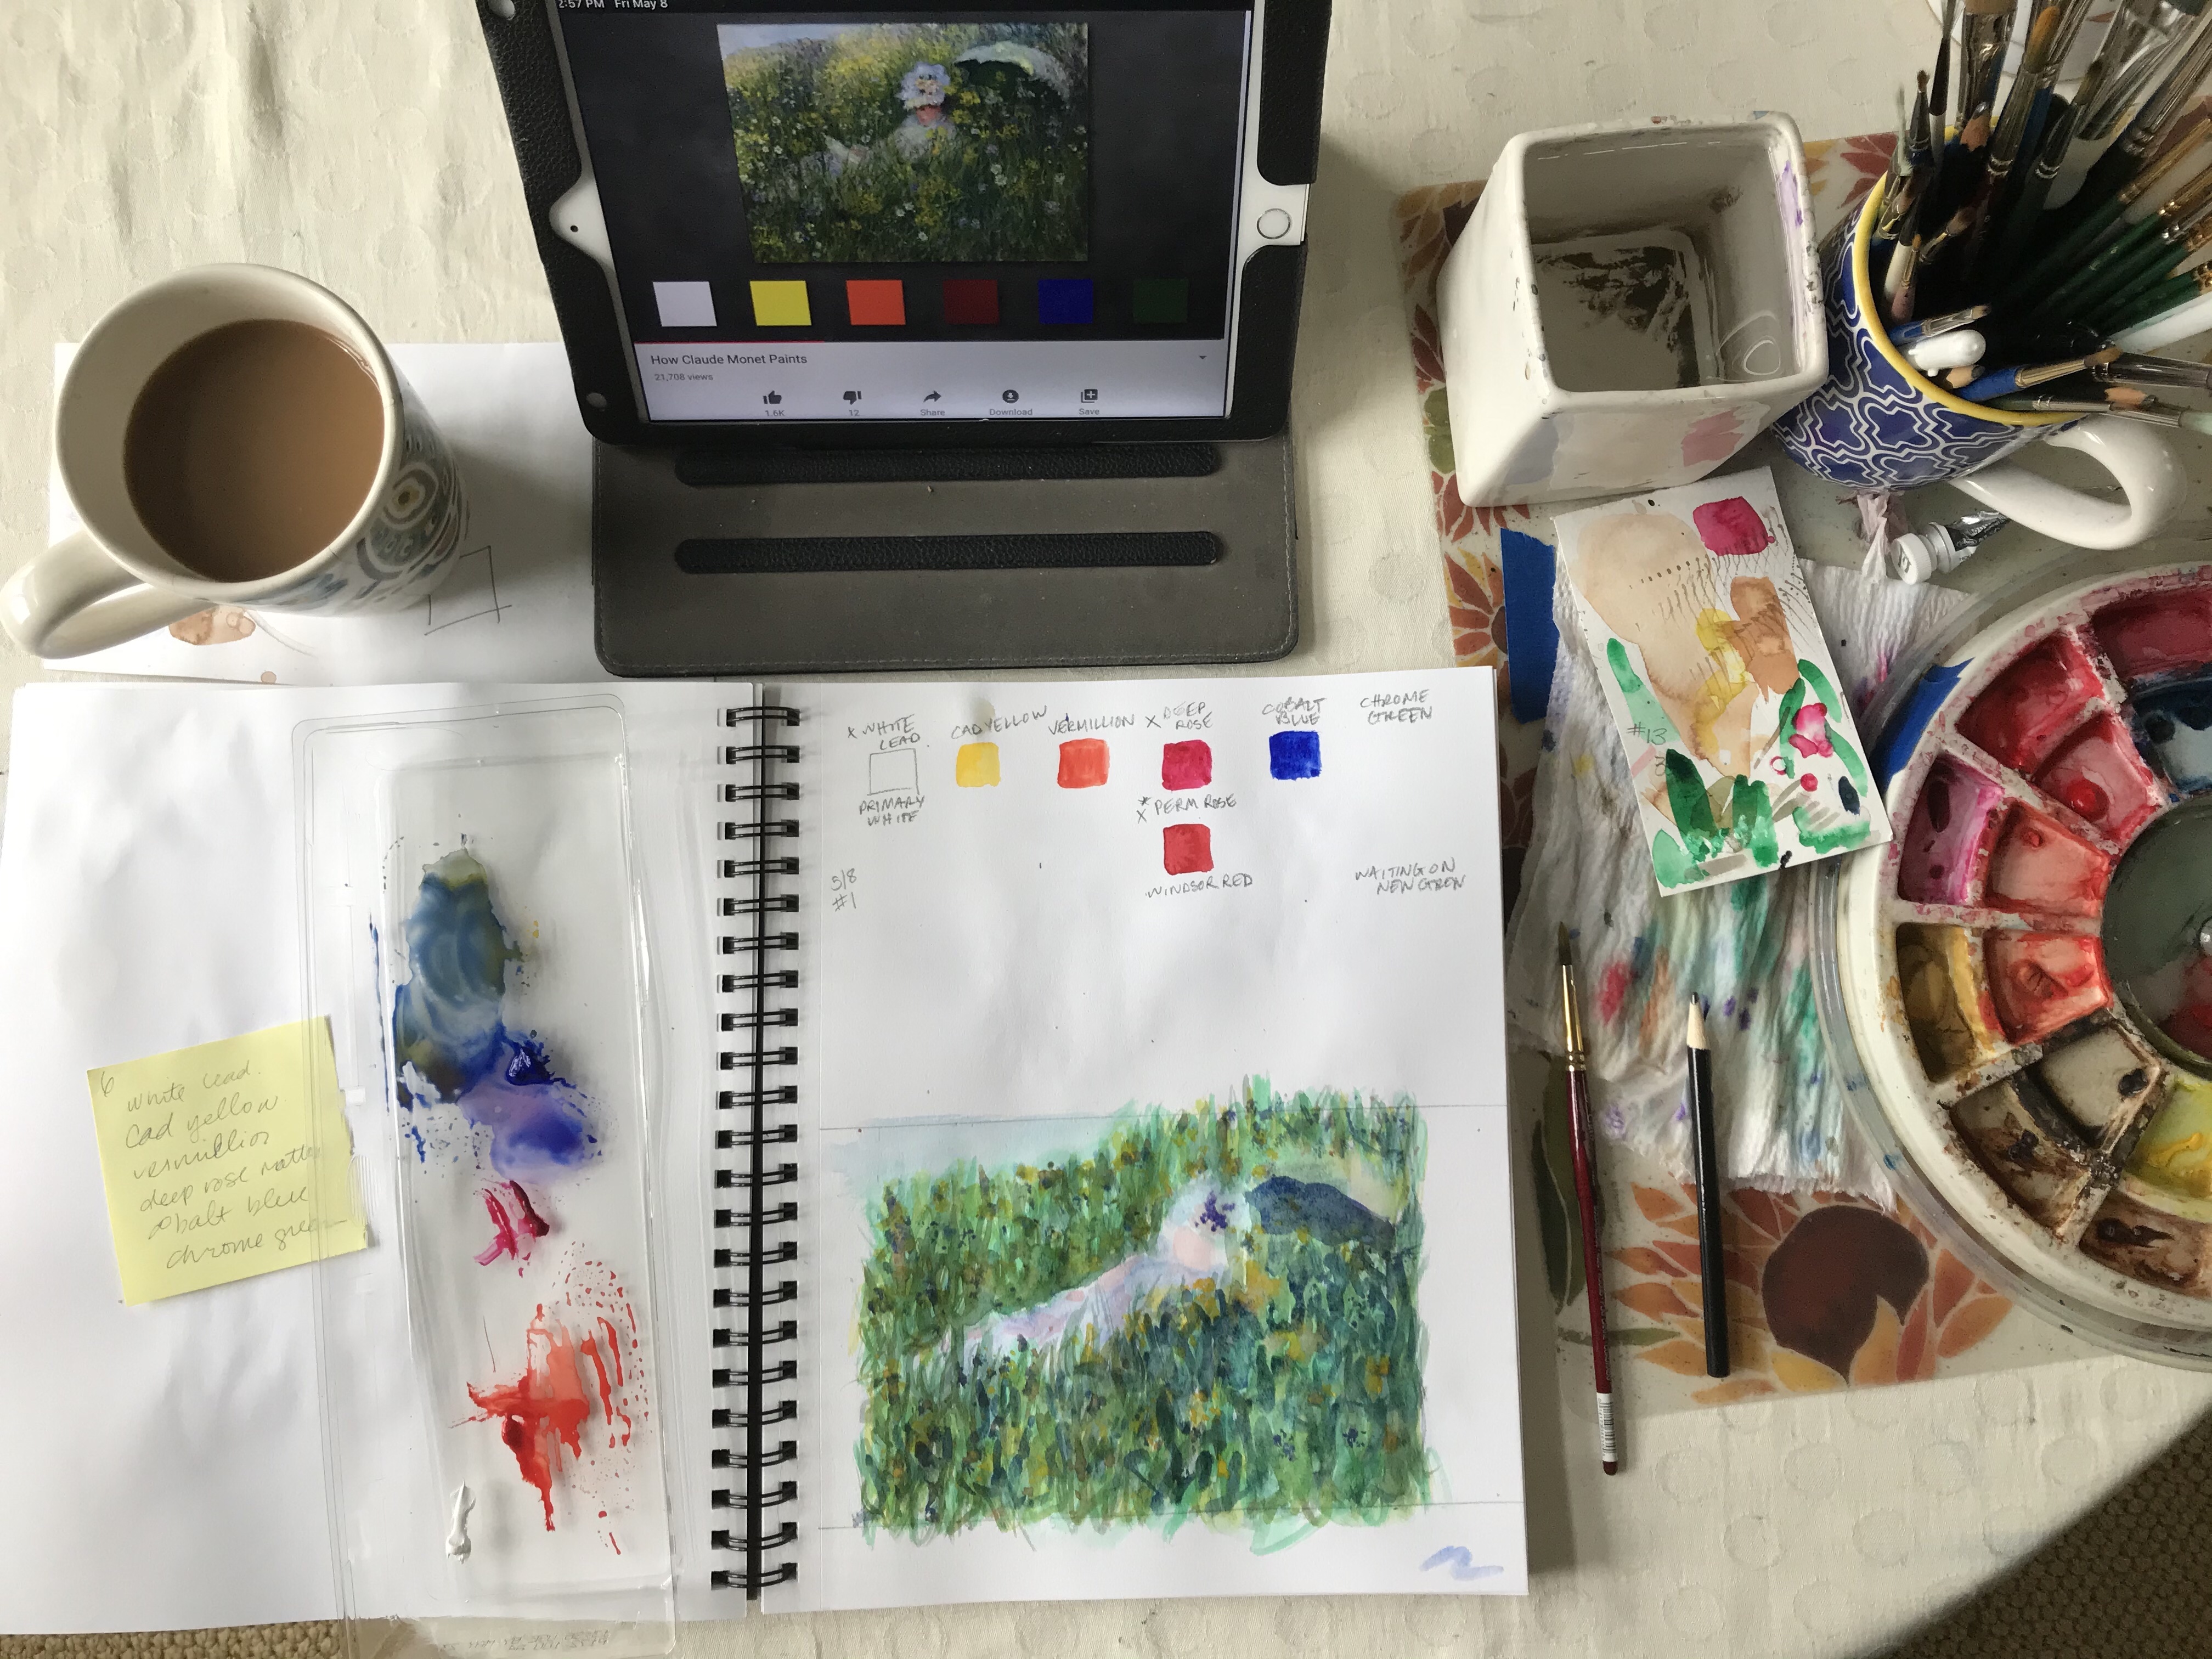
Now that you’ve collected all of your watercolor supplies, you may be wondering how to setup your workspace.
As a right handed person, I set up most of my supplies to the right of my paper or sketchbook. This is so I’m not reaching across my paper to get water or paint – I don’t want to accidentally drip on my paper! I usually place a reference photo (on my ipad) directly in front of my workspace. My mixing palette (top of an egg carton) can be moved around as needed. It’s always best if my coffee isn’t near my water. I’ve dipped my paintbrush in my coffee too many times!
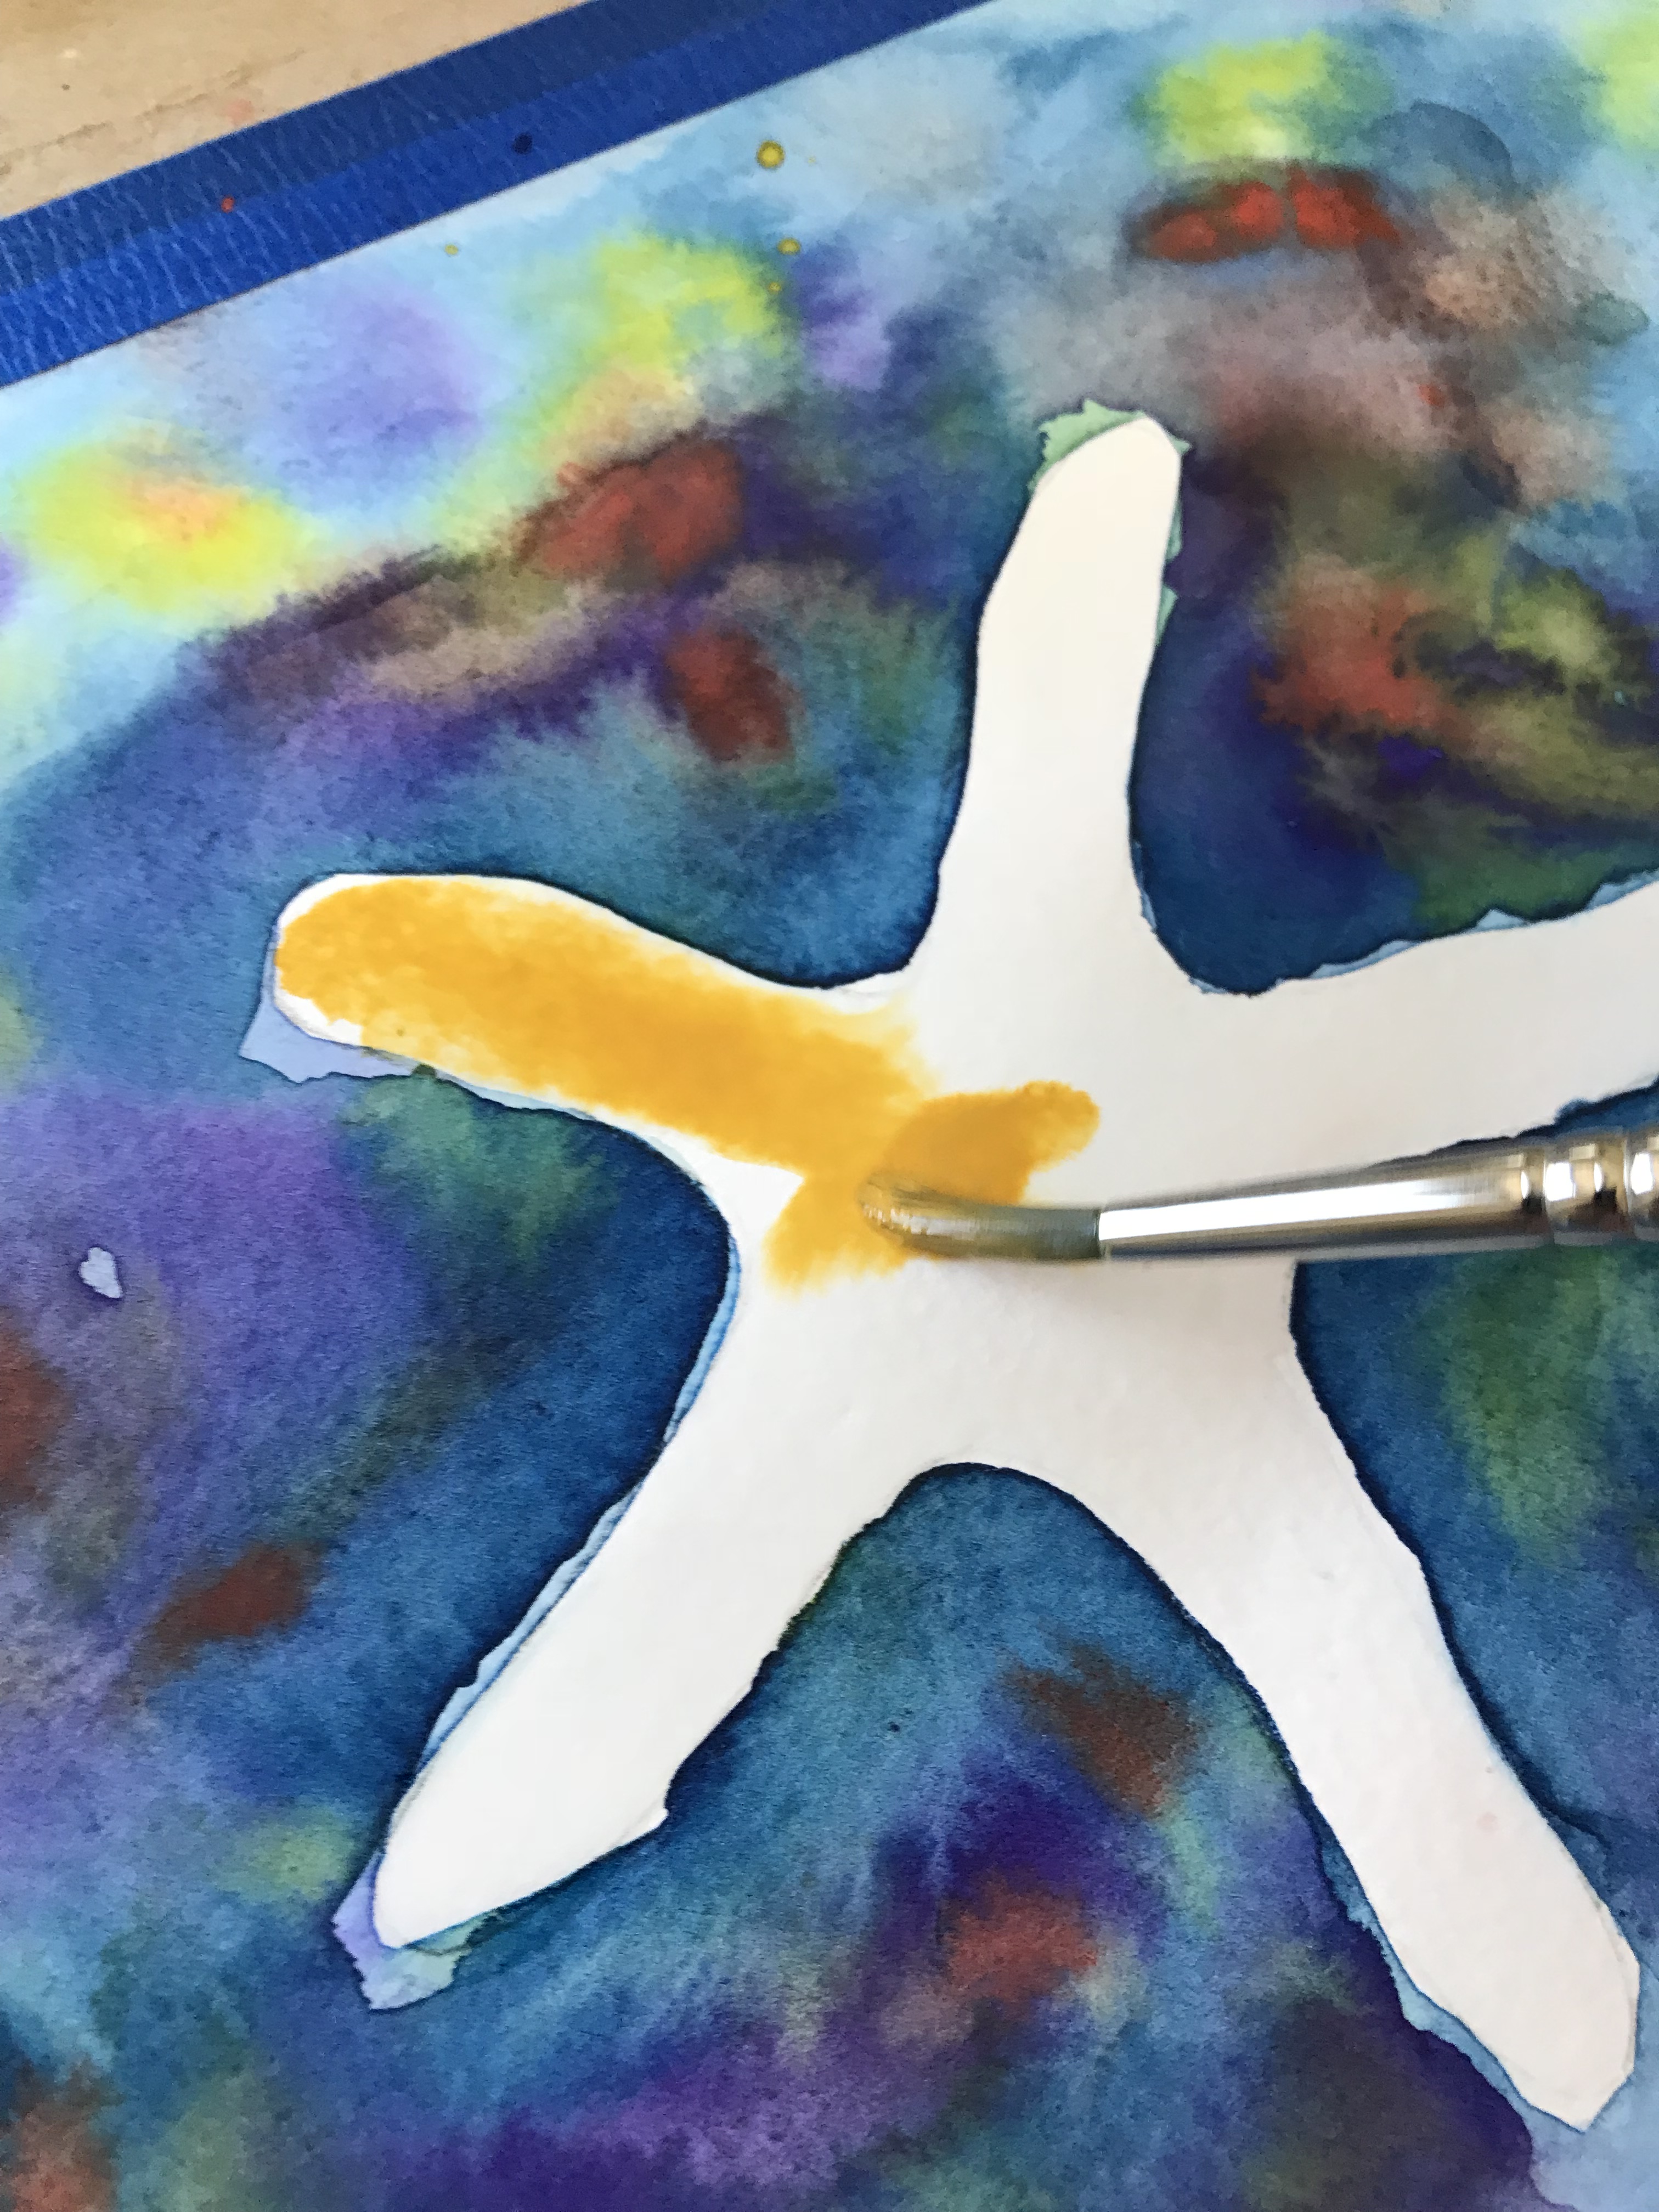
how do you paint with watercolor?
A key element to painting in watercolor is water.
If you use a dry brush, the paint will go on rough and paper will show through in spots.
If your brush is wet the paint will glide onto the page.
If the paper is wet the paint will bleed into the water on the page when you touch it with your brush.
To lighten watercolor add water, NOT white.
These different ways of painting work in different circumstances. To paint one subject you will likely use all of the above ways of painting in different areas.
what should i paint?
When you are starting out it’s sometimes hard to come up with ideas. You’d like to practice but don’t know what to paint. Choosing a challenging subject can be discouraging.
printable painting tutorials
To help with this and to introduce you to the fundamentals of watercolor, I’ve created printable painting tutorials. Each tutorial walks you through fundamentals as you paint the steps for a specific final painting, like the “WATERCOLOR CONEFLOWER PAINTING LESSON” below.
When paper gets wet it wrinkles and buckles. To avoid this tape your paper to a piece of cardboard using painter’s tape. The tape also creates a nice border to your painting.
For weekly tips, sign up for my newsetter:
Processing…
Success! You're on the list.
Whoops! There was an error and we couldn't process your subscription. Please reload the page and try again.
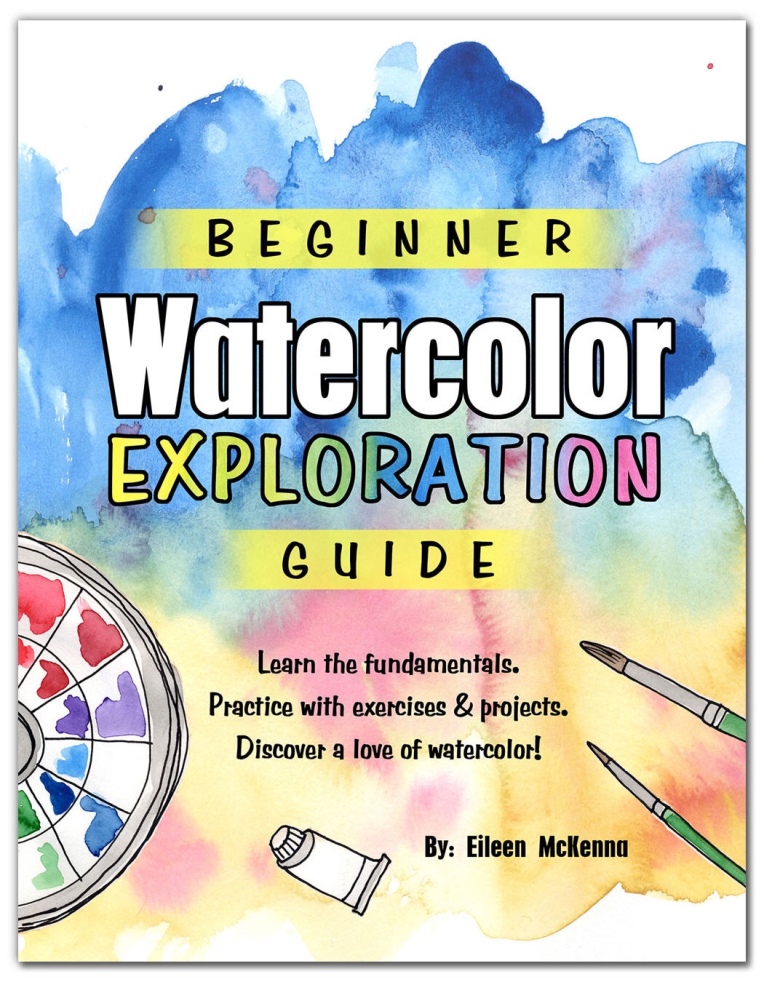
looking for a comprehensive introduction to watercolor? This guide is for you!
This Beginner Watercolor Exploration Guide is the perfect introduction to watercolor. Each fundamental is explained and then you practice it with exercises and painting projects.
The 5 tutorials build upon one another as you progress through the guide. You go from beginner brushstrokes to a watercolor seascape!
This posts contains affiliate links to products/brands I use and recommend. I earn a small commission whenever you buy using these links, at no additional cost to you. Thank you for supporting my blog!
I don’t know about you but this Covid winter has been long! Creativity keeps me positive but it doesn’t help with the isolation. I was exploring new creative ideas and I remembered reading about two people sending a sketchbook back and forth to one another. I decided, I want to do that!
Originally my sketchbook share idea involved reconnecting with a friend, but I started reminiscing about pen pals. That got me thinking. It is also nice to get to know someone new!
My idea has grown to include YOU! But I need your help!
Please do me the favor of answering a few short questions to help me create a “Spring Sketchbook Share” that you would want to participate in. I would appreciate it so much!
“Spring Sketchbook Share” program
Connects you with a creativity partner
Option to invite a friend to be your partner
All skill levels welcome
Each time you receive the sketchbook you ~ * Start a page and * Finish a page This ensures that each page is a collaboration between the creative partners.
Partners mail the sketchbook back and forth to one another. (U.S. residents only for right now.)
Participation in Spring Sketchbook Share entitles you to three months in the “Spring Sketchbook Share” Facebook group.
Get the latest “spring Sketchbook Share” announcements ~ join my email list!
Processing…
Success! You're on the list.
Whoops! There was an error and we couldn't process your subscription. Please reload the page and try again.
Each creativity pair receives:
One sketchbook
Two sets of my favorite pens. (One for each partner.)
Ideas List to help inspire you in the creation of your sketchbook pages: * Theme ideas * Suggested mediums to use
Two envelopes of extra “bits and bobs” for some added flair! (One for each partner.) I can’t wait to put together these packets!
The “SPRING SKETCHBOOK SHARE” Facebook group
Weekly Facebook videos
Instruction in different mediums
Demonstrations on creating pages within themes.
All participants will have the ability (and will be encouraged) to share their sketchbook pages with photos and video.
Four month membership in the Facebook Group
Milestones will be awarded with entry into giveaways! Milestones will include partners completing 6 pages, etc.
The “Spring Sketchbook Share” is all about: * creativity, * connection + * community!
I need your help!
Please click here TO answer the following questions about the “Spring Sketchbook Share.”
What do you like about the idea?
What do you dislike about the idea?
How could we improve upon it?
Would you like to be assigned a random partner or would you like to invite your own partner?
Are you interested? There is no commitment at this time.
When I first started painting in watercolor I was gifted a set of watercolor tubes by Van Gogh. It was a great set with a variety of vibrant colors. Painting with that set and those colors helped solidify my love of watercolor!
Sign up to receive the “Watercolor Basics” free pdf
The “Watercolor Basics” pdf covers paper, brushes, paints and other tools necessary for successful painting!
Processing…
Success! You're on the list.
Whoops! There was an error and we couldn't process your subscription. Please reload the page and try again.
Paint palette
The first thing I did with my new paints was squeeze them into my new palette. When the paint in the palette ran out I added more until the tubes were empty. Then I threw the tubes away.
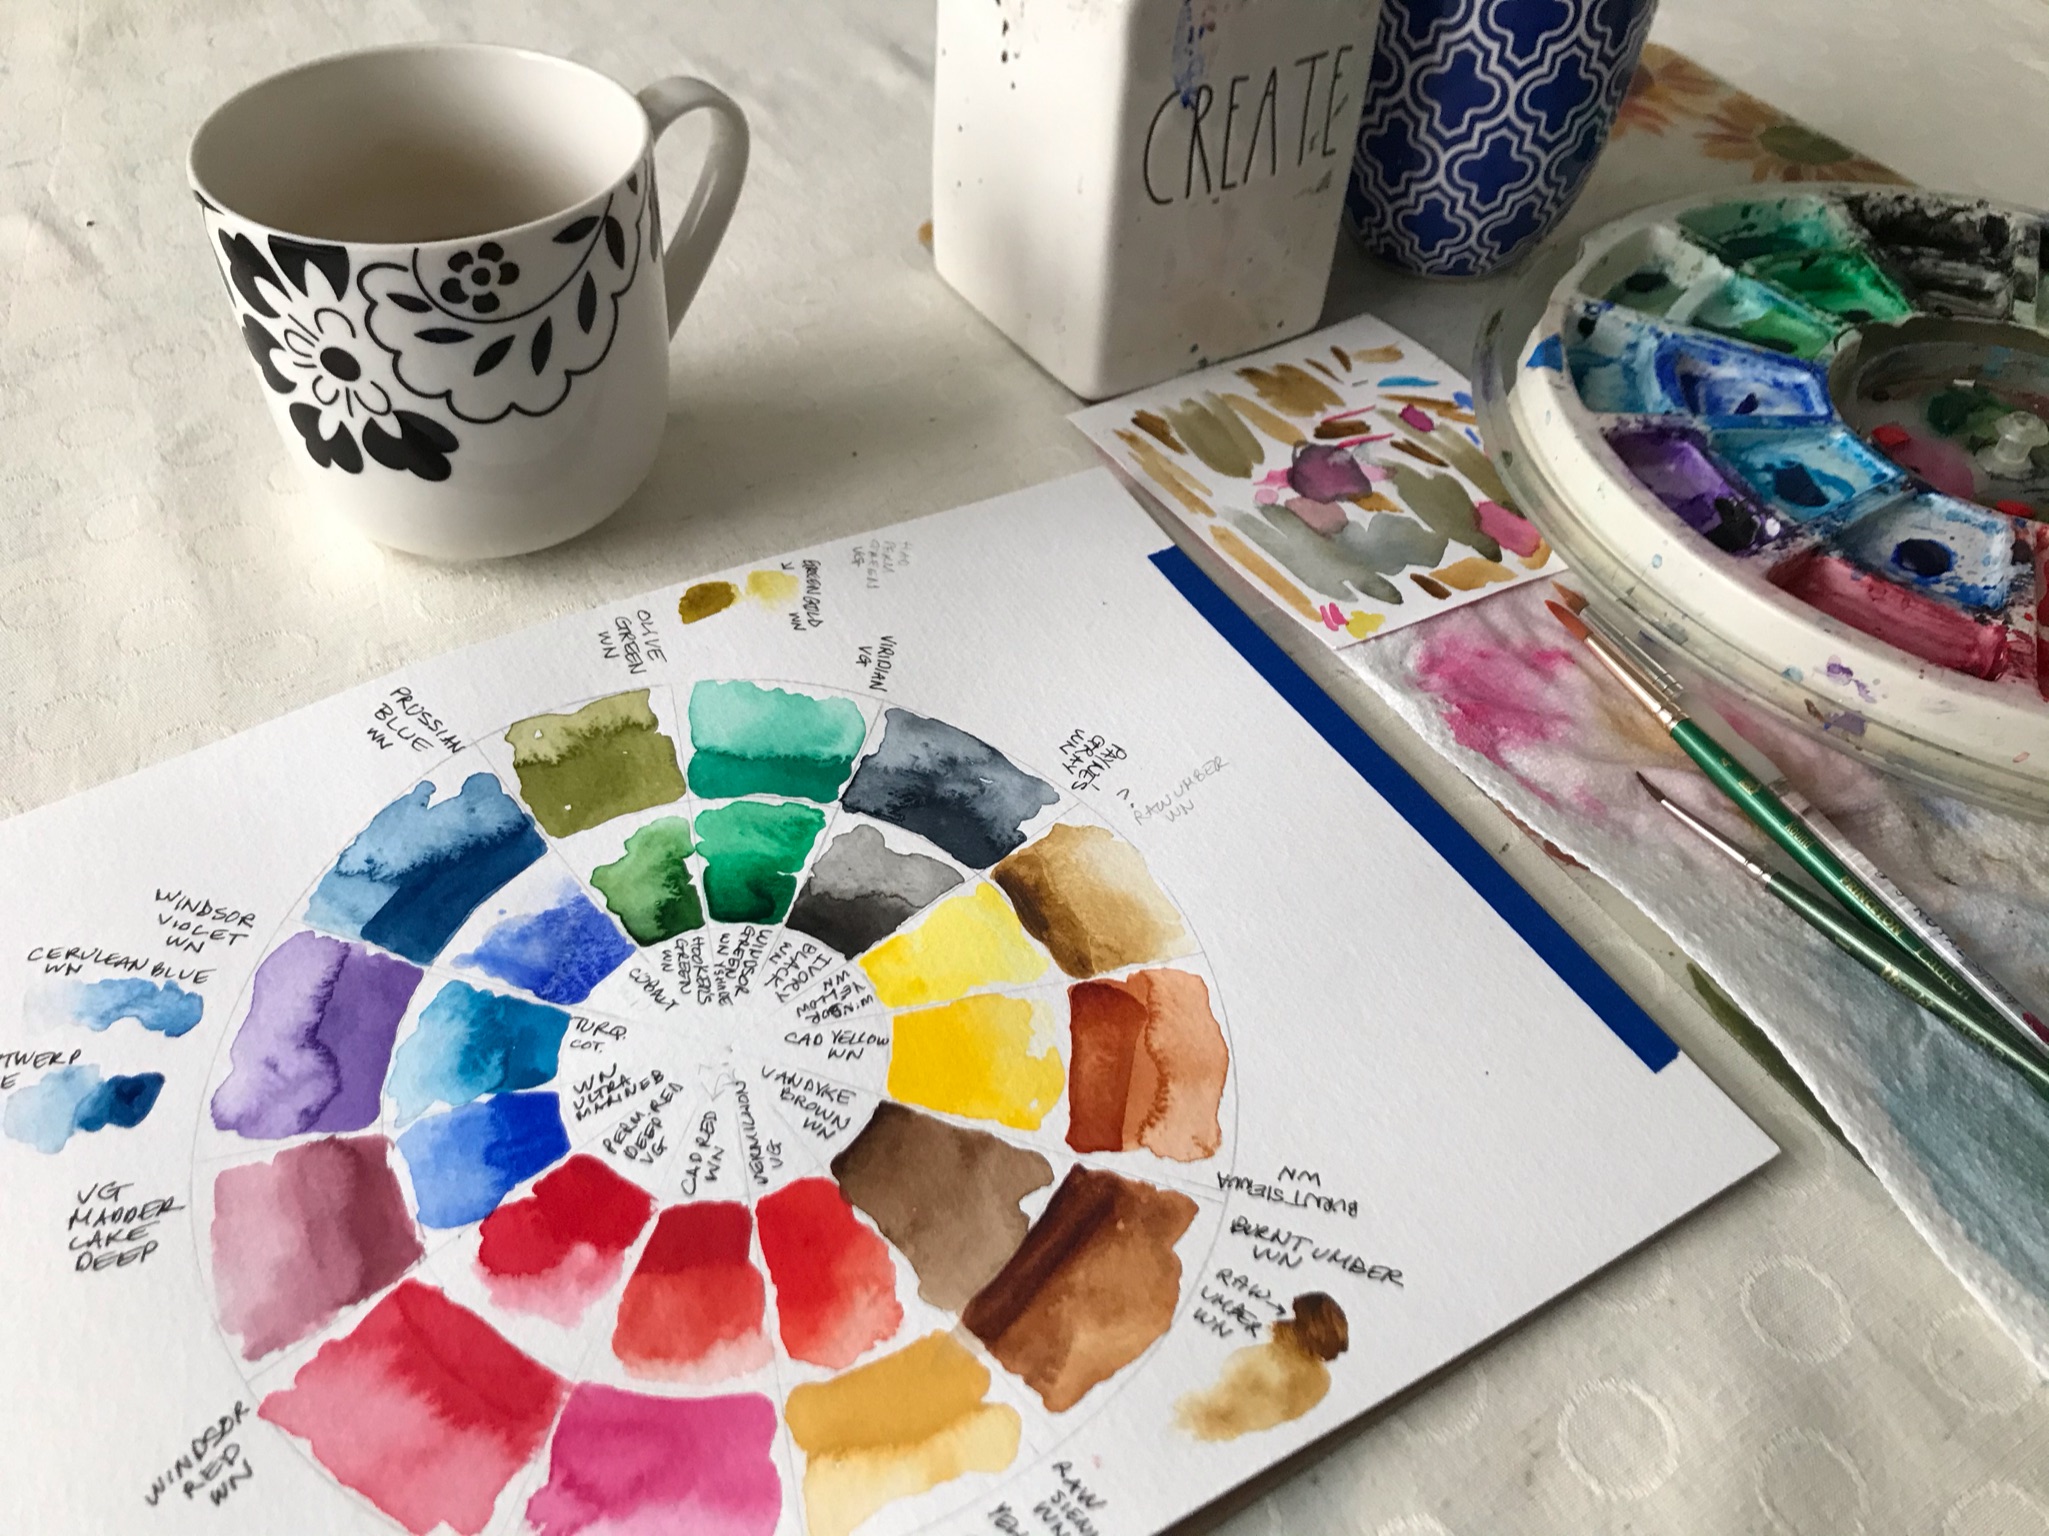
I didn’t give much thought to the specific colors – my Van Gogh watercolor set had the “standard” colors. I thought of them simply as orange, green, blue, red, yellow, etc. I didn’t realize at the time that there are many shades of each color. Imagine my surprise when I replaced my green and it was a totally different green. As I added more colors to my palette – I didn’t know which colors were which. Things got confusing.
label your colors
This might seem unimportant when you first start painting, but it can become frustrating when you replace a color and it isn’t the same shade, especially if you are in the middle of a project. Keep track of the names of your paint colors. If you put the paint in a palette like I do – label the palette or create a color key.
Explore your colors ~ create a color key
Creating a color key is a great exercise to learn what each paint color looks like. My key coordinates with my palette. I painted each color at both full strength and lighter – with more water mixed in. With a glance I know what each paint color is capable of.
Mixing Watercolor paints
I love my palette for painting with pure colors. It’s quick and easy to add a little water and re-activate the paints, but it has some limits:
The color is watered down, since I add water to reactivate the paint. To paint with full saturation color I use paint from the tube (with only a tiny bit of water mixed in).
If I want to mix colors, which I often do, I don’t do it in my palette. I prefer to keep the colors in my palette pure.
I use the plastic top of an egg carton for mixing colors. We eat enough eggs that I always have extra carton tops to use when I want to create new mixes. I hold on to some of the mixes for future use.
When I first started painting I assumed that for every color you wanted in your painting, you needed a tube of that specific color. I quickly realized that it would be impossible! Several years ago I took an acrylic painting class, where the teacher talked a lot about mixing colors. The interesting thing he said was that the colors in your painting would go together better if they were mixed from similar colors instead of straight from the tube.
A few years later when I started focusing on painting watercolor seascapes I used this theory. I mix the colors for my seascapes from three colors, which results in more natural looking ocean colors. Learn more here.
I also mix colors regularly to avoid using black. If you are painting fabric – there will be folds and shadows in the fabric because of the way it drapes. Instead of mixing black with your fabric color, mix the color with its complement.
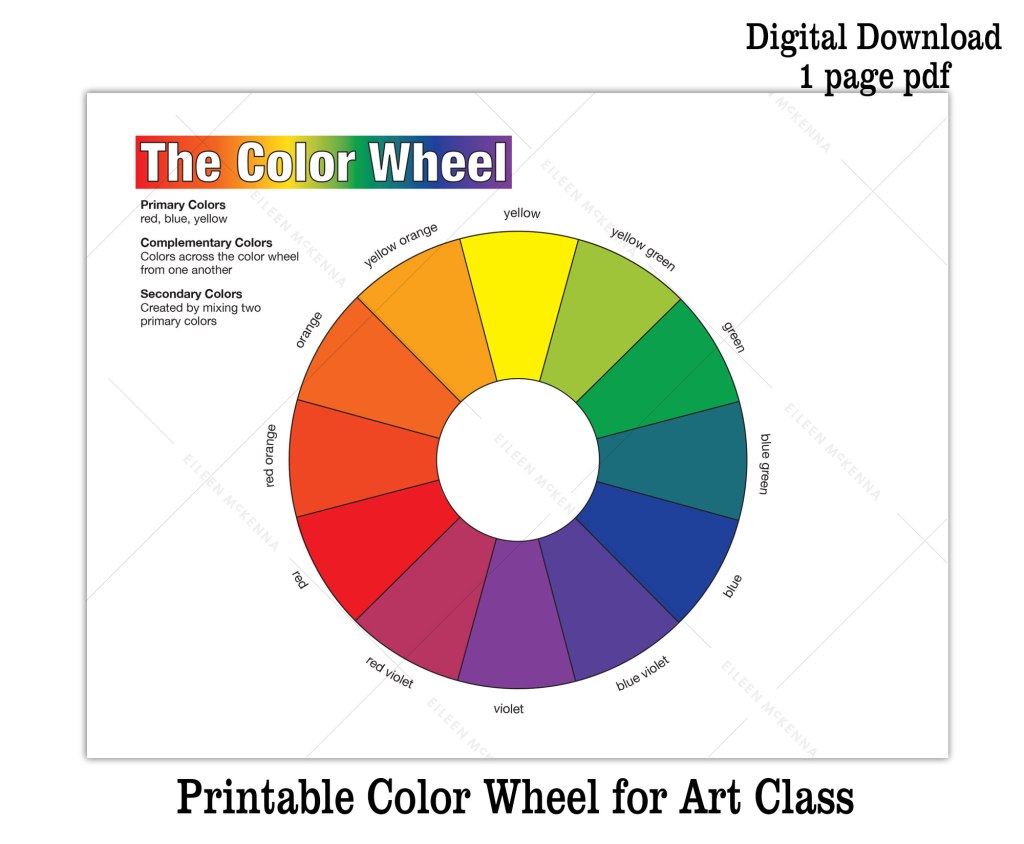
Mix your shadows instead of using black. Mix a color with its complement to desaturate it – make it less bright – or to create darker values. Complementary colors are those across the color wheel from each other. I keep a color wheel with my paints. There’s a printable color wheel in my Etsy shop – click here.
Working in my sketchbook – a mix media sketchbook perfect for watercolor – is a big part of my art practice. It’s where I feel free to play and try things, explore ideas, experiment with color, etc. I think it’s important to feel free. Sometimes especially as a beginner, you can feel pressure while working on a painting. That is what happened to me. I became afraid of ruining a painting once it got to a certain point. That’s when I adopted the regular practice of working in a sketchbook.
Aside from the freedom a sketchbook gives you, it’s also a great place to take notes. Let’s say you experiment with colors to create different skies. If you like one of your experiments it is helpful to jot down which colors you used. Otherwise down the road you may not remember.
reference photos
I always paint with a reference photo. I tell the kids at the art studio whenever they are drawing that everything they need to know is in the reference photo – you just have to look. Part of my progress in painting seascapes was that I studied the ocean in person and in the many photos I took. But because I took so many photos, I sometimes get mixed up as to which photo I am painting from, especially if a lot of time has past. This is why I write down, in my sketchbook or on the back of my painting board, what photo I am working from – where it’s saved and the date and time it was taken.
Painting ideas for beginners
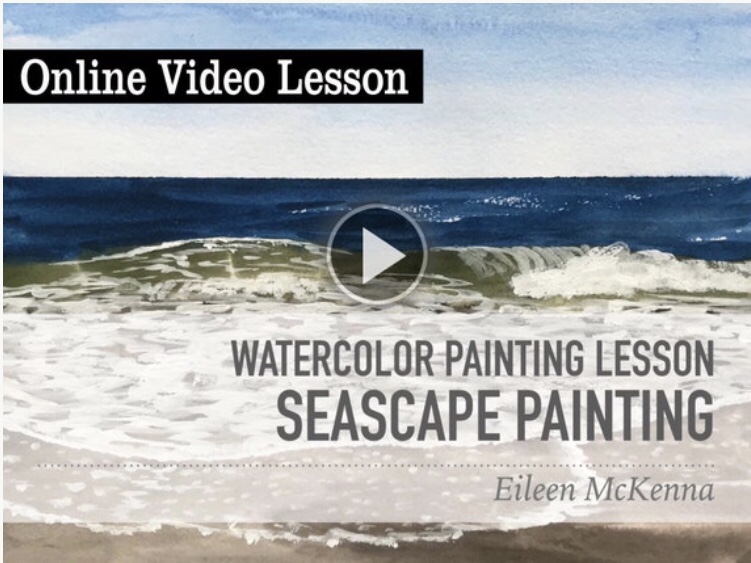
I’ve developed several painting tutorials to teach watercolor technique while allowing you to paint a great final painting. Each lesson is available as an inexpensive printable PDF with step by step instructions and photos. Some lessons are also available in video format. Browse all the watercolor painting lessons here.
Whoops! There was an error and we couldn't process your subscription. Please reload the page and try again.
Ready to get started in watercolor?
This Beginner Watercolor Exploration Guide is for you!
Learn the fundamentals.
Practice with exercises & projects.
Discover a love of watercolor!
Watercolor is a fun and convenient medium that requires little setup. There are a few basic principles to understand and after that the sky’s the limit!
This posts contains affiliate links to products/brands I use and recommend. I earn a small commission whenever you buy using these links, at no additional cost to you. Thank you for supporting my blog!
Looking for a fun Christmas project? This Christmas Paper Quilt Making Kit is printable! After ordering, simply download the files, and cut the patterned paper into squares (trim marks are provided). Then get started designing your Christmas Quilt.