What I’ve learned about art (and myself)

eye
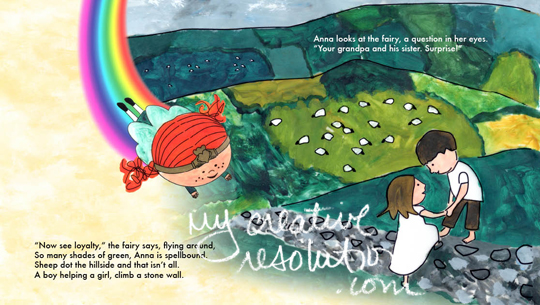
In the last six months, I’ve been on a creative journey. Here are the things I have learned through my creative resolution:

  • Every time I sit down to paint, draw or create – whether it’s a success or failure – I learn something.
  • Looking back at my lists of project ideas, helps me stay focused and complete things. And feel a sense of accomplishment about the things I can check off!
  • Even the most common objects can be interesting subjects – a bottle of windex, the vacuum – lol!
  • Trying again. A couple of times I’ve tried to redo a painting. The second painting wasn’t necessarily better – but you I improved certain things (and lost some things). It is interesting to compare and analyze. A great learning tool!
  • To post or not to post? I went ahead and posted something I felt I had overworked and was honest about it. I loved the feedback I got!
  • A weekly checklist is helpful to cover all the things I want to work on. (But it is okay, every once in a while, to throw it out the window and work on what I feel like!)
  • Learn everything you can when you visit the art store. Look at their website for even more product information.
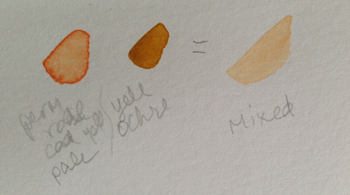
  • Disposable palette sheets are awesome. Quick clean up, plus I write what paint colors and mixes I used, for future reference.
  • Bloggers are so nice and supportive. Thank you!!! 🙂
  • The resources to learn from other artists are everywhere – blogs, videos.
  • Mixing colors leads to a less saturated color. For vibrant, bright colors – use colors directly from the tube. (It took me a whole painting to learn this!)
  • Developing a style takes time and practice.
  • A project can spark the idea for the next project, and so on and so on!
  • Sometimes I have to force myself to finish. I would love to start new projects everyday. It is fun and exciting, but sometimes I have to buckle down and finish the lingering ones. The feeling of accomplishment is amazing!
  • Hanging my paintings makes me feel good! 🙂
  • Take the pressure off. I don’t sit down to create a “frameable” piece. That paralyzes me! I sit down for a “5 minute sketch” or to play with watercolor.
  • Be open to inspiration – it is everywhere!
  • Dedicate time to being creative. Schedule time, to make sure it happens. Life can easily get in the way.
  • Step away. With a fresh eye, I notice things, I wouldn’t have, when I was deeply involved in the painting or sketch.
  • Try new things. Whether it led to success or failure, I’m growing from trying new things.
  • The computer can be a useful tool – for planning out projects, for analyzing color, etc.
  • Keep track of paint mixes for the next painting session. I found keeping a little leftover, a paint “starter,” is helpful.
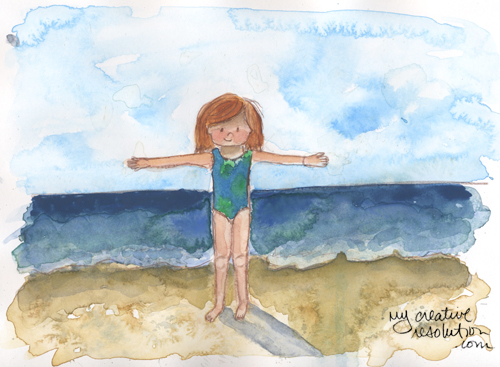
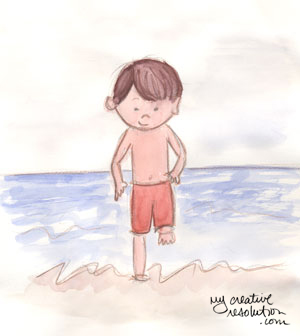
  • Painting sand is very hard. Sand is many different colors and textures and changes color as you get closer to the ocean. I’m still working on this!
  • Getting back into a project, after a lot of time has past is difficult. I’m afraid of ruining it and I forget where I was. BUT, once I get started on it again, I can quickly get back into it!
  • Keeping a blog is an amazing motivator and I can look back and see what I was thinking and working through during each creative project!

Back to the drawing board with Beach Girl’s Face

backtodrawingboard
Last week I struggled with the face of my “beach girl” in a fun watercolor painting where she was floating in a pool. I “erased” her face several times and destroyed the paper. It was extremely frustrating.

Looking back I realized that just diving in to paint her face was a bit of a mistake. I haven’t quite figured out how to paint her face. A while back I arrived at a cute pencil drawing of her face, but how does that apply to watercolor? I’ve decided I don’t want her to have just a couple of lines and dots – for eyes. I want to add a little more detail. But I’m not sure how.

It was naive of me to think I could just wing it. If I had started with her face, in the floating painting, I would have thrown away several versions. Instead I painted everything around her face and thought I’d figure it out. (That is the Aries in me!) I now realize figuring it out is going to take time, work, patience and lots of practice.

I’ve been working on this all week. First I did pencil sketches using photos of my daughter (the inspiration behind beach girl). It is amazing how hard it is to capture the essence of a person. Is it the shape of her eyes? her chin? Then I spent time mixing colors, to figure out the right skin tone. I mixed Permanent Rose and Cadmium Yellow pale. Then I added Yellow Ochre. I’m still playing around with how much of each. And I’m still struggling with what color to mix for the shadows on her face. Add payne’s grey? or the compliment?
mix2mix

I painted the shape of her head in the skin tone. Then I experimented with adding the detail – the hard part! I hated all of them. But, I learned from them – the pencil is too sharp and fine, too much detail in this one, etc.
skintone

Today, I decided to try again. Before I started I looked at sample watercolor illustrations. Then, I tried again. I haven’t gotten there yet, but I am further along then last week!

Beach girl – 2 different approaches

beachgirl3
I decided to try my recent approach to watercolors: Start with the background and play. I wet the paper, brush on color, add drops in areas, even splatter! It’s amazing what a difference in the backgrounds (above and below). Which is better? Hmmm. I love the sky above. (btw – This exercise was more about the background than beach girl herself.)
beachgirl2a

It’s been a while since I worked on my beach girl! Last time I worked on her, I practiced her face. I found a face I liked, but I’m having a bit of difficulty. When I redraw her, she looks different and if I use pencil instead of ink, she looks different. There is more playing and practicing to be done!

The inspiration to try the “background first” approach to beach girl came from an interesting blog post – “10,000 hours” and the link contained in it (Alina Chau’s watercolor tutorial.) Wisteria Interior’s post inspired me to not give up and keep trying. And as I read Alina Chau’s tutorial I started to wonder, “Why wasn’t I using all my watercolor techniques on beach girl?” It was like an “aha” moment. So, thank you!

Beach girl – drawing her face 100x

bgface2b

I decided to draw 100 faces, to find the right face for my beach girl character. I couldn’t believe how quickly I fell in love with a face! It was the 9th one I drew. I did a few more after that, but I think she is the one!

bgface3

I started out with 24 circles on the page – assuming I do several pages to reach 100. I only made it to 17!

bgface1

I tried her face from different angles, using what I learned from Shoo Rayner – Drawing School (video “Draw characters from different angles“). I need to work on the different angles more.

angles2

I also put her face on her body. I’m excited. I feel like I’m getting somewhere.

bgbody

11 Art Supplies I can't paint without 6 Tips on Developing your own Illustration Style


My creative weekly checklist

checklist
I wrote out this weekly checklist to make sure I work on all the things I want to cover. I’m a bit of an ambitious list maker! Reality is usually a different story. I feel like I’ve been slacking a little lately. Although, it’s been a crazy couple of weeks with the stomach virus and then the kids off for break. I did finish my acrylic gerbera daisy and a watercolor woodpecker. I’m hoping this checklist will be a good reminder. I’m off to a good start, but it’s only the first day. lol

Happy Easter! [Colored Pencil Bunny]

bunny

I fell in love with colored pencils when I first started drawing (6? years ago). One of my first drawings was of a bear, and after that I did several animals, including this bunny. I think I felt animals were easier subjects because the pencil strokes were the fur! Eventually I learned about blending colors (and using the side of the pencil instead of the tip) for a smoother look and to create colors that weren’t in my box (see the terracotta pot). It’s been a while since I picked up those pencils, maybe it’s time to try them out again. Happy Easter!

kitten

Beach girl – working on an illustration style


girl at the beach

A couple of years I go I did this sketch of a girl (my daughter) at the beach. I love how loose it is. I love the movement. I aspire to be a children’s book illustrator, or at least develop a children’s book style, and I think this sketch is a step towards my style. I want to fully develop this beach girl character.

Here are sketches of my sons (also from a couple of years ago).

boybeach littleboybeach

A year or so prior to this, I worked on developing an illustration style for I book I had written, “The Claddagh Fairy.” Although it was a great exercise and experience, I don’t think the illustration style is fully “me.” It isn’t loose enough, too much computer. But maybe it was me at the time, just not now.

I did this sketch this week. Definitely needs work, but I’m excited to play and work on developing my characters. I’ve watched some great videos and now have concrete ways to go about it.

beach kids

Links:
Lynne Chapman (How to draw a child’s face)
Shoo Rayner – Drawing School (How to design Children’s Book Characters)

My Claddagh Fairy illustration made into a doll!

Happy St. Patrick’s Day! I am so happy today (in honor of St. Patrick’s Day) to bring you the doll version of my Claddagh Fairy. All thanks to my niece, Ryan, my illustration has come to life – in doll form! Thank you Ryan!

claddagh fairy doll 2 back irish fairy doll flying irish fairy doll

See more illustrations from the Claddagh Fairy and my journey to develop a children’s book illustration style.

claddaghfairy

The Claddagh Fairy is copyrighted. Unauthorized use of this blog’s content, text and artwork is prohibited. Re-blogging and/or sharing links is allowed provided that http://www.mycreativeresolution.com is credited and a direct link to the original content is included. Thank you.

Developing a Children’s Book Illustration Style (Part III)

I finally developed an illustration style for my Claddagh fairy! Now what? Time to illustrate the whole book. Wow, intimidating. As a graphic designer I had the knowledge (and the software) to design the layout of the book, so that helped. I started with thumbnail sketches (a storyboard) of where the copy would fall and what the illustrations should be.

thumbnails

Even though I had my fairy design, how exactly was I illustrating the book? Watercolor? Acrylic? And I was very worried about getting the fairy right from all angles and keeping her consistent. I read online, about Illustrator, Will Hillenbrand, who draws on vellum (paper) and paints the paper (from the back side). Thank you Will for sharing your technique! I thought that sounded interesting especially because I thought if I drew on the computer, I’d have more luck keeping my fairy consistent.

If you decide to try this technique – printing the illustrations and then painting the back of the vellum – make sure you buy vellum that is compatible with your printer type: vellum for inkjet or vellum for laser.

11 Art Supplies I can't paint without

My Illustration Process:

  • Loose, quick sketch with pencil and paper
  • Scan sketch (to use as guide) and “draw” outlines in Adobe Illustrator using the pen tool
  • Print the drawings on vellum (vellum for inkjet or vellum for laser)
  • Paint the back side of the vellum using Liquitex acrylic paints
  • Scan the drawings and retouch if necessary
  • Using layout program (Adobe Indesign), import artwork and add text
  • Print final book spreads

Vellum with illustration from the computer and back side of vellum painted:

vellum

Using more finalized illustrations, I super sized my thumbnails and arranged them on a giant bulletin board to map out the book. At that point, the type and illustrations were different pieces of paper, so I could move things around. Several times I created an illustration only to move copy around and change what the illustration should be.

It was a very fun project illustrating “The Claddagh Fairy.” But it was a lot of work. So far, no one wants to publish it though! lol! In my mind getting it published was out of my control, but sticking with it and illustrating the whole book, was in my control. It felt like a huge accomplishment! It was a great learning process and I don’t regret spending time on it, even if it never gets published. One of these days I’d like to illustrate another children’s book. Although this time, I’d like to do more of the illustrations with pen and brush instead of the computer.

Here are a couple of my favorite Claddagh Fairy spreads:

castlespread

irishmeadow

claddaghfairy

Related Posts you may enjoy reading:

Copyright Eileen McKenna 2017. Unauthorized use of this blog’s content, text and artwork is prohibited. Re-blogging and/or sharing links is allowed provided that http://www.mycreativeresolution.com is credited and a direct link to the original content is included. Thank you.