Creating stencils for lettering a canvas

finalbythesea

I finished adding the lettering to my cabana stripes canvas! I played with the layout on the computer:
cabana letters computer
Then I figured out the sizing of the letters and printed them on cover stock. Using an exacto knife, I cut out the letters. When there was a shape inside a letter I left a thin connecting strip (like on the letter b).
stencils1 stencils2

Creating the stencils was easier than I thought it would be. The transparent white was a little too light, especially on the yellow. The letters didn’t pop enough, so I added the brownish glow around them. I’m happy with the end result. Finishing is such a great feeling!

Painting a Figure (Little Girl Digging – Part I)

girldigging
I may have bitten off more than I can chew, but I’m excited about this painting! I started by mixing a grey base color for my sand. I mixed thalo blue, cadmium red, and cad. yellow (as opposed to using black and white) because I wanted the sand to have color in it. I’ve struggled before with painting sand! I covered the entire canvas in this color, even where the ocean and little girl will be.
sandbackground

I added little ticks on my canvas to show where the grid is.
grid on digging

I mixed cad. red and white and added some cad. yellow to get a flesh tone, which I mixed with my base color. I wanted a color that would work as a base for the little girl, that wasn’t far off from my original (sand) base color. This way, I won’t feel intimidated to loosely sketch in the girl. Hopefully, I’ll easily be able to change any area “back” to sand if necessary.
mixingskintone

Following the grid closely, I added in the shape of the little girl. I plan on flipping the canvas over and refining her shape (with the same color). As I start to feel confident in her shape, I’ll start adding colors that will define her and pull her out of the sand. I’m developing this process on the fly – wish me luck!

Cabana stripes on canvas

cabanastripes
I painted these stripes and plan on adding the words “by the sea.” The stripes make me think bleached/weathered wood, beach, cabana. I was inspired by a small sign I have. I’m going to experiment with layouts and transparency on the computer. Once I have a layout, my plan is to print out the letters and make a stencil. I’ve never really painted letters before. I’m glad I can play on the computer before touching the canvas!

Here’s how I created my stripes.

  • I used a ruler, to make sure the stripes were somewhat straight. First I added the base color of the stripe.
    cabana1
  • While, the base color was still wet, I blended in a lot of white (to make it look bleached) and a little light brown (in streaks). I also added the a thin stripe of the light brown on the edges of the colored stripes.
    cabana2
  • I made the stripes different widths. I wanted it to look like different sized slats of wood
    cabana3

Read Part II – Creating Stencils to add lettering to a canvas

Easy steps to paint a sunset sky and a tree in acrylic paints

Easy steps to paint a sunset sky with a tree in acrylics

Start your creative journey with:
Creative Exploration book -
Creative Exploration: A Six Week Process for Introducing Regular Creativity into your Life
– Develop a regular practice of creating, explore mediums and subjects in search of your thing, and experience the joy that creativity brings. Creativity is for EVERYONE! Talent is just a starting point.

Easy steps to paint a sunset sky and a tree in acrylic paints:

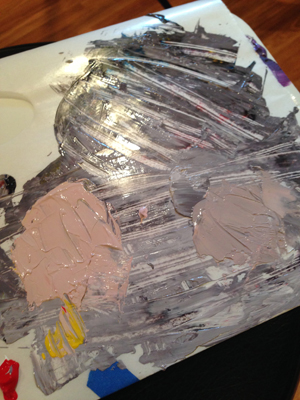
Select the colors you want in your background. I used six colors (see the list below). They can be straight from the tube or you can mix them.

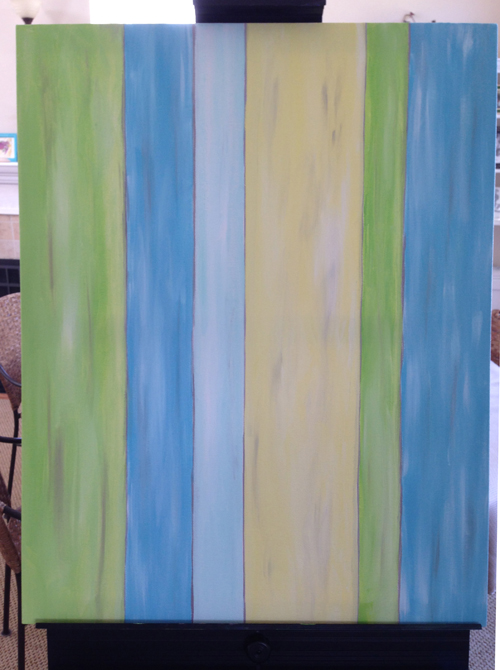
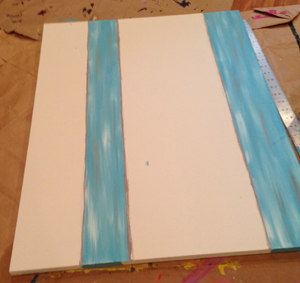
Paint each area of color onto your canvas. I used foam brushes for the background.

sunrise3 sunrise

Next, blend the areas where the colors meet so there is a softer transition from color to color. You may have to add more paint during this step.

Allow the background to dry.

Add the trunk of the tree and then begin adding the branches. Look at a tree. Notice that the branches get thinner as they get further from the trunk, and branches are not straight lines. Using thinner brushes helps with the thinner branches.

newsunrise1

Add more branches until you achieve your desired effect.

newsunrise2

Colors I used:

I’d love to see your sunset painting!

ONLINE LEARNING
easy watercolor online lesson for beginners fun project Easy Watercolor Seascape online video lesson for beginners

This posts contains affiliate links to products I recommend. I earn a small commission whenever you buy using these links, at no additional cost to you. Thank you for supporting my blog!

Easy steps to paint a sunset sky and a tree in acrylic paints

Wavering in my creative resolution (just a little)

bannernew2b
I created a new banner to remind myself of some of the things I’ve accomplished in the last four months. I was wavering a little bit in my enthusiasm for my creative resolution, when my daughter said to me, “Don’t give up.” Why are 13 year olds so smart?! She is right of course. And I don’t want to give up. I just needed a little push and maybe a pat on the back. 🙂

Practicing painting pansies and other things…

pansies
Throughout the day I kept being pulled back to “practicing painting pansies” (say that 10x fast). My intention was to dedicate the day to acrylics – why was it so hard to do that?

I started with a quick warm up sketch. Then, I started playing with the pansies in watercolor. I kept finding excuses not to start with the acrylics – breakfast, more coffee, stripping the sheets off the beds – lol! Finally I forced myself into my studio and started painting.

First I started adding branches to my “sunrise trees” painting. (Inspired by my other tree painting.)
newsunrise1newsunrise2

Then I pulled out my “jellyfish”! It has been awhile. I’m not sure I’ll ever finish this one, but I like what I’ve added to it.
jellynew1jellynew2

Why was it so hard to get into the “acrylic groove?” Watercolors are easy to pull out and work on (and easy to put away). Acrylics require more setup and clean up. Is it that? Or is it that I’m not that inspired by the ones I’m working on? Or maybe I’m more confident with the watercolor? And somewhat intimidated by the acrylics? Whatever it is, I plan on pushing through.

Inspiration found during my run


tulips pansies
I’ve been wondering what to paint next in acrylics. I spotted these tulips, while on my run. These would make a pretty painting! I love running. Actually, back up and erase that. I don’t love running. I love that it’s a quiet time to think and observe – no kids, no distractions. I don’t always feel good while I’m running, but I always feel great after. Sometimes it’s a struggle and I have to distract myself. If I think too much about how far I have to go, I’ll end up walking. So I listen to music or an audiobook and think and look around for inspiration!

My creative weekly checklist

checklist
I wrote out this weekly checklist to make sure I work on all the things I want to cover. I’m a bit of an ambitious list maker! Reality is usually a different story. I feel like I’ve been slacking a little lately. Although, it’s been a crazy couple of weeks with the stomach virus and then the kids off for break. I did finish my acrylic gerbera daisy and a watercolor woodpecker. I’m hoping this checklist will be a good reminder. I’m off to a good start, but it’s only the first day. lol

An acrylic painting finished!

finishedgerbera

It is a huge accomplishment for me to actually finish one of my acrylics! As an inexperienced painter, I often hit a roadblock and give up. Over the past few months I have spent a lot of time painting in acrylics and have learned a lot. I am proud that I moved past the “color” roadblock that I hit while working on this painting.

I did a lot today. I added darks to the leaves, and painted the center of the flower. I also painted the tips of the petals so there wasn’t a gap between the background and the petals. I brightened up the color of the flower, with a more saturated pink.

A part of me wonders, “Is it really finished?” I know I could tweak it for awhile. As I was adding my last tweaks, I thought, “I don’t want to ruin it!” So I stopped and declared the painting done.

Steps today before the finish:

step1today step2today step3today