Pressure and Painting

beachshot
For most of this year, I haven’t put pressure on myself to create “frame-able” pieces. I started the year working in my sketchbook because that really took the pressure off. Eventually, because I was using watercolor, I graduated to nicer paper, but I still approached each piece as playing and having fun – just seeing what I could make. The only “pressure” was to finish the painting and I like to think of that as the motivation that blogging has given me. With no pressure, I’d sit and play and often be surprised with the results. Sometimes I’d like the final painting so much, I’d frame it.

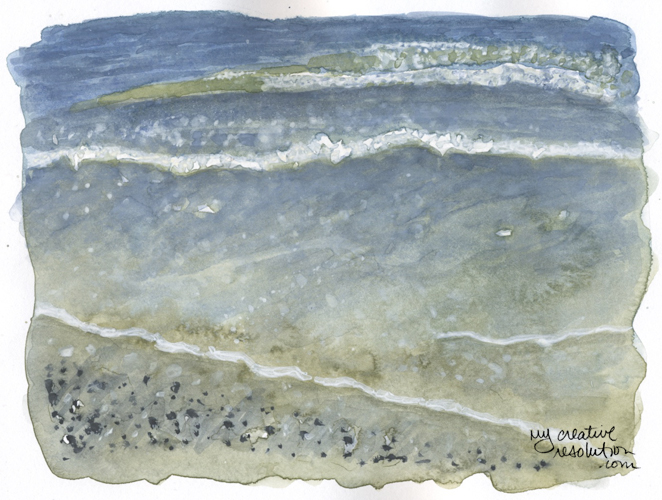
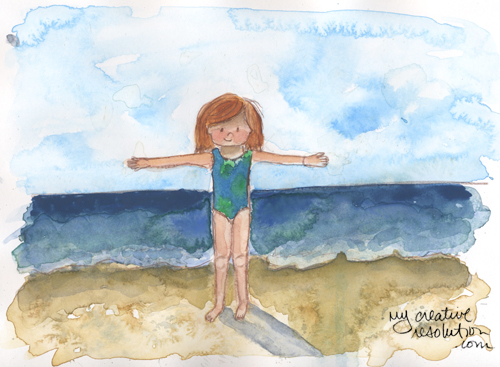
But now, I’ve started a project that I already bought a frame for. (My mother asked for a beach painting for Christmas.) It changes how I think as I work. Every step of the way I’m worried. In the past I worked around the “mistakes” because it didn’t really matter. I only had to please myself and I was happy just being creative and finishing. Now I’m stressing about the final product. Will she like it? Will other people like it?

Thankfully it’s for my mother! I can’t imagine the pressure if it was a commissioned piece! I remember as a kid, I drew the ugliest picture I could, and showed it to my mom. When she said it was beautiful and she loved it, I said, “I knew it! You always say that!”

She said, “Maybe I always think that. Just because you think it’s bad, doesn’t mean I do.” That got me thinking. Maybe to her, my “ugly” picture was beautiful – especially because I made it.

Beach Lover Wooden Sign

beachlover
I bought a piece of wood and had it cut into pieces at the hardware store. Using acrylic paints – teal and white – I added streaks of both and blended them, to get achieve a beachy, sun bleached look.

Wooden signs
I set up the lettering on the computer and outlined it. Last time around I cut custom stencils which was a lot of work. This time I found advice on hand lettering. I laid the printout on the wood and using a hard stylus pen (from my kid’s old DS), traced the outline of the letter. When I was finished I could see the outline impression on the wood.

Following the outline impression on the wood, I painted the letters black. When they were dry, I painted white steaks over the letters with a very dry brush to capture the distressed look. I’m happy with the results!

Click here to learn more about how I painted the background.

Back to School – Back to Acrylics

girldiggingrev
I’m looking forward to the kids going back to school (lol!) and having more time to paint – especially with acrylics! This week I got a jump start and worked on my painting “Little Girl Digging.” It’s been almost 2 months since I worked on this! If I let too much time pass I lose momentum and then it’s really hard to get back into a painting.

Although I haven’t worked with acrylics all summer, I’ve been creative – sketching, painting with watercolor, etc. I’m proud of all I’ve done during these busy months. It will make September, when the house is quiet again, all the more productive.

Here is where I started from:
girl digging step 3
First I worked on the sand and added some definition to the ocean. Then (above) I added color to the ocean.
girldiggingc

Figure Drawing – update on my Summer project

beachsketches
I keep a sketchbook in my beach bag and try to pull it out while we are at the beach. I wish people would stop moving! – lol. Last week I realized I’d forgotten a pencil. So, I snapped a couple of photos of people by the shore. When I got home I sketched them. They were easier to draw – since they were staying still. 🙂

Here are my previous posts on this subject:
1. Figure Drawing – My Summer Project
2. Figure Drawing – the inside of the body

Watercolor Shell

shell
Any advice for me?… I struggled with getting the shell to pop and look 3D, as opposed to smooshed in the sand. I know some of my problems were because: I painted this from a real shell and the background was made up. I used colors in the sand that I should have used in the shell. Since I didn’t want the shell to blend in, I used brown paint and it became a dark muddy mess. I sat down to paint at several different points and the shadows were probably changing.

Why is it that “struggled” is one of the most common words I write?! lol. Oh well, you paint and you learn. 🙂 Not sure I want to attempt a redo on this one. Hoping to hear your comments!

Watercolor Week!

ocean
This week, I’ve ignored my “weekly checklist” and instead ended up being free and loose with watercolor. After struggling to paint faces the last 2 weeks, it’s a relief to just play, with no expectations and it was fun!

It’s been a while since I attempted a landscape of the beach. I didn’t have high expectations, I just thought, “Let’s give it a try.” I took the reference photo a couple of weeks ago. I grew up at the beach and love everything about it. I’ve always tried to capture it with paint and I’ve had some success and some failures. Water and sand are hard!

For this painting I decided, before I started, that I was going to use white. I think I’ve used white once before – and it wasn’t pretty! I started laying the background colors:
ocean1

Then, I added in darks and details, including the white foam. I have to admit that I’m proud of how it came out. It’s amazing how just playing can lead to unexpected success. I feel like each painting is a learning experience. 🙂

Back to the drawing board with Beach Girl’s Face

backtodrawingboard
Last week I struggled with the face of my “beach girl” in a fun watercolor painting where she was floating in a pool. I “erased” her face several times and destroyed the paper. It was extremely frustrating.

Looking back I realized that just diving in to paint her face was a bit of a mistake. I haven’t quite figured out how to paint her face. A while back I arrived at a cute pencil drawing of her face, but how does that apply to watercolor? I’ve decided I don’t want her to have just a couple of lines and dots – for eyes. I want to add a little more detail. But I’m not sure how.

It was naive of me to think I could just wing it. If I had started with her face, in the floating painting, I would have thrown away several versions. Instead I painted everything around her face and thought I’d figure it out. (That is the Aries in me!) I now realize figuring it out is going to take time, work, patience and lots of practice.

I’ve been working on this all week. First I did pencil sketches using photos of my daughter (the inspiration behind beach girl). It is amazing how hard it is to capture the essence of a person. Is it the shape of her eyes? her chin? Then I spent time mixing colors, to figure out the right skin tone. I mixed Permanent Rose and Cadmium Yellow pale. Then I added Yellow Ochre. I’m still playing around with how much of each. And I’m still struggling with what color to mix for the shadows on her face. Add payne’s grey? or the compliment?
mix2mix

I painted the shape of her head in the skin tone. Then I experimented with adding the detail – the hard part! I hated all of them. But, I learned from them – the pencil is too sharp and fine, too much detail in this one, etc.
skintone

Today, I decided to try again. Before I started I looked at sample watercolor illustrations. Then, I tried again. I haven’t gotten there yet, but I am further along then last week!

Painting a Figure (Little Girl Digging – Part 2)

girl digging step 2
It’s hard getting back into a painting when a week or more has past! I’m so glad I made notes on how I mixed the colors and saved some of each color. It reminds me of a bread starter – not that I’ve ever used one! I added a little bit of my saved color to my new mixes to keep some continuity. I mixed a skin tone color that isn’t as subtle as before. [Not a perfect match – but at this point I’m not going to over think it. I’m focusing on getting the Little Girl’s figure right.] As I painted Little Girl’s body with the new color, she is popping out of my background (above). I tweaked her shape as I painted. See how subtle she was when I started:
girldigging

A few days later, I mixed a lighter sand color and added it to my canvas. Still focusing on Little Girl’s shape, I used the sand color to edit her shape as needed.
girl digging step 3

I’m getting there – slow and steady! lol. Read my previous post – Painting a Figure (Little Girl Digging – Part 1) and see how I started this painting.

Beach girl – 2 different approaches

beachgirl3
I decided to try my recent approach to watercolors: Start with the background and play. I wet the paper, brush on color, add drops in areas, even splatter! It’s amazing what a difference in the backgrounds (above and below). Which is better? Hmmm. I love the sky above. (btw – This exercise was more about the background than beach girl herself.)
beachgirl2a

It’s been a while since I worked on my beach girl! Last time I worked on her, I practiced her face. I found a face I liked, but I’m having a bit of difficulty. When I redraw her, she looks different and if I use pencil instead of ink, she looks different. There is more playing and practicing to be done!

The inspiration to try the “background first” approach to beach girl came from an interesting blog post – “10,000 hours” and the link contained in it (Alina Chau’s watercolor tutorial.) Wisteria Interior’s post inspired me to not give up and keep trying. And as I read Alina Chau’s tutorial I started to wonder, “Why wasn’t I using all my watercolor techniques on beach girl?” It was like an “aha” moment. So, thank you!