I was asked to be a guest blogger :)

goodmorning
Hi everyone! A little over a week ago, I received a really sweet email from someone in Germany (I’m in NY isn’t it amazing how WordPress connects us?), asking if I would like to be a guest blogger. I have to share with you a part of the email. I was beyond flattered!

“You are the first person I contact for this matter. I would be honoured if you would like to attend my blog as guest blogger, and write about a learning experience, testing a new medium etc. I decided to take this step and approach you after your post about how to make a pattern in photoshop. It’s inspiring, and that’s exactly how I would like my small audience to feel when going through my blog.

I don’t wanna take much more of your time, please let me know if the idea is appealing. I don’t mind if you say no 🙂

Best wischen from Germany – you have fans here!”

Anamaria

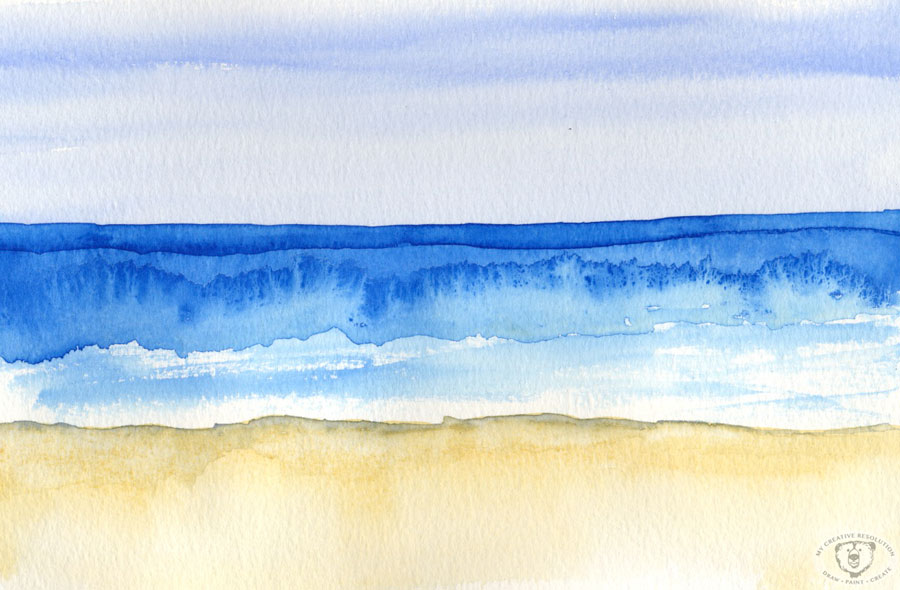
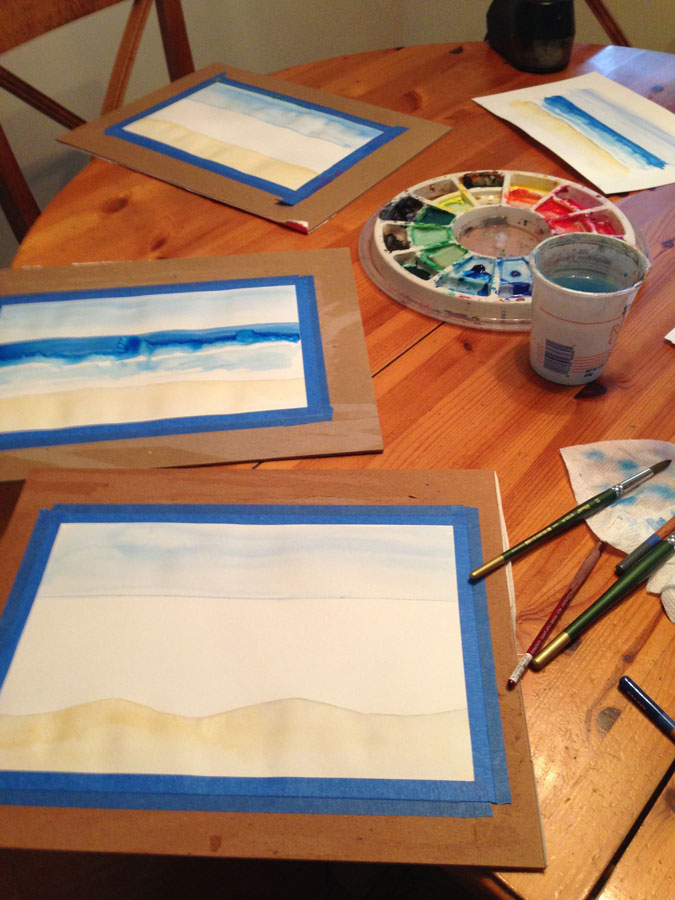
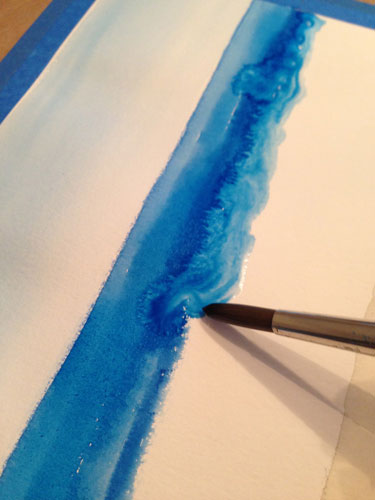
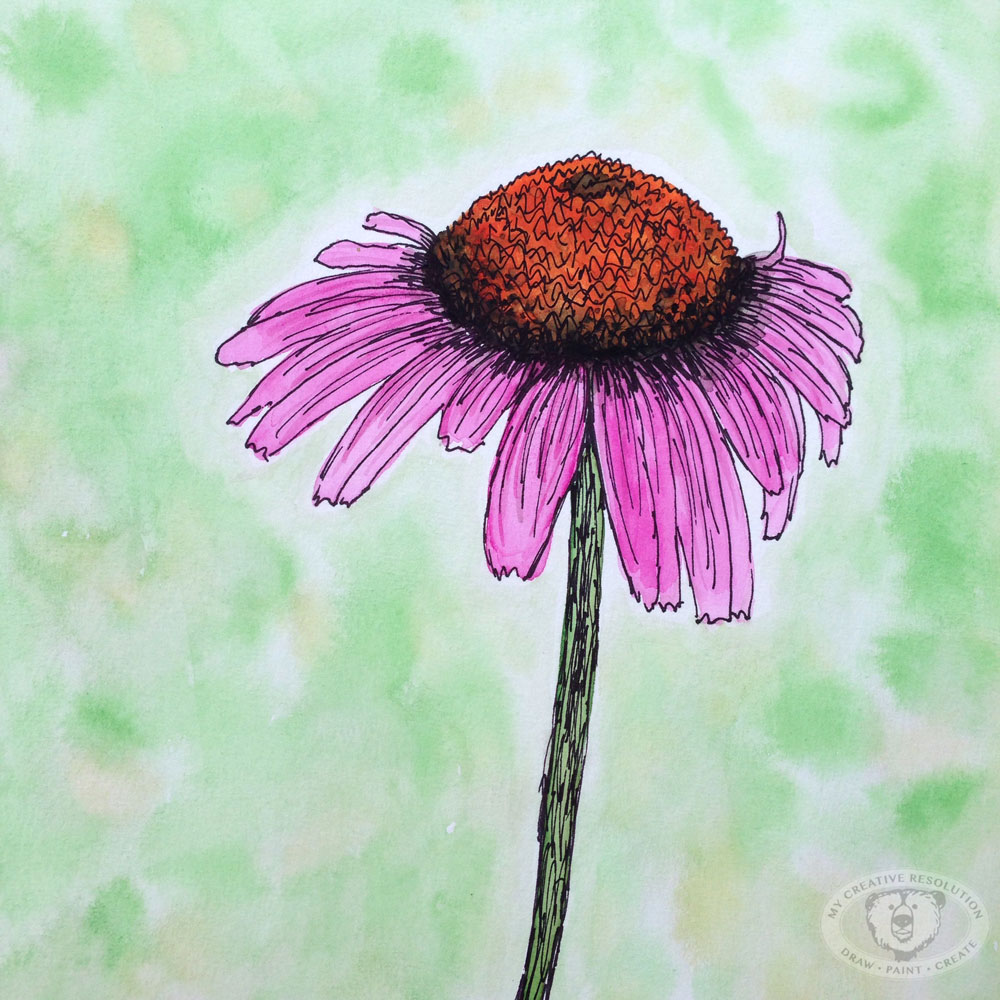
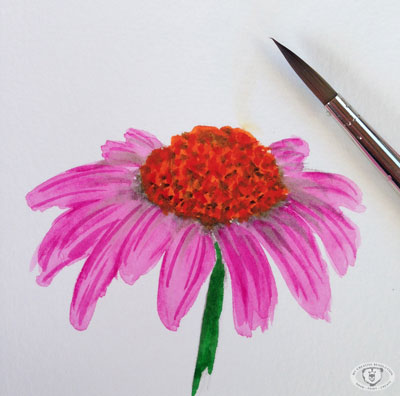
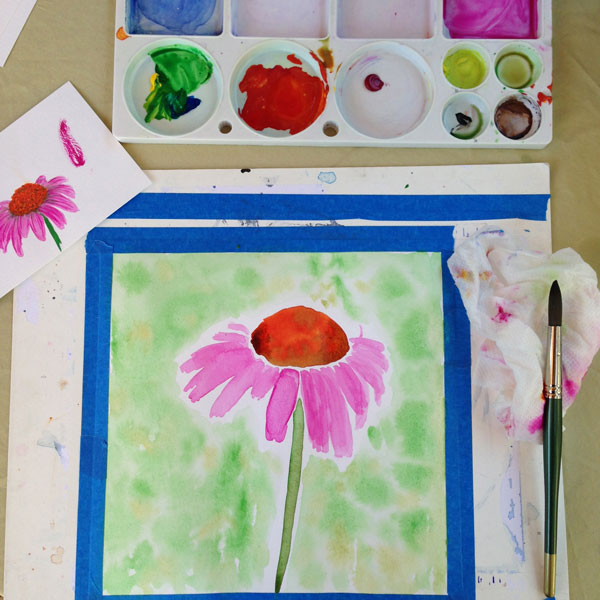
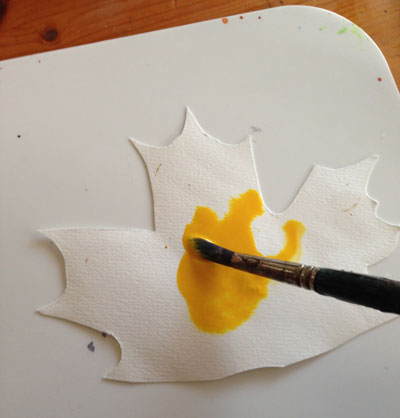
Of course I said yes! I decided to write about painting in watercolor. Ana’s response to the topic and post was:

“WOW, thanks a lot! looks awesome and it’s great, it will help me in starting my first experiments with watercolor. Couple of day ago I bought the supplies, and I am ready to give it a try, so your post comes just in time! I always wondered how the “wet on wet” effect it’s made ;)”

Sharing feels really good! 🙂

I hope you’ll visit Ana’s blog. Here is the link to my post: Ana’s Learning Lab

Writing a checklist to help you achieve your Creative Goals

watercolorinkleaves
I’ve learned so much since starting my creative resolution in 2014. About how important setting a goal is. But, not only do we have to set a goal, we need to outline the tasks that will get us there.

My 2014 creative resolution, or goal, was very simply to “be creative.” Early on I wrote (and adapted as I went on) a “weekly checklist” or a set of tasks that would help me achieve my goal. They were:

My 2014 Weekly Checklist:

  • 3 pencil sketches – “5 minute sketches”
  • 1 watercolor
  • 1 acrylic
  • illustration (children’s book illustration style)

As the year went on I added things like “figure drawing” to my list, and, as I focusted more on watercolor, acrylic painting moved to my monthly list.

My 2014 Monthly Checklist:

  • learn a new technique (from a video, book, etc.)
  • 1 acrylic painting
  • “other” project (furniture, wood, etc.)

My 2015 creative resolution or goal was to “continue my creative journey.” Right from the start of 2015 I wrote a list of things I have always wanted to try. Some of these things were one time “tries,” while others I incorporated into my checklist (see the last three items).

My 2015 Checklist:

  • Try one thing from “the list” each month
  • Create almost daily (and post on Instagram)
  • Paint with watercolor at least once a week
  • Doodle with ink almost daily
  • Design a pattern a month
  • Practice hand lettering at least once a month

As the new year gets closer and closer, I’m excited to set a new goal, a new creative resolution. I’ve grown so much, I can’t wait to see what 2016 brings! 🙂


Watercolor Leaf {A how to craft project}

This is one of my favorite Fall projects! Give it a try and share your results, either in the comments below or on Instagram – tag me: @eileenmckenna. For convenient printable instructions – visit my Etsy shop. Supplies:
  • Heavyweight watercolor paper – I used Fluid Easy Block
  • Watercolor paints (3 colors – light, medium, dark. I used yellow, orange (or red), and brown.)
  • Water
  • Paintbrushes (1 thick, 1 thin)
  • Scissors
  • Pencil and eraser
  • Leaf or photo of a leaf (for shape and inspiration)
Steps:
  1. Trace or draw leaf onto the watercolor paper
  2. Cut out the leaf shape leaf1
  3. Erase remaining pencil lines.
  4. Wet one side of the leaf shape using a paintbrush and water.
  5. Using a brush wet with yellow paint, paint the entire leaf yellow (or a light color of your choice). leaf2 leaf3
  6. With a brush, wet with orange paint, paint the edges of your leaf. The orange will bleed into the yellow – this is a good thing! leaf5
  7. Use a thinner (and not as wet) brush and paint thin brown lines onto the leaf. (Copy the veins from your real leaf or photo.) If your leaf is still wet, the lines will bleed which creates a cool texture to the leaf. leaf6
  8. Allow the leaf to dry, then add more thin brown lines. (The dryer the paper, the less the paint will bleed.) lastleaf
When I first showed my kids my painted leaf, they thought it was a real leaf! Have fun! Can’t wait to see what you make. 🙂 Ready to get started in watercolor? Check out my new guide “Beginner Watercolor Exploration” 
  • Learn the fundamentals.
  • Practice with exercises & projects.
  • Discover a love of watercolor!
Start your watercolor journey today! Learn more here.
Beginner Watercolor Exploration Guide pdf download | how to guide beginner watercolor
Would you like to: Be creative on a regular basis and experience the joy that creativity brings? Explore mediums and subjects, in search of your thing? Learn about my new book Creative Exploration: A Six Week Process for Introducing Regular Creativity into your Life by clicking here. Creative Exploration book - Easy Watercolor Leaf Tutuorial | fall crafts | #fallcrafts This post contains affiliate links to products/brands I use and recommend. I earn a small commission whenever you buy using these links, at no additional cost to you. Thank you for supporting my blog! Want a dose of creative inspiration? Sign up for my newsletter “My Creative Collection” by clicking here. Learn more about the newsletter here.

Drawing what your drawn to. {feathers}

seagullfeathers
I didn’t even realize I loved trees until they kept popping up in my paintings and illustrations. Drawing feathers was more of an accident. I was painting a sunflower when the watercolors bled beyond the shape of the sunflower. I moved on to another version, putting this accident to the side. Over the next couple of weeks whenever I looked at this accident, I saw a feather. Eventually I added ink details to turn it into a feather. You can read more about that “happy accident” here.

Since this “accident,” I’ve draw a lot of feathers, especially over the last couple of weeks. Recently I sketched several feathers in my book. I wanted to add a color background to them, so I started over and drew more feathers on watercolor paper.

feathersinink pencilfeather

For two of the paintings I started with the simple outline of feathers, then painted the backgrounds, and a little color to some of the feathers. I added the feather details in ink after. On the third painting, I painted a feather shape with a pink, purple, blue blend and added ink details afterwards. featherstart

finalrainbowfeather

I have a good feeling my September pattern will end up being feathers! 🙂

Goodbye Summer…Hello Fall!

beachwalk
I’d love to squeeze in one more beach day, but other than that I’m ready for the hot and humid weather to end. I’m looking forward to those crisp Fall days, with blue skies and beautiful foliage all around. I’m excited about new seasonal things to inspire me – leaves, acorns, pumpkins. I’ve already started doodling and collecting them. Maybe it’s too soon, but it’s nice to have new “material” to work from! Are you ready for Fall?
acornsketches

Looking forward to a new season.

leavesonwood
One of the things I’ve learned about myself since starting my creative resolution is that I’m inspired by the seasons. I’m already seeing signs of what’s to come and I’m looking forward to it! Paintings (and sketches) of shells and the ocean will soon be replaced by leaves and trees and other Fall things! I can’t wait for the leaves to change…and the weather to cool down. 🙂

Here are some of my favorites projects from last Fall:

This slideshow requires JavaScript.

Results of my “Assembly Line Painting” experiment. {Please vote for your favorite!}

assemblyfinal
I finished the four paintings that I working on in “assembly line” fashion. Click here to read more about how I approached working on these paintings.

Results: The results of the experiment are best described by this analogy: It’s like raising kids. You raise them in the same way – same environment, same food, activities, etc. but they all require different special attention and they all turn out different. And with each kid, you are a bit wiser (and more tired) so you do things differently each time – but maybe not better.

This is the inspiration painting:
bloomwave

The four painting above are numbered. Some of them were “worked” on more. For # 1-3 I used white gouache. As I worked I wasn’t sure what methods would be most successful – more details? more shadows? more white? more variation in color?

I’d love to hear what you have to say! Leave a comment and answer my poll below.


Conclusion: (Don’t all experiments have a conclusion?) Working this way, really allowed me to explore this type of painting and subject matter in more and more depth. If I had only painted one beach landscape, I wouldn’t have had the chance to try different techniques.

TRY IT! and let me know your results (and thoughts). Link to this post or if you’re on Instagram use #assemblylinepainting. Can’t wait to see! 🙂

Assembly Line Painting {an experiment}

assembly
I recently had some success with a fairly quick beach landscape. The blooms that unintentionally formed and looked like crashing waves was a large part of the success. I was curious if I could recreate this and decided to set up several boards (watercolor paper taped to cardboard) to paint all at once. My plan was to paint specific sections in each painting, one right after the other, using a similar process.

The process:

  1. With blue watercolor pencil, draw horizon line
  2. Paint the sky
  3. With grey watercolor pencil define edge of the water and paint it
  4. Paint deep part of the ocean
  5. Add water at edge of the deep ocean to get sucked into deep part and create blooms (crashing waves)
  6. Add finishing touches


As you know, I’ve set up personal painting parties before, where I get started on several paintings at once. Usually the paintings share a common theme or inspiration. But this is the first time I’ve attempted several versions of the same painting at once. Immediately I noticed that I was learning nuances or experimenting a little on each painting in an attempt to make it better. I knew from the start that they would never be identical, which is something I didn’t want anyway.

This year I’ve seen, several times, that digging deeper in a theme can lead to better results. I think the same is true here. I’m learning by painting the same thing over and over.

At this point each painting needs some special attention and some finishing touches. I’m not sure I can do this step at the same time. We’ll see. 🙂

Hoping for some “bloom” waves:
bloomwaves

Practicing on scrap paper before diving in

finalcone
After the debacle of the sunflower. I decided to practice on a scrap piece of paper before starting a painting of an Echinacea flower. This way I would have a plan on how to paint it.
scrap

The scrap paper coneflower came out pretty good, so I started my painting. I loved the start of this painting. But when I went back to add some details I felt like I messed it up. Why is it that working quick can look great, but sometimes when you work harder at something (more deliberately), you overwork it, and ruin it?
startofthecone

So here I am with a scrap of paper, that several people love, and an unfinished painting. And I am stuck.

I wrote the above 4 weeks ago! Ironically yesterday’s post was “Forcing myself to finish.” This Echinacea flower project is a great example of me not finishing – I felt I had ruined it, didn’t know how to proceed, so I stopped. Two days ago, I pulled it out, added details in ink, and declared it finished.

No matter how a project comes out it feels great to finish!